Showing posts with label House. Show all posts

Sunday, October 6, 2019

Roof is Progressing

Slow but sure, the roof is getting replaced. We're about halfway done. The entire bedroom section is complete. This roof covers the bedroom, walk-in closet, hallway, and two outside lanai (porch).


While removing the old roof we came upon a rat nest. The buggers had chewed through the wood in a corner of the overhang and gained access to the interior. They had a nice cozy apartment. We found evidence that they had chewed a tad on some electrical wiring, but hadn't gotten through the insulation yet. No wires exposed. We were lucky. In the future we need to be more diligent about rats.

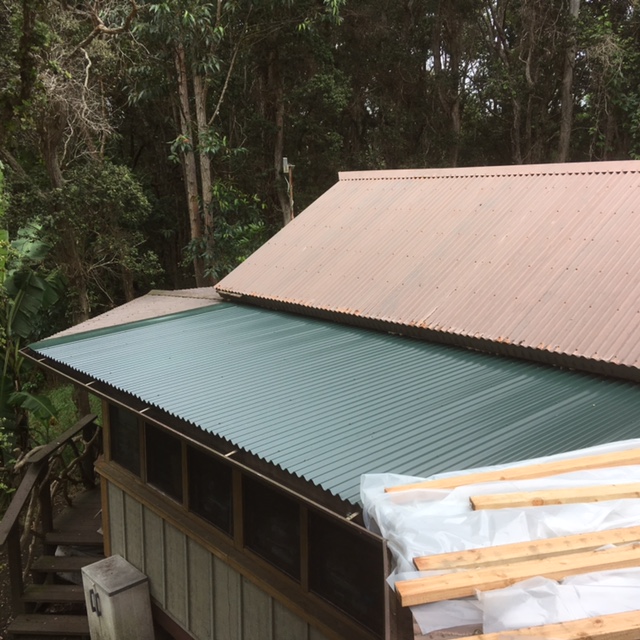
Just as we patted ourselves on the back on a job well done, David asked for the end closure strips to finish off the job. Oops. No strips. I forgot to order them. Guess who had to take a day and run over to Hilo to buy 113 closure strips. A costly mistake. Well at least I'll never make that mistake again, since this will be the last roof I need to put on this house. 

So I've been asked about the old roof panels. What do I plan to do with them? A few people have been hoping that they are up for adoption. Not really, I reply. I plan to use them. I did breakdown and give several sheets to a person who was in real need of some roofing. But the rest will be put toward roofing the cat shelters hubby plans to build. By using the old roofing, we will be saving ourselves a considerable sum. 

Sunday, September 29, 2019

New Roof

Finally...finally, we are starting the roof project. The current roof is only 15 years old, but due to the erupting volcano, it is significantly damaged in spots. We've patched it here and there, and could go on patching it for years, but we figure that right now will be our last opportunity to afford a new roof. If we wait another 5-10 years, we'll be too old to do the labor, thus making a new roof cost 2-3 times as much. No, now is the time. 

Back in July we measured, configured, calculated, and gave it our best guess, coming up with a materials list. Biting the bucket, we ordered. $8000. Ouch! That hurt. Thankfully it will our last roof. That's the only thing we could think of to make the bite feel better. 

Last week the materials arrived. It looked like an awfully small pile for that much money. Ouch again. 

First small section complete before the rain started. Yes, we've changed the color to dark green. 

Yesterday we started. We choose to start with the back lanai roof, which actually had morphed into the hallway. This was the worst section of roof with spots eaten away by the vog and acid rain. When we (David and I teamed up on this project, though David did most the hard work) removed the roof screws, several were so damaged that they twisted off and had to be removed by hand with a visegrip. Tedious work. Inspecting the house underneath the roof, all looked sound. Thankfully no repairs needed. 

Because of possible rain, we took the roof off panel by panel, replacing it as we went. Thus the need for two people. The worker (David) and the go-fer (me). And yes, it began to rain. Of course. So the day was cut short. 

Wednesday, December 5, 2018

New Deck

I'm still working in our house, though I'm almost done. Still have the bathroom to finish, but we got a bug in our butts about wanting a hot tub to soak in. So suddenly the outdoor deck became the priority job. 

A low deck is rather simplistic. Well, it feels that way after building most of a house. A few strategically placed concrete pier blocks, a few extra for supporting the weight of a full tub. Level everything up. 4x6 beams, 2x6 cross whatevers (I don't know the correct name for them), then 2x4 deck planks. Prime everything, two coats of deck paint (did the priming and first coat before the pieces were nailed together)....wallah! Deck. Oops, forgot to make a step in front of the sliding door. No problem. That's easy. Had time to prime the step, but the painting will get done later. 


The most difficult part of this job was getting the lumber here. And working with the 4x6s. They are heavy. Thankfully I have a helper to do the heavy stuff. 

Tuesday, September 4, 2018

Homemade Door Handle

"T" wrote to ask about the weird handle on the little shed that was just painted multi colors. "The door handle looks unusual. Could you tell me about it?" 

Yes, it's not from Home Depot. It's made from a small branch from one of my ohia trees. It's naturally shaped like that. 

I like using natural items from the farm. Many of my handles and towel racks are tree branches or bamboo. Besides being cool, I like the idea of my homestead providing for itself. Why spend cash for somecplastic & chrome handle from the hardware store? Heck, I can whittle my own for free. Two screws are all that is needed to attach the handle to the door. Simple. 

I grew up being taught to buy stuff at the store. Homemade was looked down on. I finally broke away from my brainwashing and now delight in handmade stuff, especially if I (or one of my friends) makes it. 

Friday, May 25, 2018

Rainwater Diverter

With the daily ashfalls, we had to prioritize getting a way to divert the rainwater from entering our catchment tanks. On the outbuildings, we had installed the raingutters ourselves for the barn and Adam's cabin, so the system already has clean out drains in place. Simply opening the drain would stop the water from entering the catchment tanks. But the house system was installed by a gutter company, and guess what......only one drain that serviced 1/2 of one of two rooves. What the heck? Yeah, poor job. We noticed the problem too late. The company had flown the coop, so we were stuck with it. Since other things always seemed more important to take care of first, we never got around to modifying the rainwater system at the house. 

Now it was urgent that we tackle this problem. So David and I walked around the house surveying the situation. We concluded that two more drain/clean outs were needed so that all the rainwater could be diverted.  Although it would be a little difficult working in tight spaces, the job was do-able.

Next problem. No one here seems to sell a clean out or even a valve for the size pipe that we have. The gutter guy used 3" pipe. Personally I would have used 4" pipe because we sometimes get torrential rains. The 3" pipe is undersized. But since those types of rains seldom happen ( it's  only happened twice since we moved here), I'm not going to replace all the piping. It's a lot of pipe. 

So David had to finagle a clean out drain. He took a 3" T and stepped up to a 4" clean out plug. It took a few pieces. It might look awkward, but it works. 


He made two, then set about installing them. Installing was the easy part. Using a sawsall, he cut the pipe, fitted the new drain, and ....wallah! The drains are located at the lowest points in the system, so all the water in the pipes will drain out when the clean out plug is removed. 

(note- the cut off pipe in the foreground is simply an underpass for the concrete walkway. I installed pipes like these in strategic spots just in case I would want to pass something under the concrete walkway, like a hose, outdoor electrical line, water pipe, etc. That way I wouldn't have to bust up the walkway.) 

The drain can be opened whenever we want to divert the rainwater.....or when we want to wash the roof or flush out the pipes. No special ground drain had to be built since the house sits atop rock rubble over top an aa lava flow. When we tested our handiwork, the water instantly disappeared into the rock rubble. 

The only difficulty with this system comes when opening the clean out plug. There will be many pounds of forceful water wanting to rush out. So what happens, as you turn the wrench to remove the plug, on that last turn the plug will fly off and a forceful stream of water will gush out. Plug will be nowhere to be seen as it shoots away.p at high speed. To prevent that, I'll screw a short light piece of chain to the center of the plug and attach the other end to a short pipe I'll drive into the ground. So when the plug flies off, it can't escape. The chain will hold it captive. By the way, I use a 4' piece of light chain on the other clean out, which gives me plenty of leeway for unscrewing the plug. I use chain instead of rope because it's less likely to break.

Friday, December 23, 2016

David's Project Update

Came home to find a surprise....David's artistic side has come out to play. He's made some decoration for the new back doors steps out of some old ohia pieces that I saved from clearing out the pastures. 


The twisty, forked pieces have found a home under the new railing. Oh, they surely don't meet building code, but they are funky, fun, and I like them. 


UPDATE 1/4/17
I added a few more branches and am happier with the results. 


Wednesday, December 7, 2016

More Progress on David's Project

Came back from the farmers market today to find that David managed to make a little more progress on the back porch stairs before it rained. The month and a half where we had almost no rain allowed us to get lots of work done, but here we are again trying to work between showers and wet days. Work is slow when you're looking to dry gaps in the rain. 


I like this picture, not because it shows the new stairs, but because in the background. I can see the hill stairs, new screenhouse, the dry river bed just beyond the screenhouse, the open field, then the garden beds and macnut trees. Yup, this is our view from the house. Not bad, eh? 


I haven't tried using the steps yet, but I can already see that I'm going to like them. When I come around the house it seems natural to take the steps into the house rather than walking around to the front door. 

I haven't done any of the work on this project. The design is strictly up to David. When I ask him what's next, he just smiles and almost bubbles with delight.......he's got something up his sleeve. Guess I'll just have to wait to see the surprise he has planned. 


Monday, December 5, 2016

David's Project -- the Back Corner

David had a chance to work a couple hours before the storm arrived. He got all the lumber cut to size, painted, and some of the framing in place. Then the rains came and things are on hold to the next dry day. 

Below, it's a terrible photo, but I was trying to show the framing he got into place. 

This one is taken from on the lanai looking out. The center horizontal railing will be removed. In the background you can see the stairs going down the hill to the screenhouse. 

This angle is clearer. 

I tried getting this photo from the top of the hillside stairs. Because of the steep drop off, it's really difficult getting a prospective that clearly shows what's being built. 

Once it's all built, I think the photos will make more sense. 

Anyway, I'm still not completely sure how this is going to end. How will the railings tie in? Will the traffic flow feel natural? Will the lanai feel like a more integral part of the living space? Will it be something I will use? Time will tell. 


Monday, November 28, 2016

More On The House - David's Project

After taking this past week off from working around the place, I'm back on the job this Monday morning. But it turns out that my plans have suddenly changed and I need to make a run to Kona, so David is getting things staged and started on this next project. Next project? Doing something to connect the neglected lanai on the end of the house to the new concrete walkway. 


Above -- this part of the house just accumulates junk. Don't know what to do with something? Go set it out on the lanai. Time to make changes. 

Below....view taken from on the lanai looking out. 

David spent time going over ideas of what to do with this lanai and how to integrate it into the living space. 
Truthfully, I wasn't full of grand ideas. David was loaded with them! After exploring many pros & cons, we've decided to try building a micro deck off the lanai with steps going down to the walkway.....which isn't there yet but will be. There isn't enough space to simply build stairs down to ground level because at the right edge of the photo above, the ground drops off extremely rapidly (almost a cliff). It's so steep right there that even the dogs can't climb the hill. So entertaining thoughts of adding fill would be sheer madness. 

David made some boxes to give me an idea where the micro deck would go. Once I gave the go-ahead, he poured concrete into those boxes to make piers to support the micro deck. 

Below, another view. Plus we dragged over some lumber before I left for town. It will be interesting to see what David creates, because I'm still not sure yet exactly what he has in mind or how it will turn out. With my time completely occupied for the next three days, it's going to be 100% up to David. I'm giving him free rein to create something that will encourage us to use this side of the house. 


Monday, April 4, 2016

Walk-in Closet - Last Update

The closet is one of my sloooooow projects. It's getting done one small step at a time. So as of today, the clothes rail is finally in place. 

It didn't take me 10 minutes before I had it full! It's so nice to have my clothes hanging up again.

Hubby got the wiring and switches done today for the ceiling lights. Ah, another step closer to finishing this project. I just need to go out and purchase two ceiling lights and install them. 

After that, the only thing else I have planned is a few storage shelves and hooks for hanging stuff. 

I had previously declared thus project finished, but of course, I obviously jumped the gun. But outside of a small shelf here or there and a few hooks, it really is done now.......oh yeah, I already forgot about installing those ceiling lights. Ok, it's almost done. But for the second time, I'm declaring it pau (finished). 

The next project? ......... Only one room left to do : the bathroom. 


Monday, February 22, 2016

Walkin Closet

I've been trying this past week to get some of my various projects completed. I have a whole long list of partially done things and it would feel good to say that a few more are done, over, complete, pau. One of those projects is the walkin closet. 

The ceiling needed to be finished off by trimming out the sides and sheathing the rafters. The most difficult part is the fact of working over one's head. All the boards were painted before being nailed into place, but they're going to need a second coat. Yuk. As you can see in the photos, all the little divets and nail holes have been filled in, so once it is dry and lightly sanded, the final coat of paint will finish it off. 


I chose "Orchard Street" for the color. Warning.....don't go pick paint when you're hungry. The moment I saw the color I thought "orangesicle...yum". So I bought it. Luckily I still liked the color when I painted the wood. 


So the closet is just about done. A final coat of paint and two light fixtures, and pau. Done. Finished. Over. Complete. 

Ok, ok. Not quite done. Yes, I need to install a hanger pole for clothes. And put in some shelving. But I'm going to call it done anyway. It feels so good to tick off another job from my list. 

Tuesday, February 9, 2016

Walkin Closet is Moving Along

Another little baby step accomplished. The cedar ceiling between the rafters is up. In the photo it looks to be a different color from the walls, but it isn't. I guess it's just the way the light is. This part was easy and quick. All the cedar was cut the same length, and working with an air gun is a breeze. Gee, I love an air nail gun. 


Next step -- sheath the rafters, then trim out the ceiling area. Sheathing requires a bit more expertise and precise cuts. Not my strong point, for sure. But David is an expert in it. David can make the finished project look really nice. I'm the rough in guy, he's the detail man. I'm the runner & go-for, he's the fine builder. What a team.    ;)

Thursday, February 4, 2016

Update - Walkin Closet

Yesterday there was a major stride in the building of the walk-in closet. The floor got installed!  


I had recently made a trip into town and stopped at Home Depot to pick up the flooring. I opted for the TrafficMaster snap together flooring. I had tried that brand in our hallway and it is holding up just fine. Although the store salesperson tried to steer me towards a snap together laminated wood flooring, I knew better than to go with that sort of product. While it might be "nicer" in many people's mind, laminate wood flooring is a disaster for my area. It is far too moist here. The floor quickly cups and is ruined. 

(Very pretty grain pattern. This one is "oak".)

Anyway, the floor is now down. Wahoo! Once I get the next load of cedar tongue & groove, the ceiling and trim will get completed. Then it's time to sheath the rafters and trim them. Ah-ha. Done. Well, except for installing the ceiling lights. Then it's time to make shelving and move in. 

Monday, December 21, 2015

Update - Walk In Closet

I haven't posted an update lately. I'm still working on the walk in closet, but I keep getting sidetracked. So I'm trying to make an effort to focus on this project more than I have. 

The interior walls are now 3/4 complete. The cedar tongue n groove is all used up so I need to go pick up more. With no more cedar to use, attention has been turned to the trim. The interior window trim is a simple mitered picture frame with no window sills. It's a closet, so window sills would get in the way of shelves and storage. So why bother. 

My mitering efforts in the past have been total failures, so David milled and mitered all the trim. 


The outside siding is all in place now, and the windows are trimmed out, plus everything is caulked. Next step was staining, something I'm quite good at. The grey stain is my own mix of 3/4 harbor grey and 1/4 antique bronze, Behr solid exterior stain (I'm noting it here so that if perchance I forget the formula in the future, I can come back here and find it. At my stage of life, accurate recall has become an uncertainty.) coming out a color I call Ohia. The window trim is a 100% antique bronze. 


The battens are going up but we're still in the process of finishing up a few on the long wall, plus each end wall still needs the batten trim. 


The end wall by the banana trees is complete except for the batten trim. 


Same for the far end. 


It's getting there. Just a bit more exterior work. But a lot more interior work to get done. 

Next up......
...run the electrical for the ceiling lights
...get more cedar tongue n groove and finish the last interior wall
...trim out the closet doorways (no doors)
...put up foam insulation in the ceiling
...cedar the ceiling and sheath the rafters
...install the flooring
...build shelving and hanger space 
...move in all our junk in order to decluttering the rest of the house while still saving room for our clothing in the closet

Next house project---- finish the bedroom. 


Wednesday, October 28, 2015

House - Building a Walk-in Closet

We're back to working on the house again. I skipped over finishing the bedroom in order to make the walk-in closet, a place to stash the bedroom stuff. On two sides of the bedroom we have porches that we really don't use. So I've decided to close in one for a large (8'x 20') closet. 

I don't have the before photos of the porch area. Dumb me deleted them from the camera before I checked to make sure I had transferred them to the computer. Oh well. You'll just have to use your imagination. 

Rather than removing the support posts and the railing, we left them in place and framed around them. 
So the framing looks a bit odd. It actually was quicker and easier doing it this way. 

We also installed windows for not only light, but air flow. Things get moldy here and air flow helps control it. There are three 2x3 windows along the 20' wall, plus one 2x3 on one end. 


The other end has a 3x3 window that will match the 3x3 that we plan to install in the bedroom wall. From the outside, hubby thought that the two windows should match. Thus both are 3x3. 

We've gotten as far as getting the siding up on the long wall. 


Still plenty of work to do. Electrical. Siding on the end walls. Sealing the walls. Exterior trim and battens. Interior walls. Ceiling. Floor. Staining and painting. And importantly, doorways between the bedroom and closet. So this part went up pretty fast. The rest will seem to go slowly by comparison. 

We need to move some electrical wiring and run wire for lights and outlets in the closet. That's hubby's job. So more progress will be on hold until he has the time to do that. 


Saturday, July 11, 2015

House - The Bedroom Project

It's about time that I start working on the house again. It's been too long of a break. Lets see, we've gotten done the livingroom, closing in the lanai to expand the livingroom, the kitchen, the little extra room off the entrance, the foyer, and the hallway that is 95% complete. On the outside we've done the siding and trim, several steps and railings, plus the roof. We're not totally happy with the way the roof turned out, so we plan to make changes later on. But that's a future story. 

Still to be completed is the bedroom, enclosing the bedroom side lanais for large storage closets, and the bathroom. Plus a few other tweaks here and there. 

So we're targeting the bedroom as the next project. Currently it's a quite serviceable bedroom with an unfinished interior. We've already wired outlets and lighting, plus put in two ceiling beams.  Next step.....the ceiling. 

Insulation. We've decided to line the ceiling with foam insulation as a sound deadening measure. Not that we are trying to block out all the sound, but just deaden it a bit. Heavy rains can be quite loud on a metal roof. A side benefit will be to reduce the heat generated by full sun on the roof. 
The styrofoam insulation sheets come 4'x8' and are easily cut to size with a box cutter. By cutting them snug, we don't need to glue or tack them into place. The next step will secure them. 

Next step is to install thin nailers to the corners and running along the rafters. These nailers hold the foam panels in position. 

The reason for the nailers is to have something to nail the cedar ceiling to. Using an air powered nailing gun makes putting up the ceiling pieces reasonably fast and easy. 

Next step will be to sheath over the rafters, like the kitchen ceiling. 
We haven't decided what color to paint them, but it won't be white. I'm thinking....pale sky blue. A possibility. 

Friday, January 9, 2015

Porch Gate

One of our farm dogs, Crusty, is a diehard thief. His favorite target is food, any sort of edible food whatever. And one of his successful targets has been our crippled cat's food. He often sneaks up on her porch and eats whatever she has left behind. But recently the thievery has gotten out of hand, stealing her  food as soon as we walk away. 

Feeding this kitty, Becca, has its issues. She is hind leg problems making jumping impossible. Thus we can't simply feed her atop something high. We started blocking Crusty by using barriers, like a box or piece of plywood. We tried feeding her in a box with a cat sized entry hole. Worked for awhile. But trying to keep Crusty away has become a nuisance. So we needed a better solution. And believe me, the command "No" just wasn't doing it. "No" only worked if we were within correction distance. Since Crusty's survival for 9 months before living here depended upon successfully thievery, he is a real master at sneaking. 

Solution.....a gate that Becca can come and go through but Crusty can't. 
Crusty is not a chewer, a destroyer of objects like a gate. Thief yes, destructor no. So a gate was a good option. It's a simple made gate. Just four 2x4s with corner braces, and four 2x2 upright rails that Crusty can't get through. 

So far it's worked like a charm! 
Oh yes...... It's mounted on hinges with a gate latch to keep it closed. 


Thursday, November 13, 2014

House Update - Hallway Floor

The rest of the hallway floor is now installed. 
There is still a bit of trim work for David to do. And the threshold plate for him to manufacture. But I'm almost ready to claim "finished" and tic off another section of the house. Yes, the ceiling outside the bathroom door isn't done, but that can't be worked on until we do the bathroom project since it involves rebuilding the roof. 

The hallway floor has three levels because the main section (livingroom/kitchen, bathroom, etc) is at one level and the bedroom is at a slightly higher level. Rather than having a step between the two levels, we opted for a ramp. 
It's not a steep rise. And it was difficult photographing it so I could give you an idea of it. So this is the best I could come up with. 

Because of the ramp, the top and bottom posed a bit of a problem to join in a pleasing fashion. David came up with using some of the leftover ash wood from the thresholds, making joining pieces. We were pleased how they turned out. 
I placed a cat food can there to give you some perspective. Once the surbase trim is in place, it will look quite nice. 


Thursday, October 30, 2014

Hallway Floor Milestone

On the section of the hallway that I intended to get done --  it's finished! Floor installed. Trim work done. The only thing that needs doing is the ceiling light, but I haven't purchased it yet. 
What you are looking at is actually only 2/3 of the hallway. The other third won't be completed until we get going on the bathroom. We didn't see any sense in finishing a section that might very well be changed as we developed the bathroom design. 

I'm quite pleased with the feeling of the hallway. It's wide enough for storage something-or-others along the walls. Shelves? Open faced cabinets? Hubby and I will have to talk it out. But regardless, getting another section of the house completed feels really good. 

By the way, we really like the way the floor is turning out so far. We're now considering on using it for the bedroom. 

Saturday, October 25, 2014

House - Hallway Floor

I mentioned the flooring we chose for the hallway and that prompted several emails asking for more info. Wow, it was like throwing out a couple kernels of corn and the birds all show up looking for more. Ok, ok. Here it goes. 

The flooring is a vinyl snap together, much like the pergo type floors. 

And it actually has a nice wood like appearance. Because of the email prodding, I decided to get some of the floor installed. Boy, it's easy. A bit of jiggling to get the edges lined up and perhaps a bit of persuasion with a rubber mallet. The floor currently is plywood subfloor that we painted. So it was sturdy and smooth. The vinyl lays right on top of it. No glues, no nails, no staples. 

The light colored strip in the front of the photo is a piece of ash that David milled to make a plate where the flooring changes angles and starts to slope downwards. Once it's urethaned it will look fine.