Saturday, August 31, 2013

Slug Buffets - Update

The slug buffet traps are working. Whoopie!! There was evidence of slug activity and a number of dead slugs. And the bait has stayed dry through three light rains.

One of the email responses about these slug buffets suggested putting the bait into something to keep it off the soil. Two reasons--- less soil contamination and less moisture getting to the bait. The suggestion was a great idea. So I came up with little trays with low sides. In this case, it was a lid from a sour cream container. Perfect size.


Bait is in a tray. Set close to the soil and with a shallow lip, the slugs can easily get to the bait. 
I'm planning to make a lot more of these slug buffets now that I know that they work. I'll try using an assortment if styles to see if one works better than the others. Right now I like the red colored containers because they are easy to see.

Top tilled back, showing you the bait tray. 

In the above picture there is a dead, dried out slug to the left of the bait tray. It's in a pile of dried slug slime. Can you pick it out? Hint - the slug looks almost black, like a one inch long twig. It's laying about two inches directly to the left of the tray. 

Each trap killed at least one slug. One of the trays killed five! Any they weren't even set up in the high slug damage area. So I think these things are going to work out. 

In in an email someone felt that only nontoxic slug traps, such as beer traps, should be used. That's a fine suggestion for a small garden, and I totally agree. But when food production gardens grow really large, or when the gardener must spread his time thinly over multiple projects, or as in the case with these slug buffets the garden volunteers only work one day a week, then beer traps won't be a good solution. Traps need to be tended daily. On the other hand, slug buffets can be tended weekly. 

Friday, August 30, 2013

Continuing Rat Attack on the Gourds

A large rat-chewed hole in one of the prized gourds. 


The rat that ate the small gourd last week, leaving it looking like an apple core, has moved over to the next trellis. He nibbled on a number of those small round gourds then got to one of the prized large gourds. He ate a hole into the side. Bummer! Bad rat!

Ok, he's got to go. He just ate a potentially $300 gourd. Not acceptable. So out come the big guns. I put some poison pellets inside the hole. I'm sure he'll find them tonight. Normally I would not be using rat poison, but I've had standard traps out in the nearby greenhouse without success. Two days ago I saw that one of the traps was sprung, but no rat. Since then the rat has been avoiding the traps. No droppings near them at all. So he's become trapwise. 

I actually feel bad killing the rat. He's just doing what he does in order to live. Totally natural. But I have to draw the line somewhere, because I too need to live. Actually in this case, a friend of mine depends upon those gourds. It's her livelihood. Losing this gourd is a major blow. 

Hawaii has an over abundance of rats. Cute furry rats. But they spread a nasty disease called leptospirosis. And they ruin our food, water, and supplies.  Plus they have a severe negative impact on native flora. So this rat just has the bad luck of having set up house in the wrong location. 

Boy, I'll be glad when the kittens are old enough to do rat patrol! 


Lilikoi - A Successful Hunt and the Reward

These past few weeks I've been doing some foraging on my way home from town. Primary target....lilokoi, aka- passion fruit. I haven't bother to cultivate this fruit on my homestead because of the abundance in the general area. There are a number of lilokoi patches around. But I have noticed that some of the patches are considerably smaller. Die out from the drought? Not sure. The plants look healthy enough, but in some areas the old established vines are dead and dry.

This year there is a bit more competition for the fruits. I guess more people are discovering that foraging is socially acceptable. Or possibly it's because of all those lilokoi recipes handed out last year. Regardless, there seems to be more people stalking the wild lilokoi.

Washed and dry, ready to be processed into juice.

Already this year I've collected several 5 gallon buckets of fruits. That sounds like a lot, but lilokoi doesn't yield a lot of juice. Thus I'm still in the market for more. It's really easy to gather this fruit. When ripe, the fruit drops to the ground. Good thing, because the vines climb to the tops of trees. But just picking it up is a cinch.

Once home with my booty, I will wash the fruit in soapy bleach water, allowing it to soak for 10-15 minutes. Reason? The fruit was sitting on the ground. Slugs can carry nasty parasites and rats transmit leptospirosis around here. Besides washing the fruits as a safety precaution, I also wear gloves when I pick up these fruits.

Fruits cut in half and ready to have the pulp scooped out with a spoon. 

Once washed and rinsed, I let the fruits dry before cutting them. No health issues here other than trying to keep all my fingers intact. Wet lilokoi can be slippery. The rinds are tough. Combine those two features along with a sharp serrated knife, and I'm sure to slice my finger! The index finger on my left hand always cringes when my right hand holds a sharp knife. 

The inside of these lilokoi is full of seeds in a gelatinous fruit, usually orange or yellowish. Not a lot of juice but enough to be worth harvesting. Besides, the taste is wonderful.  


Pulp ready to be worked through the sieve. 

I use a spoon to scoop out the flesh into a sieve placed in a pot. Once I get a good amount of pulp, I simply work it with a wooden spoon. The marvelous juice collects in the pot. This is a very low tech method, but it works. 


Beautiful juice ready to jar up and store in the freezer. 

The juice looks just as pretty as it tastes. Au natural, it is tart, making it a good substitute for lemon. Lilokoi chicken. Lilokoi ice tea. Lilokoi meringue pie. But I use it to flavor sugar cane juice and smoothies.

Thursday, August 29, 2013

No-Till Failure

I did an experiment down at the community garden: planting tomatoes via no-till method. I chat with a number of people on other forums, and no-till is a topic that I've seen discussed a number of times. So after reading about it and being repeatedly encouraged by onliners, I thought I'd give it a go. Per instructions from others who say that they are successful planting into old pastures and that things grow great, I transplanted tomato seedlings right into the ground without tilling or digging the ground first. I was told to use a fork to fluff up the soil one fork width where the plants would go. That I did. Then as instructed,  I laid down cardboard to cover the grass and topped the cardboard with compost and mulch. Right at that point I got really skeptical, but I was willing to give it a try. The soil was fairly good looking. The pasture grasses grew lushly. So I thought perhaps that the tomatoes would really grow.

As a comparison, one of the community garden volunteers planted the same variety tomatoes into the main garden, where we dig and till the soil.

Within two weeks the no-till plants were in big trouble. Small, stunted, with several dead. I replanted any dead ones, then applied commercial fertilizer to all the no-till plants. They were starving. Meanwhile, the main garden tomato plants were thriving, growing well without any fertilizer needing to be added.

A number of weeks went by and the no-till plants were still suffering. More died. All were stunted. Some were producing a few tiny tomatoes, like a strangled death cry.....quick produce some seed before you croak. The main garden plants were big, lush, and covered in flowers.

The no-till plants are still hanging in there but just barely. I've lightly fertilized them several times. A waste of expensive fertilizer. I've had to water them constantly. The main garden plants have been producing a bounty of tomatoes with no fertilizer or extra watering!

Conclusion -- no-till tomatoes don't work for us. It wasn't even slightly successful. It was a total bomb. I'm now quite skeptical about all those claims on the internet about no-till vegetable gardens.

I posted this story of a permaculture forum. One person suggested trying again but in the main garden area. Well, that doesn't sound like no-till to me, to plant into already well improved soil of a regularly tilled garden. But I haven't given up yet. I'll try more experiments. Maybe something on the order of Ruth Stout method but without any digging. But I suspect no-till veggie gardening needs to be started with soil already prepared for gardening. Maybe it could be called kickstarted-no-till.

Wednesday, August 28, 2013

Abandoned Pets Dropped on the Farm - A Rant

Abandoning pets out in the countryside.....old story. Been going on for ages. When I lived on the Eastcoast, I thought, "How sad. How wrong. What a pity." Now that I live up a dead end road amid other small farms, I am now to recipient of those abandoned pets. I'm no longer sad, I'm MAD!

People who abandon animals on distant farms should be dropped off by helicopter to a remote area atop Mauna Loa and abandoned there with no food, no water, no shelter. If they die, so be it. Tough. An eye for an eye, a tooth for a tooth, sort of thing. That just makes them equal with the poor animal they abandoned. But it doesn't make up for the livestock often mutilated and killed by those abandoned animals. 

I've seen plenty of dropped off pets. So many of them are scared to death and die a slow death from starvation that can take weeks, months. Others are far too spooky to be helped but cause havoc by harassing livestock and farm pets. Yet others instantly start attacking other animals and even go after people who try to intervene. I've seen it all. Makes me really angry at the owners. 

I feel sorry for those animals and try to help the ones that I can. But the vast majority are too frightened to be helped. Those that do not slowly starve to death usually end up getting trapped. Once trapped they often freak out, so cage and all is dropped into a tank of water. The animal drowns, scared to death. If not trapped, the next most common fate is getting shot. The lucky ones die quickly. 

Make you mad yet? 

I haven't even touched on the destruction and havoc. Both abandoned cats and dogs are guilty of livestock damage. Mutilated chicks, chickens, ducks, guinea pigs, rabbits, sheep, goats, cattle, and even horses. Killed or torn up landowners' pet cats, dogs, and even parrots. My own farm has seen the loss of chickens, ducks, sheep, and two horses. And forget about compensation. Zero. Zip. Nada.

Abandoning animals is bad news. It is despicable. It's better to just have someone kill the animal with a clean gunshot to the head than to let it loose at some remote location. You're a cowardly lowlife if you abandon a pet.

No, it's NOT going to have a chance to live. No, it's not going to run free and live a natural existence. No, it's not going to be happy nor is it going to be adopted by a farming family. All those fantasies are in the owner's head. The reality of it is that the pet will be confused, scared, hungry, thirsty, and uncomfortable. And 99% will end up dead, often a terrible death.


Tuesday, August 27, 2013

Slug Buffets

Slugs are a major problem for gardeners here. We don't have cold winters, so we seldom get a break. We garden year around, even during times of drought. Because we rely on mulches and irrigation during droughts, the slugs never leave a garden alone. Some varieties are extremely destructive, especially the African snail. And a little black one seems to be able to crawl into every little crevice on a vegetable, nibbling holes everywhere.

Controlling slugs and snails in ground level gardens is almost impossible without resorting to slug bait. Muscovy ducks will eat one variety of slug, but not the others. We have predatory snails, which I assume help, but they obviously can't control the population. We don't have snakes, a gardener's friend for fighting slugs. We do have a few cane toads, but like the predatory snail, they can't control the massive population. I've tried wood ash, eggshells, sharp sand, cinders, and coffee grounds and none of it works. I've done experiments to prove their ineffectiveness. It's too wet in my location for using diatomaceous earth. And putting salt or ground glass in a garden isn't a good idea as far as I am concerned.

So it's either hand picking at night or slug bait. I've tried hand picking. I'd pick a jar full of slugs in an hour, every night!So there was no way I was going to make a difference unless I picked for hours every single night. The gardens are too big for hand control, being heavily mulched, and moist. 

So it's slug traps and bait.....what I like to think of as the slug buffet.

 
First attempt. Not so stable. Tips over easily. 

There are two types of slug bait. One is organic -- iron phosphate, and the other is a slug poison. I've used both. They both seem to work. So I opt for iron phosphate for safety sake. But when someone donates a bag of Sluggo to the community garden, it is not turned down. The community garden cannot afford to turn away donations. So any slug bait is used there.


The design that proved to be more stable. 

I discovered by accident that slug bait's effectiveness lasts longer if it stays dry. With that in mind, I came up with slug buffets. Not traps really, because the slugs are free to leave after consuming the bait. I use something to keep the rain off the bait while giving the slugs access. Lots of things would work. Since I had dozens of plastic coffee containers on hand, I used them. I simply removed the lid and cut holes for slug doorways. The reason I removed the lids was to keep rain water from pooling inside, wetting the bait. I quickly discovered that cutting the plastic so as to leave four or more "legs" kept the containers from tipping over. And a lava rock set on top kept them from blowing over. 


 A rock holds the slug trap in place so that the wind doesn't blow it over.

These are very easy to set up. They work on soil or mulch. Easily moved to new locations, they can be taken to where sensitive crops are planted and removed when no longer needed. 


Baby plants are being lightly mulched now. Deeper mulch will be added as they grow. Cardboard is protecting the aisleways until they get mulched. Red containers are slug bait traps. 


When the slug population booms, I plan to make lots of slug buffets. I have no idea yet just how many I will need, perhaps one every 6 feet in the row? More? Less? I guess I will be experimenting and learning. 

At the community garden, slug buffets are the only way to go because no one it there reliably every day to deal with other types of traps. But in my own gardens on my farm, actual slug traps also work really well. They are more time consuming to use, but highly effective. 

Slug traps-- beer, citrus cups, cardboard, mulch, carpet. I'll take photos of my slug traps on the farm and give you the lowdown on them in another post, 

Monday, August 26, 2013

Rats Branching Out

I can just imagine it.... furry little rat sitting atop this gourd, nibbling away.
I've found rats sleeping with my Paloma, staying warm no doubt. Rats living in the ceiling insulation, like a fiberglass Hyatt Regency. Rat motels under the roof edging (less luxurious than fiberglass insulation). Even rats in the car engine compartment....camping out?

Number one favorite food....macadamia nuts. Where macnuts are abundant, I don't see them eating much of anything else. Thus the reason they are hard to catch in a traditional trap or with poisoned bait. But I have had some successes by gluing a macnut to the trigger of a trap.

Down at the community garden we've recently become plagued with rats and mice. Sadly the garden lost its resident cat to a dog attack. When the cat's away, the mice (and rats) will play! Living in the wings, so to speak, is a litter of kittens, but it will be awhile before they become proficient ratters.

The one thing that seems to be controlling some of the rodents is the fact that there are no macnuts there, as a result they are stealing the slug bait. At least that seems to be the reason it's disappearing. I've seen both rat and mouse droppings in the bag.

But one serious rat apparently hasn't visited the greenhouse where the slug bait is kept. This one is in the gourd patch. Evidence-- partially consumed gourds with markings matching those of rat incisors. Dang buggah is eating the gourds! Boy, if it isn't bugs getting the gourds, it's rats! Just can't win.

So far it is only one variety of gourd that the rat is eating. A rat with discerning taste? High class rat, I suspect. Regardless of his sophisticated palate, he's got to go. I'll be putting out traps tomorrow, baited with.....macnuts, of course.

Gosh, who'd have thought rats would eat gourds?

Friday, August 23, 2013

Little Fire Ants Attack

Here's a real nasty group of words ..... Little Fire Ants !!!  Thankfully they're not on my homestead. They would make farming really miserable. After this experience, I will be very diligent to keep them off the farm, you betcha.

So I just had my first, and hopefully last, run in with a very nasty little ant that likes to live in vegetation. I can assure you that they are aptly named. I'm quite impressed just how painful the bite can be from such a tiny ant. I don't know exactly how many ants were on me because as soon as I felt the fire I violently shook my hand and brushed them off. 6? 8? 10?  But they surely did a number on me. Luckily I was able to get ice on my stings immediately which helped reduce the pain. It's a good thing I did because in spite of the ice, the hand swelled. 


This photo was taken 3 days later when the area had developed lots of blistering and redness, but most of the swelling had gone down. It looks nasty but it really doesn't bother me much. Just a little itchy and sore. Guess I'm just too busy to notice. Not infected. Just a reaction to so many stings.

Thursday, August 22, 2013

Kitchen Update - Two Utility Tables

Another small project completed! Two small utility tables to sit beside the refrigerator and freezer.

View from the pantry side. Notice the vent on the bottom of the table for the Steca. 
I quickly discovered that having a flat surface nearby is a must for the chest units. Sometimes the item you want is down underneath something else, necessitating the temporary removal of the offending item.  So it's real nice to be able to set it aside while you reach for the item you really want to get.

View from the livingroom side. The two Steca units with the new tables on either side.
I'll eventually put some sort of pad or cover on the top shelf, but I'm not yet sure what. Maybe a hand towel? So something washable? Or a rubber mat? Or a decorative tray? Any suggestions?

Well, it's time for me to take a break from working on the kitchen. Someone else is building the counter top framing since I don't have any experience with that. I suspect I'd mess it up and end up not being able to attach the counter tops or get the sink properly installed. I can muddle along with the simple stuff. And I'm real good at sanding and applying polyurethane finish. But I know when to step aside and let someone else take over. Next week David arrives to build the rest of the big stuff for the kitchen. I think I'll start looking into how to hang the pots and pans from the ceiling.

Wednesday, August 21, 2013

Stop and Smell the Roses

On the weekends, walking the dogs is high on our activity list. And I swear Helen, the brownish dog in this top photo, knows when it's Sunday. That's her lets-go-for-a-walk day. Even at 15 years old, she still insists on at least a half mile jog up the hill before willingly turning back for home. Normally we'd have our white husky along but since the lamb wanted to join the walk this day, it was best to leave the predator dog behind. No sense risking an attack on the lamb should it decide to start boinging and running about. Lamb? Did I say lamb?? Yup, you heard right. Little Billy has taken to joining us on the weekend walks.  

Left to right: Helen, me, Billy, Crusty


If you noticed in the photos, I live along a one lane paved road. When we bought the place, the road was cinders. The farm up the road wanted to get permits for a commercial farm and thus had to pave the road. The county didn't say that he had to pave two lanes, so as you can see, the road is one lane. Fine with us. Just means that one vehicle has to pull over to pass. We seldom have a car on the road, so it's not much of an issue. Besides, it's a nice road for walking the dogs. 

It's impossible for a Border Collie to stop herding! 

Dog walking is a pleasant past time. After a week of steady work, it's not something I do for the exercise. I find it's nice to bond with my dogs and have time with hubby. 


Homesteading shouldn't be all work. All-work results in stress in my life. It always did in the past, so I actively try to avoid that now. Weekend dog (and lamb) walks help de-stress. We talk to the dogs, look and listen for birds, note any new flowers, sniff for the macnut flowers and ginger, and keep an eye out for fireweed, which we pull out.

Weekends are my time away from work, from the homestead routine. Surely I care for the livestock on Saturday and Sunday, but weekends are not work days. I've seen plenty of small farmers work all weekend long. I've seen their farms take them down, just as a wolf takes down a struggling calf. When I was active in the farm bureau back in NJ I listened to many a farmer who was so submerged by their farm struggles that they couldn't enjoy life, couldn't stop struggling. I'm trying to avoid the traps. So yes, I stop to smell the roses (or ginger).....and walk the dogs!

Tuesday, August 20, 2013

Triangular Shelves in the Kitchen

Next shelf is completed! I now feel that some progress is being made. To tell ya the truth, it feels really good seeing something physical getting accomplished.

The handy, dandy spice shelves. 

Coming around the corner from the pantry, there was dead space next to the freezer. Not big enough for a counter or cabinet, but enough for trianglur shelves. I thought it would be a handy place for seasonings, coffee, tea, and other small items. Also a fine place for coffee mugs.

Just a pic from a different angle. 
The shelf is attached to the wall so that it wouldn't tip if it got top heavy. And I've already cut rubberized shelf liner, this time in beige. The pantry shelves have black.

I already put the rubberized shelf liner on the shelves. I'm eager to use them!
I spaced the shelves so the a quart sized mason jar could be set on each shelf. this gives me plenty of useable shelves for the small stuff. The space between the bottom shelf and the floor is greater so that taller things could be set there, such as drinking water bottles.

Monday, August 19, 2013

Propane for the Range

We recently installed the new propane range in the kitchen, so it was time to make something permanent to house the propane bottles. But first I'd like to comment on two things. 

#1- Our choice for a range was either electric or propane. Hawaii doesn't have natural gas, at least not yet. Electric was totally out of the question because we are on solar. Electric ranges are big energy hogs, so there was no way we'd even consider it. 
#2- Going with delivered propane is expensive. The cost per gallon is higher than if you pick it up yourself. Plus there's the installation fee and monthly tank rental. Having your own portable bottles filled is easy here. I pass two filling stations 5 days a week, so it's convenient. 

When we first moved here, we purchased fairly large portable bottles, about 20 gallons. But here we sit 10 years later and find those large tanks to be too heavy for us when filled. So we've replaced them with small 5 gallon bottles. Over the years we've scaled back our use of propane, so dealing with small bottles is just fine. They are light enough for us to handle easily and they last for several months of use. 

Finished box, just needs paint on the lattice in order to blend in. 
We wanted to store the propane bottles outside, keep them dry, plus have easy access to them. Hubby suggested that we build a box for them, so we started scheming. What we settled on is overkill for the need, but we're both happy with it. We built a small concrete slab, imbedding lava rocks into the surface for a pleasing effect. Left over lumber made the frame, which ended up looking like a table. We covered that with plastic lattice so that the bottles were out of view but the box was very well ventilated. 

Close up view of the top. 

Next, the box needed a rainproof lid. Hubby would have been happy with plywood I suspect, but we ended up agreeing to a bench top. It's made out of some redwood and cedar that we had. I think it turned out really nice. 

Bottom of the lid showing the metal roofing to keep the rain out. 
Of course, an open work bench top is hardly rainproof! So a piece of metal roofing was cut to size and screwed onto the underside of the bench top. The lid fits nicely to the top of the box. It's heavy enough not to blow off. We opted not to attach it with hinges, so that it would be easier to access the bottles. The two wood slats on the bottom of the lid slid into the lip of the box, keeping the lid from sliding around. 

Looking down into the box. 

The box holds two propane bottles comfortably. There's enough room to easily work with the bottles, disconnecting and connecting. 


The propane switching valve. 

The two bottles connect directly to an automatic switching valve. When one bottle goes empty, the other bottle automatically takes over. That way you don't run out of propane in the middle of making dinner or baking a cake. Right under the black cap on top of the valve you can see a green band. When it tuns red, you know that bottle #1 is empty. Time to flip the lever, then take off the empty tank and have it refilled. This valve is a nifty little convenience.

One more step to do and the box is complete. I need to get some paint that adheres to plastic and paint the lattice. Then I can paint over it with another color, so that the box blends in with the rest of  the house.

Friday, August 16, 2013

Kitchen with a View

Our house is nestled in the trees, giving us the feeling of cozy security. We sit atop a hill, and while it may be quite difficult to make out in these photos, we overlook our front pasture. Across the street, the neighbor has a band of trees along the roadside. 

What a wonderful way to start each morning, watching the new sunlight so brightly reflect off the tops of those trees. From the kitchen it looks like a brilliant band a yellow. I make breakfast for us, smell the coffee brewing, listen to the birds. Couldn't ask for a nicer way to start a day's work. 
Dawn. Sunshine turning the tree tops ablaze in light. 
I've often thought about trimming some of the trees away in order to give a clearer view of the pasture. But sunrises and sunsets remind me that I like being in our protected little area, hidden from the world. So the trees will stay. We purposely painted the house the color of the ohia and eucalyptus tree trunks in order to blend in. I'd say that the tactic worked since most people around here aren't aware that the house is even there.

Sunsets here are usually colorful, courtesy of the erupting volcano, Kilauea. Rose, orange, peach, gold, yellow-green, purples. All sorts of colors. Clouds make the sunsets spectacular, but even a clear sky presents a gentle, colorful end to the day. Since colorful sunsets are almost a daily occurrence, I have to be careful not to take them for granted. I want to be thankful and appreciate every sunset I get the chance to celebrate.  
Sunset.

When I lived back on the eastcoast, I saw that most people were so disconnected from nature that they were seldom aware of sunrises, sunsets, nor the night sky. But I can't be too harsh in judging people, because I myself often failed to notice. Life is different back there. Here I make a conscious effort to keep in touch with the world around me. 

Thursday, August 15, 2013

Kitchen Progress Update

The kitchen is very gradually coming into existence, one baby step at a time.  A friend worked on the trim this week, a job that I'm terrible at. He got the window trim finished, then proceeded to make the "earthquake trim" for the shelves. So what do I mean by earthquake trim? It's a piece of trim on the edge of a shelf that sticks up above the level of the shelf, designed to keep things from falling off during an earthquake. Since most of the earthquakes here so far are in the 3-5 range, the quakes causes objects to vibrate and dance about. A half inch lip keeps them from dancing off a shelf. I also plan to use a rubbery shelf mat to help hold things in place.
Earthquake lip in place. I set the container there so that you can see that the lip
is about 1/2 inch deep, just enough to prevent things from sliding off but not
deep enough to interfere with using the shelves easily. 


Two corner shelves were added in the pantry this week. And the first shelf in the main kitchen got made. This one is beside the new range and will eventually hold pot lids. I plan to store gallon jugs of drinking water under the shelf, a place where they will be handy but out of the way.


Two corner shelves in the pantry area. It's a start. 

Now I need to sit down and draw the plans for the rest of the shelves and "cabinets". Plus make a shopping list of the materials I need to buy. The kitchen is slowly but surely coming along.

This is a corner shelf beside the range. If you look closely you can make out the
half inch lip that will prevent things from jiggling off during an earthquake.
I plan to store water jugs (drinkable water) and a fire extinguisher under the shelf
and pot lids and the extra potholders on the shelf itself.
If you noticed, I'm already using the range! 
By the way, the propane shut off valve for the range is not behind it, like most people do. I installed it in under this shelf, back against the wall. Out of sight, out of the way, but far easier to reach than having to pull the range out. Just one of those little things I wanted to do to make life easier. 

Wednesday, August 14, 2013

House Floor Plan

Here's the floor plan of our funky little house. It's totally nothing like we've ever lived in before. Surely not you're conventional 3 bedroom home! Ok, first of all it's only one bedroom. But we found that's a great asset when you're living in Hawaii. All your relatives and friends, even ones that you didn't know you had, start wanting to visit. So unless you like running a free B&B for your brother's friend's cousin's nephew's neighbor, a one bedroom house comes in rather handy.

When we bought the unfinished place,the bedroom was a separate building with two roofed lanais (porches) -- the red lined ones. The black line one we added. A walkway connected it to the bathroom/living room building. We enclosed the walkway and lanai, making a wide hallway. Gee, it's so much more pleasant going to the bathroom at 3 a.m. without being soaked with wind blown rain. Hubby, being your typical guy, considered it an advantage to be able to walk out the bedroom door and pee over the porch railing into the flower bed. Enclosing the lanai ended that shortcut. I preferred the idea of keeping dry. And it made the place one building instead of two.
The bathroom is the future plan. Right now it's a simple toilet, sink, shower with the rest of the space being storage.

The living room use to have a frig, range, and sink along the left wall. We took those out when we finished the room, moving them to the lanai, them opening up the wall for a door to the new kitchen. We added stairs coming off the lanai since it was a nuisense having to walk through the house everytime you wanted to exit or enter the lanai. The front door use to be right off the livingroom, leading to the wrap around lanai. We moved the door out, enclosed the lanai on the left to make a kitchen, the lanai at the bottom to make a pantry to the left of the front door and a small room (office? Sewing or craft room? Guest bedroom...heaven forbid!) to the right. 

Enclosing the lanais greatly increased the living space of the house. And being that everything is still under the original roof, it didn't change the official square footage for tax purposes. Thus it was simple to upgrade the permit without having to jump through hoops again.

We've been thinking of semi-closing in the lanai off the living room, basically screening it in. That would be a task once everything else is done with the house.

I'd like to enclose the bedroom new lanai (black lines), making it a hugh walk in closet-storage space. Of  course we'd have to cut in doors from the bedroom. But for now were using that lanai as our construction work area for the various saws, sanders, planer, and router.

Someday I'll have this house finished. It's getting there. 

Wednesday, August 7, 2013

The New Kitchen - In Progress

Besides creating a family hometeading farm, we are also building our home. 1/4 of my time is devoted in some fashion to the creation of our house and home. I really haven't talked much about the house, so I'm going to add that to the topics of discussion.

The thing that we've been without since we moved here is a real kitchen. And even though I don't have much in the way of domestic instincts, I do appreciate the idea of a kitchen. I mean the sort of kitchen that makes most women happy. These past years the kitchen has either been a sink, refrig, and range in the living room, or else ditto out on the porch.

Now having a kitchen out on the porch isn't as bad as it sounds. Sure, yellow jackets can be a nuisense and you have to take precautions against rats, but hey, it's really convenient to chuck that onion peel over the railing into the flower bed. Carrot peelings? Flick. Apple cores? Fling. Drop the bag of flour? No problem, just get out the leaf blower. Spill water on the floor? Ha, it will dry by morning. Plus cooking cabbage or fish doesn't smell up the house. Thus an outdoor kitchen has some nifty advantages.
Hubby assembling the new range. He also converted it to propane use while he had it apart.

In the original house floor plan, there was no room for a separate the kitchen. The previous owner had set up a "kitchen" along one side of the living area, a large room used for everything except bathroom and bedroom. Partitioning that room into a living room and kitchen would have created two tiny rooms not acceptable for either function, so we decided to create a separate kitchen room. A solution that was acceptable to both of us was to enclose part of the wrap around porch. The original vision was to enclose just enough for the kitchen, but our ideas ran away with us, and we ended up enclosing the porch on two sides of the house. Oh I am so happy we did! Now I'll end up with not only the kitchen, but also a large pantry and a separate little room ......a craft/sewing room? ....an office? ...a guest bedroom? Haven't decided yet.
Looking down the kitchen from the livingroom access doorway. The Stecas are
on the left out of view behind the wall. 

I wish I had taken photos while the work was in process, but I had no idea that I would be sharing this information. So I'll do the best I can. The outdoor porches originally were roofed over, having solid plywood floors, and a porch railings. So enclosing them wasn't too difficult a task. Luckily the
flooring was level and solidly built. The walls went up easy, then we installed high quality sliding windows. Boy am I glad we went for the bonded, good windows! They were hubby's choice and I was hesitant in spending so much money. First, they are the nicest windows I've ever had, but more importantly, they are holding up extremely well in the vog. We lucked out on this one. (Thank you, hubby!) Wanting as much airflow as possible, we installed windows the full length of the kitchen. 

Next we needed to consider how to cover the walls. In that mold and mildew are major problems, we opted for cedar. Absolutely no drywall or manufactured wood! We used cedar tongue and groove, installing the smooth side toward the room. Lightly sanded, we then gave it a coat of polyurethane. We were pleased with the results. 

What to do for a ceiling? It was already low, though within code, but we didn't want to simply nail a ceiling to the roof rafters. We thought it would make the room look like it was ready for midgets, hobbits, dwarfs, and the like. So we opted to sheath the 2x6 rafters with pine to give the effect of beams, then put the cedar between the rafters. 
When you leave the pantry, this is your view. The new range and the two
Steca units in their new home. 
Onto the floor. Both hubby and I are slobs, just face it. So a durable, easy to wash floor was a must. Tile seemed a good solution. And some pattern that wouldn't scream, "I'm dirty! Look at these footprints!" I picked out a mottled neutral pattern, planning to use a highlight, accent color in the kitchen accessories. That way I would not be locked into cherry red, sunshine yellow, autumn orange, blushing blueberry, or whatever.  The room is narrow, so I opted for small tiles to help give the illusion of the room being bigger. A friend who installed the tile suggested putting them on an angle. I'm glad he made the suggestion. I think it turned out pretty good. While I'm pretty good at laying tile myself, laying it on the angle was a bit daunting. Thus I let David do it. 

The pantry. Walk thru and to the right and you're in the kitchen. 
One thing that I really, really, really (get the idea yet?) love is that I can walk around the corner and be in a large pantry area. You can enter it from the house's front door, for easy putting away the groceries, or from the kitchen, for easy use. As you can see, we've started building in the storage shelves. In the photo you'll notice that even before they are finished, we've found their horizontal surfaces to be fairly handy.   

Tuesday, August 6, 2013

Back to the Country - Not the Perfect Life

My last post generated a whole lot of emails! Blasting me for being antisocial, for trying  to keep paradise for myself, for trying to scare people away from living on a farm. From my position, I'm just announcing why I decline all the requests for farm tours from people coming to Big Island on vacation. Besides the fact that the County of Hawaii requires special permits for farm tours that can cost tens of thousands of dollars, my insurance company will not insure farm tours. Anyway, there was enough said repeatedly in the emails that is prompting me to make a few comments of my own about the "perfect life on a farm".

This pertains to me, but it very well be pertinent to many. Leaving behind the hectic, high stress, high population areas and going to the less populated rural areas doesn't mean that I ran to paradise, the good life, the perfectly happy life, a safe life. I chat with many people who appear to believe that if only they can manage to move to a small farm, they will achieve instant happiness. They congratulate me on my move as though I've left all problems, failures, depressions, and other negatives far behind. In my experience, life is never without problems. My hope is that they will be fairly minor and readily resolvable. But I've discovered that I tend to carry my habits with me everywhere I move, thus if life depresses me in location A, it will repeat itself at location B unless I make the effort to change. So just because I now live on a small farm doesn't make my life idyllic. Every day isn't perfect, things go wrong, I'm not happy 100% of the time, nor is life here one big vacation.  

Farm living on any economic level is difficult and dangerous. I read about other farmers' problems in the trade journals, and it doesn't seem to make a difference if it is an 3 acre farm or a 20,000 acre ranch. Farm life is not heaven and it's not automatically "the good life". 

Farming is work. It is long hours. It is disappointment and disasters. A 5 day a week, 9 to 5 job is a cinch compared to farming. On a small homestead style farm, another factor is added into the equation - you're the only employee and you seldom can afford to hire others. So if a job needs to be done, it's all up to you. And there's no one else it blame it on. No manager to vent your frustration on. So suck it up. 

I've seen a number of people move here to small acreage assuming that life would be instantly wonderful. Many have failed for various reasons. All these became disillusioned, blaming their failure on everything but themelves. Some managed to injure themselves, yet still place the blame on others. 

Yet I've seen others move to country life and be content. They willingly admit that they left the crazy, problematic lifecycle behind and ran toward a simpler life. Perhaps they didn't expect work-free bliss? Perhaps they were willing to accept responsibility? Did they lower their expectations? I'd answer yes to all 3. In order to maintain a happy life, I still need to lower my expectations on a regular basis. I take this to mean that my life isn't perfect and that I create my own happiness by changing. 

My blog is not intended to be an instructional book for wantabee homesteaders. I'm not here to tell people about a perfectly happy life of living on a farm. I don't want to give readers the impression that running  to the countryside will solve all your problems. Please note, I am not an expert. I like to experiment and learn but make plenty of mistakes along the way. And I often prove myself wrong when I see the results of my own test runs. 

 I get asked a lot, "How did you do that?" Thus I find that doing a blog is the easiest way to answer. 

Monday, August 5, 2013

Visitors Not Welcome! -- Danger on the Farm


Want to come visit my homestead? Not a chance!!! .....unless I already know you fairly well or you're a country-type person. You are free to look from the road, but that's it. Why am I so antisocial? Too many bad experiences in the past. Non-farm people are just an accident looking for a place to happen, they misinterpret what is going on around them, they tend to be obnoxious and ready to sue at the drop of a hat over stupid stuff. Gee, sounds like I don't like people. Hey, didn't I move to Hawaii to get away from those kind of people afterall? I don't see the sense of now inviting them onto my farm. 

Farms are dangerous places. They seem to be even more dangerous for city folk who haven't a clue about how things work on a farm.

I find that many non-farm people see my place as a free petting zoo. They are so out of touch with nature that they don't see the danger of trying to approach a ram, getting between a ewe and her lamb, of ducking under a horse's belly to get to the other side, or trying to pet a rooster. It's not smart to try to kiss a chicken on the nose, nor offer a finger to a bottle fed lamb without expecting it to grab it. They are either totally ignorant of the dangers or expect other people to ensure their safety. I don't wish to babysit those people, nor get sued by them when they get themselves injured.

Non-farm people don't listen or comprehend what is going on around them. For some reason they don't understand that the aisleways in the garden are there for walking. I've had plenty of visitors tromp on the veggie plants. I've seen them rip their clothing on barbed wire fencing. Even after being warned I've seen them walk into ditches, trip over rock piles, get zapped by the electric fence. I've seen people dip their hands into the barrels of manure tea and be appalled to find out what they just swished their fingers in. They approach animals that they've been told to stay away from. They just don't get the fact that things are dangerous on farms. I've had to stop visitors from trying to eat jicama beans, mistaking them for edible snap beans, and from eating the berries of  potato plants thinking they were some sort of cherry tomato.

Visitors have gotten mad when a chicken pecked them while feeding them corn out of their hands. Angry at me because their children started throwing horse turds at each other. Horrified that their toddler picked up and tried to eat sheep turds (mother said she thought they were berries. Gee, you let your child pick berries off the ground at home and eat them?) Mad at me when the rabbit scratched them when they tried to pick it up by its ears while they were petting it. I couldn't yell "stop" fast enough. Mothers have gotten upset because their kids step in manure, or put their fingers in their mouths after petting the horse. 

Then I've had others who are not just ignorant of the dangers of farm life and nature, but who are fearful of imagined dangers. One mother followed her family around with a bottle of hand sanitizer, making them wipe their hands after touching every animal and even after every vegetable! I had one women question the safety of the vegetables once I told her about using compost for fertilizer. She was certain that parasitic worms were inside the tomatoes, beans, etc. Another questioned the health value of my veggies because I never mentioned applying vitamins to the soil. Yet another, who was lucky enough to see a chicken lay an egg, was horrified to see where they come from and swore that my eggs would cause lethal diseases if not soaked in bleach before eating. Said he would never eat an organic egg in the future. 

Even after you successfully get people off the farm in one piece, you're not home free by any means. I've had people phone me the next day claiming they got food poisoning from eating the fresh peas off my vines. Now understand that these were English shelling peas, so the people had to take them out of the pods where the peas were totally isolated from any soil, manure, or compost contamination.  I've had another claim that they were having migraine headaches now because of touching their butt to the electric fence. They wanted me to pay for the doctor visits, tests, and medications. A mother claimed that her child was permanently traumatized by the guinea hens and wanted me to pay for therapy. One visitor tried to claim that my border collie bit him in the hand and wanted me to pay his emergency room costs. Luckily the photo I took for them at the farm gate when they were leaving showed his hand to be perfectly healthy. 

The American society that tourists come from is totally out of touch with rural living. Let them learn about farming on someone else's place. I don't welcome the headaches and lawsuits. 

Friday, August 2, 2013

Grow boxes - Making Soil


It's time to empty out some of my grow boxes and start them over again. Below is a picture of one box that I've opened and removed a couple buckets of soil out of it already. First of all, you can see that the surface of the soil has gone down a bit more than a foot from the top edge. Initially I overfilled the box by about 3 inches. So over the course of 6 months, the soil has settled quite a bit via decomposition of the organic material (grass clippings, weeds, compost, horse manure, and chicken litter).  I had expected that but I didn't know exactly how far it would go down. 

Next, I was impressed by the well developed root system the sweet potatoes made deep down into the box. The roots travelled all the way to the bottom although the tubers were in the upper 12 inches. 


I've opened this grow box and am taking some of the soil out to use in filling another grow box.
 You can see the deep root system that the plants made. 

When I loaded this box in the beginning, I placed the coarsest material on the bottom. The only pieces still intact were the bamboo chunks and 1 inch thick tree branches. Everything else had disintegrated or else was soft enough to crumble by hand as I unloaded the box.

Most of the organic material has decomposed, turning
into a medium brown soil. 
Most of the material I had originally put into this box is no longer identifiable. It is all crumbly and medium brown in color. As a bonus, I found a few dozen worms living in it. 

I emptied the box, returning to coarse stuff to the bottom. Then I refilled it with lasagna style, with thin alternating layers of  organic material (grass clippings, chicken pen litter, horse manure, weeds, waste mangos) and dirt which I took out of this box. I used 1/3 of the dirt for refilling the box. The rest of the dirt went to starting two new grow boxes. 

Thursday, August 1, 2013

Dumpster Diving

Cardboard down at the trash station. Good dumpster diving
opportunity. 
Now, I'm not advocating dumpster diving for others, but I admit that I do it myself. I find some great stuff at the trash transfer station that I can use, fix, or repurpose. I find it a shame that so much stuff put into those dumpsters goes to the landfill. The county is always moaning about the landfill being overfull, it costing too much money to expand or keep it open, of trash being a real super problem. But then, they won't let the public take any of it either. Sure, sure, sure, it a liability thing. But I'd be willing to sign a contract saying that I assume all responsibility for my trash picking activities. But alas, it's a no-go. Thus I become an outlaw and dumpster dive.
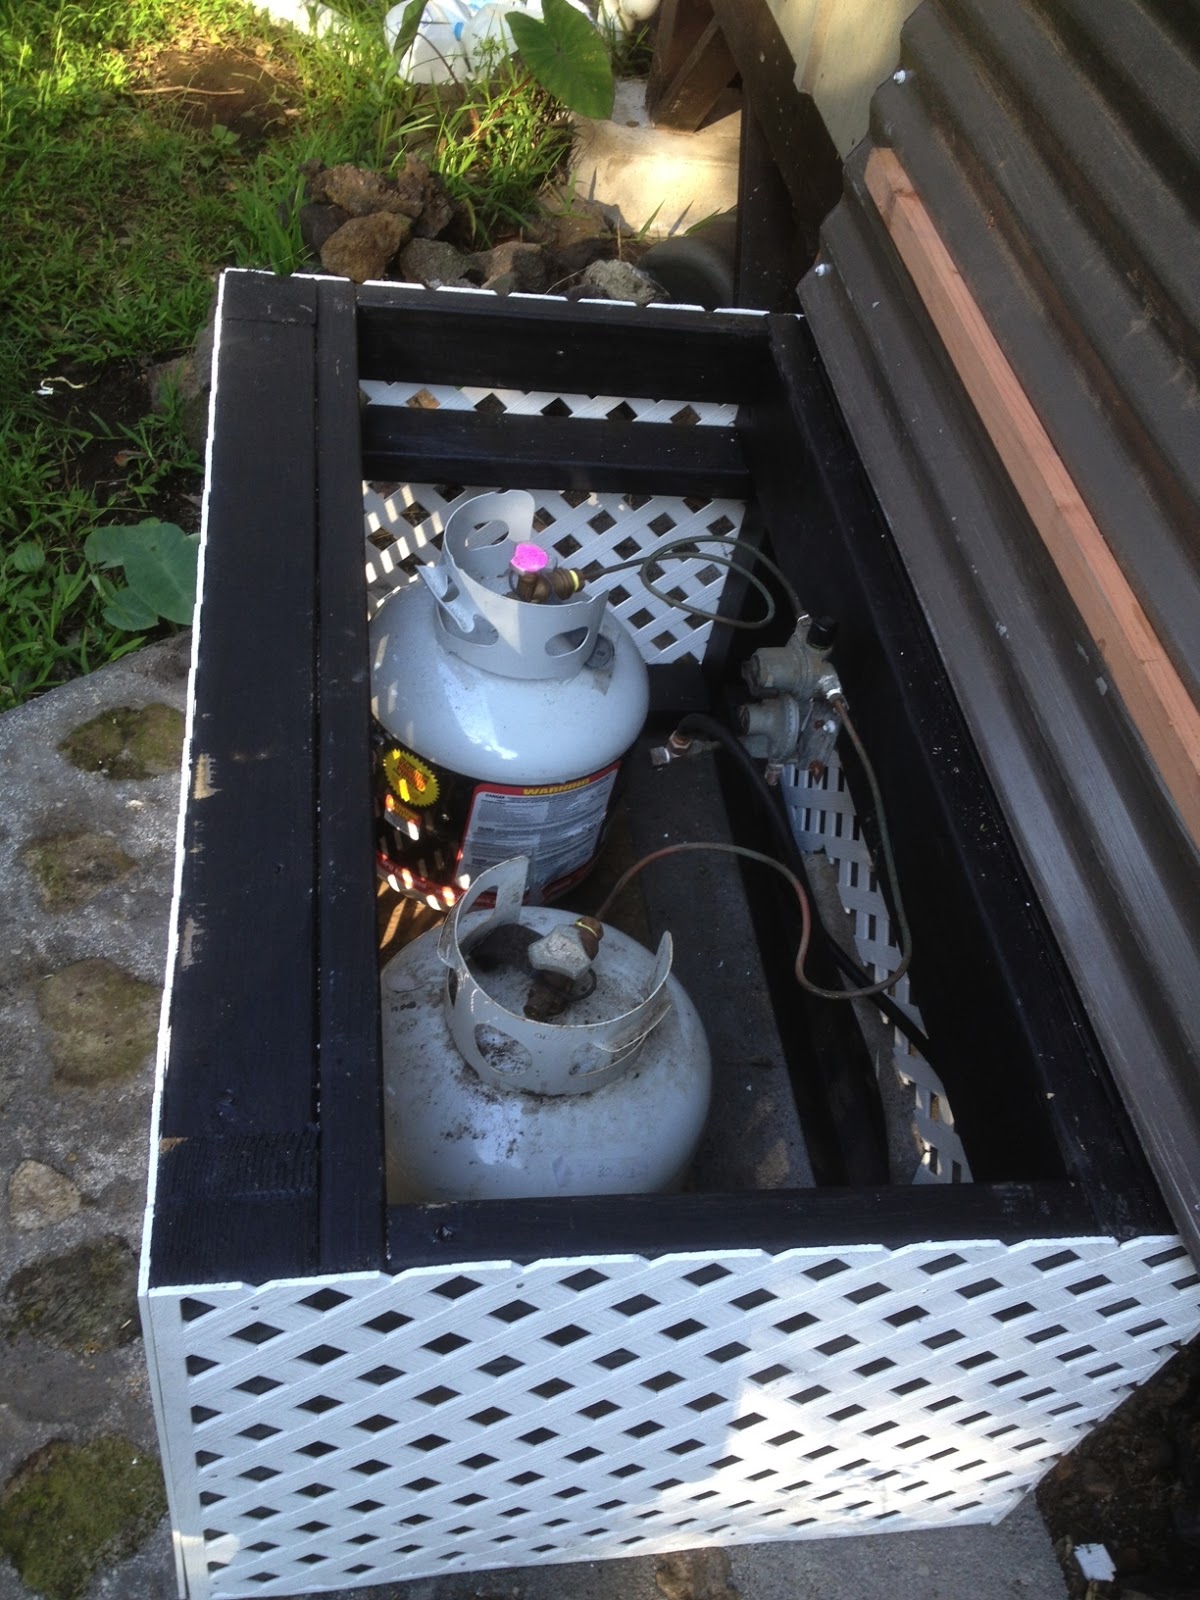
Just needed an easy repair. I've been using it for over a
year now. Still has plenty of life left. 

Dumpster diving saves a lot of homestead money, plus it provides a lot of resources for repurposing. Some of the stuff I pick up:
...newspapers to be used for mulch
...plastic bottles and containers to be made into fruit fly traps, fly traps,  bird chasers, pots for sprouting seeds and growing plans
...egg cartons for use in the greenhouse
...feed sacks for toting stuff like grass clippings, mulch, coconut husks, macnuts, etc
...feed sacks and old tarps for lining my grow boxes
...gallon jugs for carrying water and making drip waterers (ollas)
...cardboard to be weed blockers in the aisleways of the garden
...old coolers to be made into planters
...old or cracked buckets and totes to be made into planters
...pallets - all sorts of uses such as making grow boxes, shelving, wind blocks, firewood
...old pots and pans for chicken feeders
...old hoses for electric fencing insulators
...discarded drip irrigation lines to be reused
...hogwire fencing to be used to make trellises. If in good condition, to be used as fencing.
...pipes to be used for trellises, and asking all sorts of things
...barbed wire to be reused to protect garden perimeter from feral animals
...old clothing for rags, making garden ties, making pet beds, etc.
...partial cans of paint for painting my homemade planters
And the list could go on.

Reusing stuff from the dump gives a homestead the opportunity to have lots of physical use-items, if you wish to call them that, that it might not normally be able to afford to buy. I look round my own homestead farm and see so much that came from reusing and repurposing:
...in the garden - plant containers, planting pots, grow boxes, spot waterers, funnels, water storage containers, trellises, bird chasers, fruit fly traps, mulch, material for garden signage, 
...on the farm - fly traps, livestock feeders, hen laying boxes, sheep shelters, tool and hardware organizing, paint, wire, sheet metal, t posts
...for the home - firewood, rags, pet beds (made from discarded clothes), pet feeding dishes, storage uses

I've picked up some gems at the dump that were ready to use or only needed minor fixing. A wheelbarrow, 55 gallon drums, rope, extension cord, circular saw, shovel, rake, mirror, double sink, floor tiles, a lamp, card table, assorted chairs, pots and pans, dishes and silverware, puzzles and toys, clothing. 
Been there.... and got the t-shirt !

What's sad in my opinion is the amount of stuff that goes to the landfill. With dumpster diving not allowed in my area, diverting stuff is difficult. Thus I see plenty, plenty, plenty of serviceable things heading for the landfill that people could be using instead. I've seen perfectly serviceable doors, windows, screens, household goods, tools ending up in the trash beyond my reach. Eeerrrggg. So I have zero sympathy for the county government who moans about running out of landfill space.