Showing posts with label Recipes. Show all posts

Friday, November 2, 2018

Using The Garden's Tidbits

I wrote this little piece a couple of months ago as lecture notes for a gardening presentation. I thought it was good enough to include on my blog.......


Often times the garden doesn't produce in abundance. So sometimes there's just little tidbits of something, not enough to make a meal out of by itself. I see this happening to small gardeners around me, but it also happens frequently enough to me too. Even though I'm sure that I'm planting enough, the curse of  bad weather, disease, pests, the sheep getting out of ther pasture, a neighbor's cow wandering through, all take their toll. So sometimes I don't get much return on a particular planting. 

The learning process to grow a new crop also can lead to a sparse harvest. I can't count the number of times I was happy just to get a few carrots, or perhaps two sweet peppers, while trying to master a crop. I've seen other gardeners having the same challenge, so I'm not alone on this. 

One other reason I might bring only a small handful of something to the kitchen is that it's the beginning or end of a normal harvest. There's always some plant that produces a few days earlier than its bed mates. And of course, some plant straggle behind at the end. 

So, do I toss those 3 cherry tomatoes into the pig food bucket? Only one carrot ready....do I bother with it? Only one mini broccoli ready to pick a week ahead of the others.....feed it to the chickens? No, not usually. Having tidbits is common. The first....or last, sole cucumber, summer squash, cucumber. It happens all the time. Since I don't tend to preserve my excess (freeze, can, dehydrate, pickle, etc), I have to use those tidbits creatively. Here's some of the things I do......

... Have a meal of "finger foods". Each plate might end up with half a carrot cut into strips, a few slices of sweet pepper, a few slices of cold boiled sweet potato or Irish potato, all for dipping into a sauce. A hard boiled egg.  Half a cup of yogurt with a handful ground cherries (or that last piece of pineapple, cut up) mixed in. A few cherry tomatoes. We've come to like a finger food dinner. You never know what it will contain. 
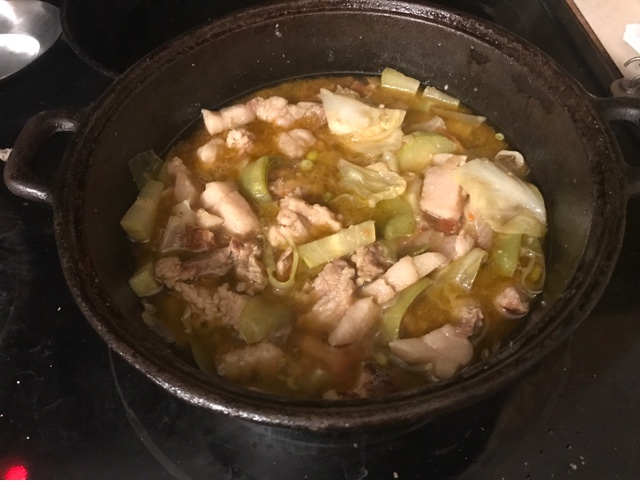
... Stir fry. Just about anything can go into a stir fry or a sweet & sour dish. It's a great way to utilize tidbits. 
... Soup. Start out with a basic stock soup then add the tidbits. Top it off with some seasonings and you've got a meal that used all those stray veggies. I've added lettuce, radishes, even cucumbers to a mixed soup. 
... Mixed salad. This is another meal that we are very flexible about. Most veggies, fresh or steamed, go fine with a mixed up salad. I've been known to chop up that sole last banana into the salad, or slice up those two strawberries rather than toss them to the chickens. 
... Omelets, quiches, fritattas are great ways to use those solo veggies. Only harvest three spinach leaves? Into the omelet they go. 
... Sandwiches. Our sandwiches can sometimes look a bit weird to outsiders, but heck, I don't force people to eat them. If you look closely at the egg salad you will sometimes see shreds of carrot, green pepper, green onion, leftover cheese, minced tatsoi leaves, diced tomato. You never know what may be in there. 
... Spaghetti sauce. I believe that spaghetti sauce is a fair place to dump garden tidbits. Just about anything could end up in the pot, including chopped fruits and macnuts! 
.... Smoothies. Like spaghetti sauce, a smoothie is a dumping ground. Start out with yogurt and go from there. Anything goes! 
... Grilled kebabs. Marinate, skewer, throw it onto the grill. Yum! I can use even that one snow pea or cherry tomato, as long as hubby and I don't fight over it. 
... Glop for stuffing potato skins, peppers, scooped out pumpkin, etc. I'll usually mix the tidbits with rice or pasta to make the stuffing or topping. 

I've been known to blenderize leftover mixed veggies and stir then into gravy for topping baked potatoes, rice, and making hot hot gravy sandwiches. Mixing those chopped tidbits, along with herbs, with cream sauce makes for interesting toppings over pasta, rice, bread, etc. 

One of the many suggestions I make to new gardeners is to be flexible and creative with their harvest.......or keep a couple chickens. I feel it's a shame to waste all those tidbits by just turning them back into the garden. Worse yet would be to toss them into the trash can. Just about everything that's been cooked can be blenderized and stirred into the chickens' mash or pellets. The hens will clean it up and turn it into eggs, meat, fertilizer. (ps- chickens may not eat certain things raw, nor if presented whole, but cooked and blenderized my hens eat it all. I mix the garbage glop with chicken pellets to absorb the excess liquid.) 

Wednesday, October 4, 2017

Delicious & Homegrown

I've had people question whether or not one can make a delicious complete (or 99% complete) meal from one's own farm. Huh? Do they equate homegrown with simple & bland? I guess so. Around here, good meals use ingredients available right off the land. And if not entirely from your own little piece of paradise, then they can be had locally, either grown by others or foraged/fished/hunted. 

Below is a posting from another local person's blog. "S" is mini-farming her acre of lava desert, and successfully producing some yummy meals. So yes, it can be done. One doesn't really need to go to the supermarket to find enticing food that begs you to sit down and enjoy a meal. 
...................................................................... 
"S" post.....

A community garden twist on a Filipino dish. 


Chunks of my home bred pig, with vegetables from the community garden harvest table: onion, tomato, snow peas, peas, some green cabbage, and 2 tender pipinola squash, cut into chunks. Alas, I did not have the fresh garlic or the fish sauce to make it more traditionally flavored. I made do with garlic salt, Bragg's amino acids, and Hawaiian chili pepper paste (my go-to seasonings).


Saturday, March 19, 2016

Calcium Foods on the Homestead

Ella asked in an email, "I know that you're not vegan and do eat dairy. But I'm vegan and want to start growing some of my own vegetables. Which ones should I grow for calcium?" Elsa lives in Southern California. 

I'm not familiar with what will or won't thrive in Ella's region, but I am aware of which veggies, able to grow in my area, are considered good sources of calcium. 

Amaranth
Beet greens
Bok choy
Broccoli
Broccoli rabe
Collards
Cowpeas
Dried beans
Figs
Fresh soybean (edamame)
Kale
Lambsquarters 
Mustard greens
Nopales (prickly pear cactus pads)
Okra
Oranges
Sesame seeds
Spinach
Taro
Turnip greens

Almonds and stinging nettle are also decent sources for calcium, though they don't grow in my area. I think both will grow for Ella. 

Truthfully, I don't think about which veggies to grow according to nutriental content. Perhaps I should. But I believe that if I'm eating a wide variety of fresh foods and stay away from most commercial foods, I'll be doing fine with the nutrition. Once upon a time I used to micro-analyze stuff. It was an aspect of my job. But I've drifted away from that. 

Wide variety makes sense to me. I tend to grow a little bit of lots of different things. I have dozens and dozens of micro garden beds, so often whatever is ready to pick becomes dinner, with nothing leftover. This habit causes my neighbor to shake his head. He wants me to grow large beds of one item, more like a traditional farmer. Then sell or store the excess. While I may only plant a small part of a seed packet at a time, he will invariably plant the entire packet no matter how large. ..... Different strokes for different folks. 

By the way, my homestead also produces dairy (via trading), meat, and eggs. Sources of calcium. And I could always trade for small fish, pressure cook them, and eat bones 'n all. Calcium isn't difficult for me to find. And heck, there's always coral sand......a bit gritty but edible. 

Friday, March 13, 2015

Microwave Lemon

I'm passing this kitchen tidbit along, for what it's worth. I got the tip from a friend. 

Juicing lemons /limes. Microwave for 20 seconds before squeezing. You'll get more juice. 

So I decided to play around with this idea. I think this tip would be apropos when hand squeezing, as apposed to machine juicing. My little machine juicer removes all the pulp from the rind, then mashes it pretty well. But hand juicing is a different story, especially if I'm doing more than just one or two lemons. Hand juicing is more difficult for me. 

First, I discovered that microwaving softens the lemon. The difference is most noticeable between a refrigerated lemon and a microwaved one. But I could see a significant softening even between room temperature vs nuked (a.k.a. - microwaved). 

Second, the nuking seems to have had some effect on those little cells inside the lemon that hold the juice. On the microwaved lemon, more of those cells ruptured when I squeezed. Because they were changed by the microwaves??? Or maybe because the rind was more supple so that I could squeeze better???  Not sure which (or neither) is true, but I did seem to see more juice coming from the nuked lemon. 

Third, for older people or folks with damaged hands, it's easier to squeeze the nuked lemon. Less hand pain.  

My microwave is a low wattage critter. I don't use it much, and being in solar I purposely bought a low wattage microwave. Why? I wanted to avoid a situation where the microwave was running and the frig & freezer called for power at the same time, thus overloading the system. If I ask for too much power all at the same time, the system shuts down. Safety thingee. It was a nuisance the time I did that once, so now I avoid that situation. So....back to the lemon. I found that I needed to microwave the lemon 30 seconds for best results. 

Sunday, January 25, 2015

Cooking Atop My Woodstove - Cooking Rings

Debbie J wrote via email, "Your woodstove is really small. How do you regulate the cooking heat? Don't your pots boil over?" 

With a kitchen wood fired cookstove, it's fairly easy to regulate the cooking heat. And the stove is big enough that the cook can put a pot on the back burner to keep things at a slow simmer or below. But as Debbie pointed out, my stove is tiny. It barely holds two pots and there is no way to find a cool spot on the stove to move a pot to. So I had to be creative. 

I remember from way back in my early childhood that my grandmother used a variety of methods when cooking on a wood fired stove. One was the use of metal rings that could be set atop the stove top for her to place a pot on. She had different sized rings for small to large pots, plus they were different thicknesses. Some had vent holes in them, some didn't. I've looked in old catalogs and antique barns for these old fashioned cooking rings, but I've never seen them. So I'm guessing that someone local made them for her. 

Since my grandmothers cooking rings aren't available, I've come up with a substitute. Her rings had handles, which must have been very convenient. My solution lacks the handles. I'm using old mason jar rings, the ones for the wide mouth jars. . 

They are not as big as I'd like, but they do the trick. So if one of my pots is boiling too briskly, I can place a ring on the stove then plop the pot atop it. 
This brings to cooking down to a simmer. Works pretty nicely. 

Some day I plan to have a blacksmith make me some proper cooking rings. I just haven't gotten around to it yet. 

Friday, September 19, 2014

Homemade Mint Extract

I love the flavor of mint. Hubby's not impressed by it, but I'd say just about everything tastes better with a minty touch. Thus, I grow mint. Spearmint, peppermint, and chocolate mint. I like all three. It grows fairly well here in Hawaii, but I notice that is goes through a rest period. The plant partially dies back, pauses in growth, and generally doesn't look good. And of course, zero harvest. So in order to get my mint fix during that rest period, I need to preserve the mint. 

Drying mint leaves is easy. But in order to preserve the flavor, the dried leaves do best if stored in a sealed container in the freezer. I'll use dried mint for teas. We drink green tea on a daily basis. A bit of mint in it is really refreshing. As long as I don't go overboard with the mint, hubby likes it. 

For other recipes, I find that an extract works easier. Being the self sufficient type, I wanted to learn how to make my own using my homegrown mints. Turns out that it's really easy to make mint extract. It won't be entirely home sourced because I don't make my own vodka, but I discovered that one bottle of vodka will last me a long time. That's right, I'm not a drinker. I've read that you can use rum instead of vodka. Hey, I've got plenty of sugar cane around here. I wonder how one makes rum.....? 

Anyway, here's the steps for making mint extract:

1- Remove the leaves from the stems. I just use leaves and the tender stem tips. I choose the nicest looking, perfect leaves. 
(Above, fresh picked sprigs of spearmint.)
2- Wash/rinse the leaves. Spread them out on a towel and let them dry. Or towel dry them to get most of the water off.
3- Bruise the leaves. I use to either crush the with my hands or use a rolling pin. But I soon discovered that if I rolled the washed, wet leaves in a dish towel then crushed away, the leaves got dried and bruised at the same time. The leaves could be chopped instead of bruised, but it just means that the small pieces may be harder to remove from the extract. For most applications, it doesn't matter if there are mint leaf pieces. 
4- Pack a canning jar with leaves but don't overpack it. If overpacked, the leaves will expand over the top of the vodka and rot, ruining the batch. 
5- Fill the jar with vodka, making sure to well cover the leaves. 
6- Put the lid in the jar then store it in a dark area for about a month. Test the liquid. If its not minty enough, then store it for another month. Having said that, I have a new method that I've switched to. I store the leaves for one month then fish out the spent old leaves, discarding them. Then I add a new batch of fresh leaves. Then I'll store that jar for another month. At the end of the two months the extract is nicely minty. I suppose you could keep repeating that step but I usually don't. 

As for the choice of vodka, it doesn't matter, I'm told, as long as its 80 proof or more. The alcohol acts as a solvent and preservative, 

Some tips I've discovered--
...the mint leaves float initially. After a few days they sink. So in the beginning until the leaves sink, I will give the jar a little shake to keep the leaves well coated in vodka. 
...the longer it is steeped, the stronger the mint flavor.
...replacing the old leaves with fresh makes for a mintier extract. But after doing that a couple times the vodka must get saturated with mint oil because it doesn't seem to get all that stronger. So replacing the leaves once or twice is it. After that it isn't worth the effort.....the effect of diminishing return. 

I haven't tried it, but I bet I could make extracts using this same method for vanilla, coconut, orange, ginger, etc. But since I can get those fresh pretty much year around, I haven't experimented. But I have considered trying various citrus extracts. Perhaps someday......


Thursday, July 31, 2014

Steamed Hardboiled Fresh Eggs

The only draw back I see with fresh farm eggs is that thy are a bear to shell when hardboiled. I usually mutilate the white part with much if it sticking to the shell. Until recently I use to store a dozen eggs in the coldest part of my refrig for five weeks before hard boiling them. Even then I had to peel them under running water. It has such a nuisance that I eventually stopped making deviled eggs. And for making dishes where the eggs would be chopped up anyway, such as egg salad, I just hardboiled fresh eggs. When cooled, I broke the egg roughly in half then used a spoon to scoop out the egg from shell. 

I had tried all sorts of suggestions, but for some reason they never worked for me.
...salted water
...water with vinegar
.,,water with baking soda
...pricking one end with a needle .....you talk about disaster! Should have gotten me on video trying to accomplish this one. I came to the conclusion there must be some sort of kitchen trick involved here that I'm not aware of. Or perhaps the shells on home raised eggs are thicker. Regardless, the few that I successfully pricked still peeled in chunks. 
...placing the eggs into already boiling water
...placing the eggs into cold water then bringing to a boil
...starting out with cold eggs
...starting out with room temperature eggs
...slowly heating to a boil
...simmering instead of boiling
...boil for 7 minutes, let sit in the hit water for 7 minutes, run in cold water, then shake while in the pot to crack the eggs all over
...bring to a boil then turn off the heat. Run in cool water after 20 minutes. 
...bake them in the oven 
...peel them under running water
Yes, none of these worked on my eggs. The shell always stuck to the white. 

I've always been willing to try suggestions, but until right now I've not had good results using fresh eggs. But It surely makes me wonder about those store bought eggs. What the heck to they do to them that they end up peeling so readily? Cold storage? How old are they really? Is it something they treat the shell with to keep the eggs "fresh"? I always wonder what it is they do to our food. It's scary sometimes!!! 

Recently I was given a suggestion that I'm now trying out. Steam the eggs. So here's my first attempt.

........ Room temperature fresh eggs. Bring the water in the steamer to a boil, then add the eggs. Steam for 12 minutes. Immediately cool the eggs in cold water. When cool enough to handle, peel them. 

BINGO !  It worked! I had been prepared to try steaming them in a variety of different ways, but the first time around worked. Wow, I'm impressed. So I guess I'm up for making deviled eggs again. 

Thursday, March 20, 2014

Chicken Feet - Uses

I gave a chicken butchering demo recently and someone asked what I do with the chicken feet. I had set them aside rather than throw them nto the slop bucket, so it peaked a person's curiosity. I do one of two things.....use them for chicken broth, or give them to the dogs as a treat. 

#1- Chicken broth. If I'm going to eat something made from chicken feet, then those feet need some good cleaning. Yup, they're pretty disgusting. The first thing I'll do us wash them well in soapy bleach water and give them a good rinsing. Use a brush. I prefer a toothbrush. Once visually clean, they get dipped into a pot of boiling water for 30-60 seconds. Cool them off in cold water then peel the skin off. It comes off easy by just rubbing or a little encouragement from a kitchen knife. Now clean, they are ready for cooking. 

I usually save the cleaned feet in the freezer until I have 10 or 12. To cook them I simmer them in a pot of water for a few hours. Yes, hours. So I usually put the pot on the woodstove in the morning when I'm taking the chill off the house. The feet will make a slightly gelatinous broth. I'll beat the cooled broth with a spoon or fork before discarding the feet, but I try not to handle the feet with my bare hands because the gelatin tends to stick to your skin. Sticky fingers are hard to clean up afterward. Of course you could use your hands if you don't mind. It's just that I don't like to. This broth makes a wonderful mouth texture when added to soups and sauces. 

My grandmother always used chicken feet in her chicken soup, so I grew up loving it. 

#2- Dog treats. My dogs love raw chicken feet. They'll eat them fresh or frozen. I don't cook them for the dogs, just give them raw. 

Wednesday, October 16, 2013

Limes!

'Tis the season for some mighty fine limes. The Tahitian limes are in full production. This variety is incredibly juicy and seedless. It definitely is my favorite when it comes to juicing.

I'm a big user of lime juice. We both love limeade made with fresh cane juice. Creamy lime popsicles are wonderful desserts and treats. Nothing wrong with lime pie either. A neighbor makes lime curd which is very yummy. And who doesn't like a tad of lime in beer? I'm not a beer fan, so I take my squirt of lime in ice water. Funny thing, but I never used limes until I moved to Hawaii. Now I use them every week. 

This year I've been supplying lime juice by the gallon to some local restaurants. A couple of smaller entrepreneurs by it by the cup or pint jar. And I can use it for trading. Lime juice freezes very nicely, so I can stockpile it for future use and sales. 

In the past I use to squeeze the limes by hand, using a small glass juicer. It was the kind that you pressed and rotated the cut lime upon a fluted point. It worked, but was work. Ok for a few limes, but it got tedious. Since I am now selling juice by the gallon, I needed to upgrade my juicing method. There were a number of options out there, but being a bit miserly, I opted to try a rather inexpensive juicing contraption. I bought a Black and Decker citrus juicer for $20. It turned out to be one of my good decisions. It juices quickly, is easy to use, and simple to clean up. I've made over 10 gallons of juice so far with it. It paid for itself the first day I used it. Now that's a good payback.