Showing posts with label Fence. Show all posts

Wednesday, March 20, 2019

Electric Pig Fence - A Hotwire

"R" asked me what is an electric fence/ hotwire. The only wire fence he knew about was the invisible dog fence. 

The invisible dog fence is actually a radio fence that activates a shock collar that the pet wears. I bet one could train a pig to an invisible fence, but I don't see the value in it. It's cheaper, simpler, and quicker to use an electric fence. 

An electric fence is a wire that transmits a mild electric current. The charger is grounded so that anything touching the wire and the soil gets a shock (no shock collar needed). The amount of that shock depends upon the charger setting and the soil moisture. (Where the soil is dry, there is an alternative way of creating the necessary ground.) The set up I use just gives a mild, intermittent zap....enough to startle but not harm. 

The pigs, like myself, don't like to be zapped. So we all tend to avoid touching the hot wire. As a result, an electric fence is a good deterrent to roaming pigs.....and careless humans. Since I installed the electric fence, the pigs have been staying in their pasture. 

The charger is the heart of the system. There are all sorts of chargers (also called energizers) available. You just need to match it to the task at hand. In my case, I opted for a charger from Premier 1, a solar powered one that can use AC current to tup up the battery if needed. 

There are several types of hotwires to choose from. I prefer the lightweight rope, but I couldn't get it when I needed it. So I bought a roll of galvanized electric fence wire. It's easy enough to work with, and will last quite a while. 


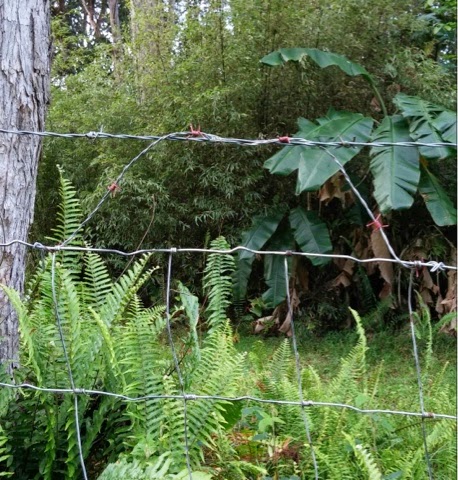
The hotwire needs to be insulated from the soil. I use plastic posts to mount the hotwire on. But there are other methods to accomplish the same goal. The wire needs to be strung at the height the particular animal will touch it. For my pigs, that's 6"-12" above the ground. 

Thursday, January 11, 2018

How Much Fencing Does a Farm Have?

"K" asked, "How much fence do you have around your farm?"

The entire 20 acres has a perimeter fence, and while the front property line is a stone wall, there is fencing running inside it. Why? Because one of the farm dogs used to jump the wall when he was skinnier. He's now too overweight to make the leap, but the fence stays. It comes in handy for keeping the new dairy goats in, and 2 footed snoops out. 

The back 14 acres also has cross fencing. That means that it is divided into several separated pasture fields. This is because I use rotational grazing. 

So counting all the fencing, it comes very close to 2 miles of fence. Oh geez! It's hard for me to believe I put most of that original fencing up myself. Thank heavens for David, who completed what I started. Yup, the old farm fence was all rotted away when we bought this land. Even the fence posts were well past their lifespans. And now since the time that the fence was put up, it's had to have many repairs here and there over the years. Occasionally a t-post has rusted off at the base, but mostly it's the fencing itself that rusts out. Surprisingly the whole fence doesn't rust away at the same rate. Some sections of my original fence have rusted badly, requiring replacement twice now. Other sections are the original fence. All the same brand and grade fence, so go figure. 


Although it was very expensive, I have no regrets fencing in the 20 acres. And the cross fencing, though not mandatory, has been a significant benefit. I may never see a full cash return on the cross fencing in my lifetime, but again, I have no regrets. 

A farm surely doesn't need field fencing. There are indeed other options. But field fencing keeps not only my livestock in, but also controls the farm dogs. It's really nice being able to let the dogs run the farm without having to keep an eye on them. Now that the new pup is 6 months old, he can no longer squeeze under the gates, so he's secure now too. 

Wednesday, January 10, 2018

Emergency Fence a Repair - Being Prepared

Checking the fenceline today I came upon a rusting section that is finally giving up the ghost........rusting through, that is. It's been trying to die for months now, but it was still solid enough and effectively keeping in the livestock. But on close inspection, I found places that had rusted away, potentially leaving holes in the fence. Time for action. Leaving it go much longer could result in escaping sheep. Believe me, they can be difficult to relocate and bring home. Been there, done that, never want to do it again! 


Now here's the Boy Scout part ..... being prepared. I keep a roll of field fence on the farm at all times. Not always a full roll, but at least 100 foot of fencing. Why stockpile it? Because the nearest place to buy it is a 1 1/2 hour drive away, and when it's needed, it's NOW, not this afternoon. 

The roll I had was about 150' of fence. The rusting section was 100', give or take a few feet. So I had enough on hand to fix this section. 


Since David was working today, I asked him to help. Between the two of us, we cleared the fenceline of weeds and brush, strung the fence, got the job done in less than an hour. 

Because of our local volcano, replacing sections of fencing is a never ending job. Now I need to put a roll of field fence on the shopping list for the next time I run to Hilo. Last time I bought a roll it was almost $200 for the medium grade. I'd like to buy the better grade but it's difficult finding it in stock. It's a popular item. Perhaps this trip I'll be lucky. 

Sunday, March 5, 2017

Pallet Fence Pau

It's been almost three years since I first built the temporary pallet fence around the garden. Overall it was a success. It was incredibly cheap, quick, and easy. It did the job. It wasn't as strong as a post & wire mesh fence, but it surely outdid that kind of fence when it came to cost, time, and ease to install. 
Later three years, it's falling apart. The wood that contacted the ground has rotted enough that it is falling apart. Many of the slats are weak and can get broken easily by hand. And since I no longer need the fence (my pasture fences have since been upgraded), it's time for the pallets to go. 

(Above, all gone. Looking down the old pallet fence line, it's once again an open grassy area.) 

Because I never nailed the pallets together in the first place, dismantling the fence is a matter of cutting the ties and pulling that pallet out of the tangled grass growth at ground level. Almost all of the pallets came apart in pieces. 


The slats that lifted off, I stacked. The rest of the tangled pallets need a little more persuasion with a hammer in order to come apart. 


This now all becomes firewood. While I could stack the wood into one of my hugelpits, I'd rather have the firewood. 

Would I ever use this kind of pallet fence again in the future? Sure! 

Wednesday, September 9, 2015

Wire Fence Gate

Around here, plenty of us make gates through our pasture or property fencing the cheap and quick way -- wire fence pass-through gates. They are simple, quick to make, and cheap. I find that this sort of gateway is fine when I'm not having to move livestock through it on a regular basis. But with livestock I prefer a rigid swinging gate because it's easier to prevent animals escaping past me. I have better control. But having said that, I do indeed use these cheap wire fence gates in my pastures. Ha, go figure. But where security is highly important, such as gates which provide exit from my property (that us, the driveway gates), I have rigid gates. Escaping livestock does not make for a happy farmer. 

Anyway, back to the wire fence gate. Below is my first attempt at making one. I started cross-fencing my pasture and needed a gate in one corner. So I cut the fence then added a brace to the t-post, and secured the end of the cut fencing to the t-post by wrapping about ten inches of fence around the t-post. Of course the fencing piece going from where I cut it near the t-post (on the left in the photo) going toward the perimeter fence (on the right of the photo) was now too short to be used for the gate. So I just cut it away. I then cut a new longer piece of fencing to make the gate. I secured the end on the right to the perimeter fence. The end in the left you can see that I nailed to a five foot high 3" diameter tree trunk......in this case from an ohia tree which is fairly strong and rot resistant. 


Now how to make this floppy gate stay shut. Hhuumm. I've seen where other landowners make loops to secure the top and bottom of the gate post, in my case, an ohia post. So I used a piece of stout wire from the discarded piece of fencing. Forming a loop, I nailed it to the post using a large fence staple. I made the loop just large enough that it could fit over the top of the t-post snug enough to hold but not too snug that I would have difficulty using the loop. 


To secure the bottom of the ohia post I again used a piece of the discarded wire fencing to make another loop. Not the neatest job, but it was my first try at experimenting. 


With a bit of effort I came up with a loop that did the job. I could slip the butt end of the ohia post into the loop, then flick the top loop over the t-post. The gate was secure. I could readily open and close it, and it held the livestock in. So far none of the animals have put any effort into learning how to flip the loops open and escape. Good. 


The one big problem I've had with this gate arrangement is what to do with the floppy gate while it is open and I need to drive the ATV through. Laying the floppy gate on the ground has caused the fencing to bend and warp. As you can see in the top photo, my gate now has a decided curviness to it. Since the warping was getting worse, I decided I needed to address the problem. 


The answer was sitting right before my eyes. A wood pallet was sitting there that I used to set buckets, water jugs, and other assorted items on. By slipping the butt end of the ohia post into the slat, the fence gate stood upright. No flopping and twisting like when I was setting it onto the ground. Much, much easier to use this way. Again, a cheap and quick solution. Not the prettiest, for sure. But it works.


Monday, April 20, 2015

Fencing - Top Barbed Wire

I admit I'm not the best fence installer. It's a hard job. And I don't know any of the inside tricks of the trade. But I got the initial fence up successfully. Since then David has taken over the task of repairs when needed. And after the January windstorm, there were plenty of places that the fencing needed repairs due to downed trees. While making repairs, we decided to run a stand of barbed wire atop the fence. But alas, the posts weren't always high enough or the fencing made an awkward dip some place. How to keep the barbed wire in its proper location? 


David to the rescue on this one. Without a bit of hesitation he clipped a short strand of barbed wire and deftly twisted it this way and that. So even though the fence post (above) was too short, it was no problem. The barbed wire got firmly and correctly positioned. 

 In other locations the barbed wire was riding too high, or too low. Again a short strand of wire properly twisted held the barbed wire strand exactly where it should be. 

Brilliant! Gee I wish I had thought of that one. But I thank whoever came up with this simple solution. 

Friday, September 19, 2014

Creative Repair

It's not uncommon around a working homestead farm for quick emergency solutions to problems that pop up. I've done dozens so far. It's such commonplace that I don't even think about them. 

Today I moved my horse to a neighbor's pasture. The neighbor lives on the mainland, so the pasture is vacant. In order to keep the pasture from over growing, she allows (actually encourages) people that she knows to use the pasture. Nobody has had livestock there for a few months and with this crazy weather the grass is getting out of control. So I moved my horse there. Yoshi will think she died and went to pasture heaven......belly deep grasses of all sorts. 

I saw right off that the gate that I was familiar with was gone. Most likely rusted away. Someone had improvised a gate. 
Two young trees sacrificed to make suitable poles. Then creatively attached to the fence posts on each end using some old telephone cable. 
Nothing sophisticated, but quite functional. 
Definitely wouldn't hold an escape artist in, but my mare won't bother testing this gate. For the next couple months she'll be content to eat grass. 

A proper gate would cost hundreds of dollars. But since this pasture doesn't have what one would consider to be proper fencing, this gate will do just fine. And it didn't cost a penny.....except somebody's time. 

Saturday, April 5, 2014

Pallet Fence Update

So far the fence is working. The gusty tradewinds have been defeated! Score one for the farmer. 

Gates --  making gates out of the pallets could be done, but I had a better option available. Salvaged from the dump, I have three sections of worn out chain link panels from a dog pen. They are 4 foot high and about 5-6 foot long. By simply tying them to a pallet with the poly hotwire, they are very easy to open and close as gates, and they are sturdy enough to keep a curious horse or sheep out. 
By setting two together, I had an entrance wide enough to drive a truck through for delivering compost and mulch. 

For people gates I happen to already have two damaged chain link gates that I picked up cheap at a flea market. I haven't set them into place yet, but tying them with the poly hotwire will work. 

Several people have asked me what is this poly hotwire that I've mentioned. It's a fine braided rope that has wire strands braided into it. It is highly flexible, strong, not apt to break. It is used for hotwire fencing for delivering a shock when touched. But in my pallet fence application, it is not attached to a charger, thus no shock. 

Friday, April 4, 2014

Temporary Pallet Fence

This week I wanted to put up a quick fence to keep the horse and sheep out of the area into which I'm expanding a veggie garden. Putting up fencing on my land is a real painful task because anywhere from zero to 6 inches down you hit solid lava. Pounding or digging in fence posts is just about impossible. Putting up fencing usually requires the use of a hydraulic hammer or drill. 

I wanted a quick fence and I wasn't interested in it being permanent. So I began to fiddle around with ideas. A hotwire would work for the horse but not the sheep. So that easy solution was out. Next idea was using saplings for a tripod n rail fence or a wattle fence. That might work but it would take an awful lot of saplings with reasonably straight trunks, something I didn't have. Besides, it would take days and days to cut and transport those saplings since I'd need a lot to effectively contain sheep & horse. Toss that idea out. Next- wood pallets. I had access to plenty free ones. I first thought to cut them up and build a picket fence of some sort. But the KISS principle kept nagging me, so I said, "Why cut them? Why not use them as is?" I couldn't think of a reason why not. 

My first attempt at a fence was to line the pallets up like a normal straight line fence. I tied them together. They fell down. So I nailed them together. The next day the gusty tradewinds blew it down. 

Next attempt - set the pallets up in a zigzag so that were more stable. That night the trades blew sections down. Even with open slats, there was too much wind resistance.

There had to be some simple way to make those pallets more stable. Something cheap, easy, quick, simple. I finally came up with a solution that worked. Let me show you how. 
This pallet fence really works. It follows the contour of the land with no problem. Gusty winds have not blown it down anywhere. And it is not nailed together so it would be very easy to remove, add to, or change the direction. 
Right now it's not painted, but if it were a nice natural tone of green or brown, it would look better. 
I erected the fence by placing one pallet perpendicular to the fence line. I tied a pallet to either side. Then continued adding pallets using this same pattern: one perpendicular, two on the fence line, then repeat. You can see the pattern pretty well in the photos. 
I didn't need to use a perpendicular pallet at the corners. The corners met at a 90 degree angle, so it was stable enough. 
I just tied the corner pallets to each other top and bottom. I'm using electric fence poly "wire" for tying. It's strong and not apt to break, is easy to tie, the knots don't slip. And on a farm, I always have a roll of it handy. 
This photo shows how I tie the pallets top and bottom to the perpendicular pallet. Just two ties appears to work. 
Left side. 
Right side. 

I've had this pallet fence up for several days and so far so good. High enough to discourage the horse and the sheep ignore it after their first investigation. 

I bet if I used the nicest pallets, leveled them up and used a string line to set them straight, nailed them together, and painted them that they would make a rather nice farm fence. And boy, you can't beat the price!