Showing posts with label Potatoes. Show all posts

Sunday, August 4, 2019

Colorful Potatoes

Growing weird potatoes is fun. Yes indeed...fun! I grew up knowing only two types of potatoes -- white russet bakers and red skinned boilers. I was long since into my adult years when I discovered that potatoes came in all sorts of sizes, shapes, and color combinations. 

To date this year I've harvested 3 potato varieties. 

La Ratte. This one is a yellowish-white fleshed fingerling. Great for frying or boiling. Just don't try to mash it. It has a delightful nutty flavor. 

La Ratte

Dark Red Norland. The potato of my childhood. Red skinned, white fleshed. Mom used this one for everything but baking. 

Just like the label says.....Dark Red Norland

Purple Majesty. Purple skinned, purple fleshed. It's a beauty. Makes great fried potatoes. We like the flavor of this one. 

Purple Majesty

Friday, June 21, 2019

La Ratte

La Ratte is a variety of fingerling potato. It grows easily here but does require fertile soil in order to get good sized tubers. When I grew it in mediocre soil, the tubers were mediocre too. But that is true for most potato varieties. It's just that La Ratte, being a fingerling, tends to have small tubers to begin with.

This photo was taken one month before harvesting. 

I harvested two pallet boxes of potatoes yesterday, both the La Ratte variety. Each box had been started with 16 medium sized tubers that were a bit in the small size, not my preferred seed size. I like them bigger. But that's what I had available, so they were used. Each box had been newly filled with fresh compost mixed 50/50 with older compost. Once planted, the seed potatoes were mulched with a couple of inches of fresh grass clippings. One month afterward, I re-mulched them to help prevent greening of surface tubers. They could have used a third mulching near the end but I didn't have the time, so I did lose a few big tubers to greening. 

Harvested tubers range from large to small. We eat any size. 

One box yielded about 7 lbs, the other a tad over 8 lbs. I'm pleased.

These represent the larger sized tubers. 

I've replanted the two boxes, again with La Ratte. I saw no disease or pests, therefore I didn't rotate to a different crop. Before replanting, into each box I tilled in a 3 inch layer of fresh homemade compost plus a 5 gallon bucket of composted sheep manure. I laid the tubers on the soil surface then covered them with a 2" layer of county mulch. They will get grass clipping mulch as needed as the plants grow. 

Note: normally I wouldn't add extra manure to a potato bed, but I find that La Ratte (and other fingerlings) produce better with the added fertility.)

Monday, June 10, 2019

Pallet Boxes for Potatoes

I've been making more boxes as I have the wood pallets available. Along one side of the sheep paddocks is an area with only an inch or so of soil. The only thing that will grow is tropical grasses, and even they have a hard time making roots. Thus they grow in a mat that can actually be pulled up like a sheet in places right off of the pahoehoe lava beneath. It's really weird. It's like having a grass carpet. 

This is the area I'm building more pallet grow boxes. It's a method whereas I can grow food. So far I have 10 boxes made, filled, and planted with potatoes. 


Here's a quick description of how I make these....
... I cut the pallets in half retaining both cross pieces for stability, then screw four together into a box. I'll use pieces from the discarded section to fill in any big gaps on the sides of each box. 


... To make them more visually pleasing, I paint the sides. 


... Next I place cardboard on the bottom to help keep the grass farm growing up through the soil. Then I line the sides of the box with some air resistant material. Currently I'm using black plastic trash bags. 


Several layers of cardboard on the bottom. Then I use a staplegun to Lin the sides with plastic trash bags. 

... Then the boxes get filled with my homemade compost. After watering and settling for a couple days, I'll plant them. 


Coarse compost fills most of the box, then compost is used to top it off and plant into. 

After planting, don't forget the label. 
These boxes are made very much like my compost bins. But they don't have a side that is removable. And they are only half as high. I find the height to be very ergonomic. Just right for an old buggah like me. 

Once this row of boxes is completed I plan to make more for other areas where there is little or no soil. I might grow more potatoes, or I might try something else. Time will tell. 

Two months after planting, the potatoes look great. 

Friday, April 26, 2019

Potatoes Fading Away

"V" mentioned in a comment about how the purple potatoes they grew gradually gave irregular sizes and fizzled out. Actually, this is a common problem. Fading away can happen due to the build up of diseases and soil pests, or the slow decline in soil fertility and quality over time. So how does a gardener address this issue? Try to prevent it? Try to remedy it? 

... Selection of seed stock.
     Although home growers hate to do this, (and so did I when I started out) I get really picky about which tubers I select for next seasons crop. I look for the larger ones that are well formed and have no blemishes. I pick the best for seed, not eating. But they are clones of the parent, you say? They shouldn't be any variations, you say? Well, we can say that over and over again, but Mother Nature actually allows for variation. The plant reacts to its environment, so even clones, like potatoes, can vary. 
     Back to selection. I use large tubers. The small, super jumbo, irregular, blemished one get eaten. Only the best are used for seed potatoes. On top of it, I also want to select from plants that are healthy looking, robust, and heavy producers of large tubers, not a few super jumbos or tons of little ones. 

... Cull out diseased or weak plants. I know that there is the urge to grow out every plant, to get as many plants as possible. But this weaker plants are often diseased in some fashion, thus passing the problem to neighboring plants and infecting the soil. I'm quick to remove problem plants. 

... Clean the seed potatoes prior to sowing. The seed potatoes go through a dormant period prior to sprouting. While in this dormancy, I remove any tuber that starts to show any problem. Plus I will give them a soak in a 10% bleach solution for ten minutes just prior to planting, letting them air dry. 

... Keep the soil alive with fresh compost and nurture the soil organisms. Soil organisms can help a lot with keeping the garden healthy, suppressing pathogens (disease causing organisms). This is not a perfect solution, but it makes a positive difference. I've often heard that you shouldn't add fresh compost to potatoes, but heck, I've grown crops successfully in pure 100% compost. 

... Change of location (aka- crop rotation). Again, not a perfect solution, but it can help. If one location shows signs of disease, then surely change to another. The problem with this is that gardeners tend to use the same tools on the entire garden area, thus spreading disease around. And many walk through their garden while the foliage is wet, again increases the chance of spreading disease. 

Diminishing harvests, weaker plants, fading away are problems common to growing potatoes. When I see this happening regardless of my efforts, I bite the bullet and purchase fresh certified seed stock. While most gardeners see fading away after about 3 years, I don't buy fresh seed stock that frequently.  So I guess my precautions help. I've only purchased certified seed stock 3 times since starting this farm.

The other part of the fading problem is soil fertility. Potatoes respond really well to fertile, evenly moist, light & fluffy soil. Yes, the big commercial farms grown potatoes in sand, clay, etc., but they use chemical fertilizers and aggressive hilling to compensate. Plus if yields fail below a certain level, farmers switch to another crop that is more profitable. On my own farm I've seen that if I fail to incorporate plenty of compost between crops, the potato harvest shrinks to less and less. They really respond favorably to fertilizer, be it commercial or homemade compost. Potatoes also seem to respond well to light soil. Light fluffy soil allows them to spread out roots better, making the plant larger and more robust...which translates into a bigger crop. I also like to keep the plants well mulched. My plants with a good mulch layer produce far better than the ones where I've skipped or scimped on mulch. 

I find that certain varieties are more durable than others. Some yield better from the get-go, whiles others don't. Some "fade away" worse and faster than others. So part of the trick is to find the varieties that like your location and garden methods. 

Saturday, April 28, 2018

Late Applied Mulch

"F" commented about my mulching the potatoes. Specifically "F" asked me "Why bother. The plants are almost full grown." 

There's a few reasons why I put the effort into mulching those potatoes. 
...weed control. With all the moisture plus not being able to repeatedly walk through the crop to scuffle hoe, the weeds have been having a party. I see certain weeds returning to the garden beds because of my heavy use of homemade compost and mulch. This is to be expected and normally isn't an issue. But this time around, the weeds haven't been smothered with mulch. Thus the weed seed has been germinating out of control. So what have I done? Did I need to pull or chop weeds prior to applying mulch? No. I simply covered the weeds with the grass clippings. And if Mother Nature allows, I'll apply another layer of mulch in 2 weeks, just about the time some weeds will be poking through this first layer of clippings. So the weeds aren't an issue for me. No need to put the effort into pulling weeds. 

Above, lots of weeds between the potato plant. 

Above, same spot right after the mulch has been applied. 

Above, same rows two days later. Photo taken from the opposite end of the row, so it looks a bit different. The mulch really looks good and does a nice job once it dries out some. 

...prevent greening of the taters. Ever wonder why the garden books recommend hilling your potatoes? Hilling refers to pulling the soil from between the rows and depositing it around the base of the potato plant. No, it doesn't mean making a mound and then planting your seed potato on the top of that mound. Potatoes aren't meant to be planted atop a mound. Hilling accomplishes a few things. It destroys the young weeds in the aisleway, smothers the weeds around the plants, plus builds a barrier against the light for the developing tubers. My mulching does essentially the same. By blocking the light, the tubers won't get green where they are exposed. Green tubers aren't good. 

Under more normal weather patterns, mulching would also help keep the soil moisture fairly constant. That's important for tuber development. Fluctuating soil moisture can result in tuber deformities....splitting, knobbing, hollow hearts. 

Tuesday, April 24, 2018

Growing Potatoes - a few more observations

Potatoes is one crop that I get a lot of questions about. Generally In answering, I generally refer the questioner to my posts made September 2016, the 27th and 29th. If those posts don't answer their particular questions, then they can email me again and I'll offer help. 

I grow potatoes a variety of ways.....in garden beds, in containers, and in pallet grow boxes. They produce well for me regardless of which method I use. With containers, just make sure there is drainage because taters don't like to sit in mud. I find that loose soil that is well mulched produces the best potatoes. This is certainly not a no-till crop, not unless you already have light fluffy soil, something only a mindful long term gardener may have created. 

I've only had a few problems....
...mice. Initially I left the crop too long in the ground, thinking that I had to wait for the plant to die back. The field mice feasted on the mature spuds. Thankfully a barn owl moved onto the farm a couple of years ago and most of my garden rodent problem has been solved for me. Natural, non-toxic control....isn't that neat! 
...flea beetles. I've occasionally had flea beetle problems, but it's not a constant problem. They come, they go. My best solution to date is crop rotation. I move the next crop of  potatoes to an area at least 20 feet away from the flea beetle population. Trying to control the beetles in place has proven to be time consuming and overall ineffective in preventing crop loss. Keep in mind that I try not using toxic chemicals on my food crops, not even organically approved ones. Toxic is still toxic whether they're from an organic source or not. 
...scab. By improving my soil and being mindful of the nitrogen levels and pH, I have gotten this under control. 

I mentioned that I had left the crop too long in the ground, thus the mice found them. Here in Hawaii there is no need to wait until the plants die back. When I lived in New Jersey, that's what was done. But here, no. When the plants are around 3 months old, give or take depending upon the variety, they will lose their luster and looked "tired". This signals that it's time to harvest. Rather than dig the entire harvest immediately, I'll often snuffle around the soil with my fingers, harvesting the easy to find surface tubers. After the next two weeks or until I don't find any more easy ones, I'll then dig the soil looking for the deeper tubers. I find that the potatoes stay in better condition this way as opposed to harvesting them immediately then trying to store them. 

Monday, April 23, 2018

Potatoes vs Sweet Potatoes

Recently "D" sent me some questions about potatoes, and among them was a question of "white vs purple vs orange". I mistakenly thought she was talking about sweet potatoes because I'm not aware of any orange "Irish potatoes". In a follow up email, I became aware that "D" might have had questions about Irish potatoes. My mistake. I was totally off base babbling along about sweet potatoes. You see, sweet potatoes and potatoes are two totally different vegetables. I'm sorry "D" if I confused you! But I will go and answer your questions as if you meant Irish potatoes. 

Above, Irish potatoes. These grow bush-like, approximately 18" to 30" in height. 

Above, sweet potato vines. They creep along the ground surface, seldom attaining much height. 
Below, if you pull up a stem, you can easily see that it's a low growing vine. 

Working with many new gardeners, I find that it's not uncommon for people to confuse the two, at least until they're grown them both. The differences then are really obvious. The two plants don't look anything alike. Their growth habit is different. The tubers even look different. Their flavor is different that even the non-sweet varieties of the sweet potato won't be mistaken for an Irish potato. 

Above, potato leaves. 
Below, sweet potato leaves

So after one more rambling post about sweet potatoes, I'll move in the potatoes and hopefully lift the cloud of confusion I've caused around "D". But first, some comparisons.......

Sweet potato 
...vining growth habit
...tubers develop as an enlargement along the root, thus there is a root coming into the tuber and a root leaving the other end of the tuber
...leaves are edible
...tuber skins may be white, tan, orange, pink, red, purple 
...flesh may be white, creamy, light yellow, pale orange, bright orange, reddish orange, light violet ranging to deep dark purple. Streaks and blotches of contrasting colors is not uncommon. 
...tubers generally mature around 5 months 
...flavor is general sweet to some degree

Potato
...bush growth habit
...tubers develop at the end of a rootlike stem or along the underground stem
...leaves are not edible 
...tuber skins may be white, tan, brown, pink, red, dark purple. May be blotched. 
...flesh may be white, pale gold, medium gold, pink, light reddish, bluish, purple. Streaking of pink, red, or blue may occur on white or whitish flesh. 
...tubers generally mature around 3 months
...flavor is generally somewhat nutty, but not sweet

Above, a very young potato. It's attached to the plant via one rootlike stem. 
Below, a young sweet potato. Usually a thick stem-like root coming to the tuber on one end and a thinner one going out the other end. 


Friday, May 26, 2017

Potato Flowers

On this beautiful sunny morning (yeah, no rain!), several of my potato plants busted out with flowers galore. Were they also happy to see a bright sun? 

Not all my potato varieties blossom. But this time around I have three different ones that are maturing at the same time, and each has beautiful flowers rising above their foliage. And each one has a different colored bloom. 

A white flower lightly streaked with purple.

A dark, all purple flower. 

Pure white. 

On a whim I picked a fistful of flowers, brought them into the house and put them in a small vase. Lovely! Hubby had no idea that they were from common potato plants. It was fun to surprise him. 

In a few days the flowers will drop and I expect many will produce fruits. The fruits will be green, hard, and the size of a common marble. One could harvest those seeds and plant them, if looking for a fun experiment. The seeds would not produce true to its mother, but would produce a range of variations. While many would not be worth keeping, some very well might be. Who knows, one of those seedlings could be the next great potato variety! Most likely not, but one can never tell. 

I've never tried growing potatoes from seed. I might be something fun to do some day. 


Tuesday, October 11, 2016

Potatoes in Containers

One of the blog readers has been growing a variety of veggies in containers. She sent me nice photos of her recent potato harvest. 

"S" wrote": 
One plant, small old dead cooler, one foot loose soil.  Mother spud by tip of fork.

Impressive harvest from just one plant! "S" uses homemade compost as her fertilizer source and refurbishes the growing medium at each harvest. Her results are great! By the way, she included a picture of the original seed piece, called the mother tuber. In this variety, the mother doesn't rot away. But it does change color so that it can be distinguished and discarded. The mother tends to be darker or browner. 

Another photo.......
"S" wrote:
Two plants, one half barrel, two foot deep loose soil.  Mother spuds by tip of fork

Truly amazing harvest! 

Thursday, September 29, 2016

Potatoes - Growing Them In The Garden Beds

Potatoes are a crop that I grow year around on my homestead. They always grow well for me. Oh, I have the occasional problem with flea beetles, but so far that's about it. So here's some growing notes on what I do for growing them in my regular garden beds.....

How I start the crop
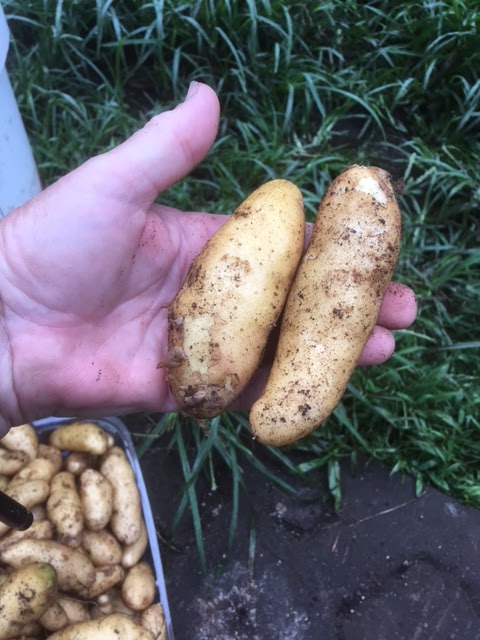
Everytime I harvest a potato crop, I set aside the nicest looking tubers of my preferred size. These will become my seed potatoes for the next crop. Size depends upon the variety, so I can't say "baseball size" or "large goofball sized" because each potato type varies. But I'm looking for a tuber that has the desired characteristics (color, shape) and is medium large or large for that variety. Plus importantly, the tuber came from a plant that produced other large tubers, was productive, and didn't have any detrimental traits. Even though potatoes are vegetatively reproduced, the plants do indeed vary.
     I also will plant all those under sized, odd shaped, greened tubers that happen with any potato crop.....but only if I happen to have free space that I'm not using for something else. This usually means newly opened ground that I'm getting ready to turn into a garden bed, or some otherwise unused out-of-the-way spot. Sometimes it means the beds along the street where people might steal some of the crop. Why? Growing a crop, any crop, helps improve newly opened soil. And if I'm going to lose veggies to theft, it might as well be something I won't get upset about. (Actually to date I haven't had anything stolen.) And I can use whatever potatoes that happen to grow to feed the livestock.....or ourselves if there happens to be big enough tubers under those plants. But I won't save seed potatoes from these type plants. I don't want to accidently be selecting for small or mishappen tubers. 

Preparing the bed
I will remove the previous crop residue and coarse mulch, but leave the partially decomposed mulch in place. I'll then top dress the bed with a little rabbit manure, an inch layer of compost, a dusting of coral sand, lava sand, burnt bone, and urine (or manure tea) treated biochar if I have it. I'll then lightly till it in, using a cultivator type lightweight tiller that goes down about 6 to 8 inches. For potatoes, I normally don't add wood ashes. 

Planting the seed potatoes
Everybody has different ideas about the best way to plant potatoes. Actually, this crop is quite flexible. My preferred method is to plant the tubers shallow, about 2 inches below the surface of a freshly tilled bed. I'll space them 12" apart in 2 to 3 rows in my 42" wide beds. With fingerlings and small planted varieties, I can do three rows. Most standard potatoes I plant just two rows. I then cover the soil lightly with grass clipping mulch. A few weeks later I'll be able to add more mulch as the plants start to grow. I'll keep adding more light layers of mulch. The goal is to keep any surface tubers from seeing the sun, and thus greening. 
    One interesting tidbit that I do. I cut a notch into the seed potato tuber so to mark it. Usually I simply cut off a slice from one side. If this mother tuber survives to harvest time, I want it to be easily recognized for what it is, the mother tuber. I don't want to accidently mix it in with the harvested fresh tubers. 

Harvesting
When to harvest. Everybody asks me that and they guess wrong about how I do it. Everybody says to wait for the plants to die back. Well, that doesn't happen here. Plus if I try to wait that long, the mice find the potatoes and eat them. I guess they give off a yummy odor once the tubers are mature. In the beginning of my gardening efforts here, I lost plenty of potatoes to mice before I finally figured out when to harvest my crop. 
    I harvest when the plants look "tired" or spent. They tend to lose their glossy, vibrant, lush look. The foliage gets a bit dull and droopy, then gets yellowish or bronze. The plants aren't as perky looking, for many varieties that means after two months. For others, it's three months or a tad more. But the plants will tell me. As I said, waiting until they die back doesn't work here, but that's probably is good way to do it in most of the mainland USA. 
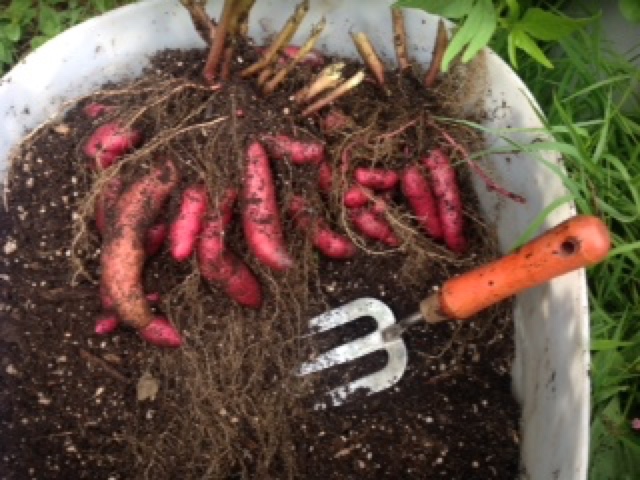
    The first thing I will harvest is any tuber that is exposed to light. I'll go through the bed and remove them and set them aside. These tubers have greening issues and I don't wish to eat the green parts. So these will be eaten first (cutting off the green part) or set aside for using as seed potatoes. Next step, I will pull the plant out and observe if the plant was an exceptional producer and if there are good tubers to use for the next crop. I'll select my seed potatoes and set them aside. Now I'll harvest all the rest of the tubers that are eating size. Finally I'll pick up all the mishappen or undersized tubers, and any "mother tubers" that survived. In some varieties the "mother tuber" rots away, but sometimes it is still there at harvest time. They go into the livestock feed bucket to be cooked along with the extra smalls and odd shaped taters that I don't replant. Any overly green tubers go into the compost bin along with the spent plants. 

Growing Tips 
I like using grass clipping mulch with this crop. It allows me to tuck the mulch around the plants easily. And I can apply it as thickly as needed to prevent tubers from reaching the light, thus turning green. I'm not always successful in getting enough mulch applied, but I try. I don't use the chicken pen litter as a mulch for potatoes. It's too high in nitrogen for this crop. 
     I'm aware that this crop prefers even soil moisture. For me that means irrigating as needed before the soil dries out, not waiting until things are dry then bringing out the water buckets & hoses. 
     By observation I learned that potatoes are a shallow crop. They don't need deep soil. In fact, they don't make tubers down deep. So growing them in a trashcan has no advantage over using a half barrel. The tubers will be up near the soil surface in either container. I find most of the tubers in the top 6 inches, but some can be 8 inches down for some varieties. I've successfully produced potatoes in only 3" of soil. That may sound amazing but it's true. Some of my garden beds are quite shallow, but by planting the seed potatoes as deeply as possible and right on top the pahoehoe lava, then using a thicker than usual mulch, I can get a normal sized crop of spuds. There are a number of crops I can grow in only 2"-3" of soil, and potatoes is one of them. 

Problems 
...overcrowding. If planted too close, there will be less good sized tubers. So I don't space them closer than 12 inches. 
...hollow heart. The only time I've seen hollow heart is during a year that alternated with heavy rains and dry spells. I suspect it has to do with inconsistent soil moisture. 
...scab. I often saw some degree of scab when I first started growing potatoes here, but for the past several years I haven't had a problem. Whatever I'm doing, I'm apparently doing right. And I withhold wood ash, which I think contributes to scab in some way. Plus no chicken pen litter is used on potatoes. 
...ring rot. Again when I first started growing potatoes I saw some tubers with this, but now I'm not seeing it at all. 
...flea beetles. My worst potato problem. These little pests can really damage the plants. To date, I've had problems controlling these insects. If I experience flea beetles, then I will change locations for the next crop, hoping to find a spot where they won't find my potatoes for awhile. Another thing I've done is to plant radishes near by and use them as a catch crop. Flea beetles seem to prefer radishes, various Chinese greens, and beets. And the third thing I can do is to use a good amount of compost when starting out, giving the young plants an good boast for growing rapidly. Aggressively growing plants seem to have more tolerance of the flea beetles. And finally, I've learned that I need to be right in top with it when it comes to flea beetles. Otherwise the infestation gets quickly so far out of control that there is little I can do without resorting to chemical pesticides. 
     Happily I don't have the Colorado potato bug here. I find that amazing, since we seem to get just about every other crop damaging insect that comes along. 

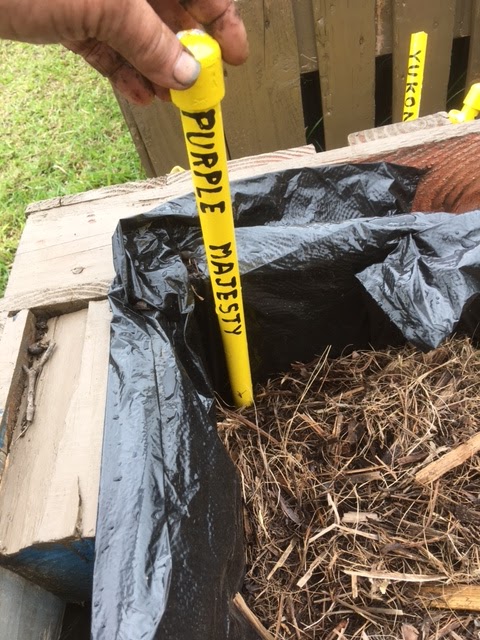
Types of Potatoes I Grow
I like growing all sorts. White, yellow, red, pink, purple. And different sizes and shapes : fingerlings, boilers, bakers, round, blocky, long and skinny. It's fun. The only type that I don't do great with are the russet type bakers. They never get real large, but they do grow ok otherwise. 
     Varieties I like growing best:
La Ratte
Purple Majesty
Caribe
Magic Molly
Red Thumb
Elba
Dark Red Norland
Yukon Gem
      But I grow plenty of other types too. Irish Cobbler does well. Frankly, just about every variety does at least "ok", but some I'd say are more outstanding than others. Plus the weather has a big factor, so by growing it's if different varieties, I'm guaranteed to get a potato crop in spite of the year's growing conditions. 

Tuesday, September 27, 2016

Potatoes in Containers

I received an email from a blog follower living not too far from me. Living on lava with virtually no soil, she has been experimenting with growing things in containers -- old coolers, plastic half barrels, etc. She's been making her own growing medium by filling the containers with compost/soil made from assorted biomass from around her property....primarily weeds mixed with some spent potting soil. And you know something ----- she has been very successful growing beans, peas, gourds, and now, potatoes. 

Here's the photos she sent of her latest potato harvest:  

The foliage turning color. From healthy green to bronze/yellow.......
The plants are signaling that they have matured. Here in Hawaii, that means that it's time to harvest. 

The tops of the plants have been cut off and removed, exposing the top layer of mulch......

With the mulch removed, the tips of the tubers can now been seen. This variety is a long fingerling type, and amazingly it likes to grow its tubers vertically! So just the tips poke up.......

The plants have been pulled up, exposing the long tubers.......

And here is the harvest from her three plants grown for 3 1/2 months in containers......

Quite the beautiful harvest. Way to go, girl!!!! Congratulations. 


Friday, April 3, 2015

When To Harvest Potatoes

The timing for harvesting potatoes is a bit different here in Hawaii than back in NJ. When I first started out I waited for the plants to die back. Turned out to be poor timing because the mice got them all. So I tried checking the tubers earlier, hoping to get baby new potatoes that weren't half eaten by the mice. What I discovered was that I could get a nice crop by harvesting earlier than I had be led to believe. 
As soon as the plants "look tired", I harvest the taters. By "look tired" I mean that the plants are no longer bright green and standing perky. The leaves tend to dull. On some varieties the leaves will droop or curl a bit. The plant tends to sag a little all over. Thus, it looks tired. A few varieties might bloom, many do not. So I can't judge by the blooming cycle. 


Once the plant looks tired, I will remove the mulch, often revealing several tubers near the surface. Any that have greened I will pick and set aside for propagation rather than eating. I find that it is easier to pick those greenish ones now before digging the rest. I'll also pick the tiny "rejects" and toss them into a different pile. They will go to be cooked for the animals. 


Now I'll pull up the plant and take a shovel to unearth the buried tubers. This variety is Red Gold. It's not the heaviest producer I grow but it gives me several nice useable potatoes per plant. 

Some potato varieties are ready for digging in two months. Others at 3 to 4 months. They come to harvest faster during the summer than during the winter. And they can be grown year around here. 

I've been asked if I've ever tried growing potatoes in a barrel, a compost pile, atop the soil under a thick mulch, in a trashcan, etc. No, I haven't. I did grow them once in one of my pallet boxes and it worked out just fine. But I have great success growing right in the ground here, which I find to be very labor friendly. So I haven't put the effort into trying other methods that would be more time consuming or require more resources. 

Friday, May 30, 2014

Potato Harvest Today

Several months ago I met a woman at a botanical garden and got into a friendly conversation. After chatting about gardening, she mentioned that she was growing a potato that had exceptional yields and was very dependable. It even did well in her poor soil. Ah, my ears perked up. What variety was it? She didn't know. She had picked it up at a seed exchange in Hilo and knew little about it. So I asked if possibly she could send me a spud so that I could add it to my garden. We separated. I forgot all about it. 

Two months ago I received a package in the mail with four starting to sprout potatoes. No return address that I could make out. PO box something or other, Hilo. Gee, that girl must be a doctor! The only number I could make out was a one. Sadly, I couldn't even thank her for remembering. 

I was tickled to get the spuds.  Cutting them into pieces, I was able to make 7 plants. I promptly planted them and hoped for the best. 

For the past two months the plants have been growing well. It's a tall variety, whatever it is. Then this morning my horse, for some reason only she knows, decided to eat them! Yikes! She's never touched a potato plant before. I was surprised. I don't know what got into her. Most likely she doesn't either. So I sadly retrieved the shovel from the shed and set about salvaging what I could. 
I'm happy to report that the plants had set tubers already, though the plants could have used another few weeks of growing. So it looks like this variety should grow about 3 months before harvesting. But at least I got tubers, so all is not lost. 

I weighed what I harvested, including the small potatoes. 7 plants (harvested too early) = 12 lbs. I think this potato is a keeper. It's white skinned with pink eyes, white flesh. Looks like a boiler type.