Monday, December 31, 2018

Age to Harvest Lamb?

After my post of yesterday, I got a few emails asking exactly what "F" has asked, "At what age do you slaughter a lamb?" 

Sheep can be slaughtered for meat at any age. The younger the animal is, the more tender, mild, and paler the meat is. But of course that means there a whole lot less of it. The older the animal, the more meat. 

...Newborn lamb. 1-3 days old. Normally this is only done when the pelt is wanted, or you have a bummer you don't want to hand raise. But the meat is quite edible, being soft, pale, and "sweet". There's just not much if it. I find its best used for soup.
...Baby lamb (also called young lamb) is a traditional Easter meal. 6-8 weeks is the usual age. 
...Spring lamb is 3-5 months. 
...Lamb is up to 1 year of age. 
...1-2 years old is a hogget, though I've heard via the grapevine that the rules have changed to allow a hogget to be labeled lamb. Perhaps that's why store bought lamb tastes so strong nowadays. 
...Anything over 2 years old is strictly mutton. Personally, I think anything over 1 year is mutton. 

Mutton is darker colored, tougher, and stronger flavored. Both hoggart and mutton improve with hanging or aging for 7 days, but no sheep meat actually needs to be hung or aged to be decent. Since I don't have a facility to hang a sheep carcass, I simply age the meat in the bottom of my chest refrigerator where the temperature is about 35°. Personally, I prefer to grind up mutton rather than butcher it into cuts. 

By the way, I don't hang or age my lamb. And I prefer 3-4 month old spring lamb to anything else. 

Sunday, December 30, 2018

Home Slaughter

"B" asked me the other day when he was picking up his live New Year's Day lamb to haul it to the slaughterhouse for processing...."Do you do your own slaughtering?" 

Many a time I've been asked if I do my own or send the animal to the slaughterhouse. Plain and simple, I do my own. I feel it is the most humane. It also happens to be the most self reliant method and cheapest, but I do it because it's the least disturbing to my animals. There is no excitement of being loaded onto a truck, no stress of being transported 2 hours and held in a strange place with strange smells and other strange animals at the end of the journey. No anxiety of being separated alone from the flock/herd.  No fear of being approached and handled by strangers. I'd rather have my animals at home, at ease, and be completely unaware that something is about to happen. They are instantly rendered unconscious using a gun, and then killed with no pain, no sensation. Killing is done by cutting the main arteries and bleeding out. 

I never like killing my animals. I find it stressful (I fear I might make a mistake), disturbing (I don't like watching an animal die). I'm ultra careful to make sure everything goes perfectly. 

Once the animal is dead, I have no trouble butchering it out. Butchering a chicken or rabbit is quick and easy. Butchering a lamb, goat, or pig takes more time and work, but it isn't difficult. I've never helped with something larger like a cow or horse. Having worked in veterinary medicine most of my life,   I have no aversion to butchering. It's the slaughtering that is difficult.

Saturday, December 29, 2018

Whistle

"J" casually commented to me this morning about how cellphones have made working alone on a farm so much safer. It's easier to call for help. That could certainly be the case for many farmers, but I have a problem on my own homestead. I don't get phone coverage on much of the farm. So what to do? 

Introducing the old fashioned call for help....a loud, piercing whistle. I keep one on my wrist at all times. 


Hubby found this small metal whistle on Amazon. A pack of 5, all different colors. I opted for the black for no special reason. I just did. I wear it all the time. Hanging from a ring on my watchband, I never lose it and can easily find it. 

This whistle came in handy for training Noodles. It's his "come" command. He's strongly conditioned to come to me anytime he hears it. The sound travels quite a distance so I can call him just about anywhere on the farm and he comes a runnin' full speed. 

My neighbor and wwoofer know that if they hear repeated short blasts on the whistle that means I'm in trouble. In all the years I've never needed to use it for an emergency. But it's good insurance to carry it on my wrist. Yes, I always have my cellphone on my too, but it's reassuring to also carry the whistle. 

Friday, December 28, 2018

Is The Pig Pregnant?

For the past few weeks I haven't noticed Lava, the female pig, coming into heat. And Shelly, the boar is leaving her alone. Perhaps I just missed the signs, but I'm getting to think that she might be pregnant. It's really too early to tell for sure, but I'm noticing a few changes. 

#1- Her ribs have sprung. That is, she has gotten thicker across the area of her hindmost ribs. This is a change I'm familiar with in dogs. Does it apply to pigs too? We shall soon find out. 


#2- Her teats have become most pronounced. She no longer looks like a young little girl. 

#3- Her clitoral hood has changed position. When I last checked to see if she was in heat, the pointy thing in the photo below, circled in yellow, was pointing down more. It has definitely shifted upward. If it continues to point more and more upward, then Lava is indeed pregnant. 


The gestation period for pigs is 3 months, 3 weeks, plus 3 days. So if she is pregnant, it will still be awhile before she delivers. But knowing how slow I can be on some projects, I had better start getting ready now. Lava needs a proper shelter to deliver her babies in. I'd prefer her to deliver back in the new pig pasture, but since she is comfortable in the front pasture, maybe I'll leave her there and just move Shelly out back. 

Thursday, December 27, 2018

Strange Oranges

When you grow enough of something, you're bound to discover some of Mother Nature's mistakes. Here's some funny oranges.......

 
This looks very much like a heart to me. 


And this one looks like a weird smiley face. 

Wednesday, December 26, 2018

Farm Kids, the Human Kind

There's a local farm family near me that is doing a grand job at home style farming. The children actually want to help and take an active role in farming. I look at them and see myself, but I wasn't fortunate enough to grow up on a farm. I was born in the city, dang.


Above, pressing their oranges for selling fresh juice at the farmers market. Every week I buy at least one glass of fresh juice from this young man. 


Above, another young fella opening coconuts for the tourists. He sells quite a few and is a popular subject for a video. He actually runs is own market tent separate from the family farm tent. 

Getting young people interested in farming should be a priority in my opinion. But society seems to not agree. In my own area, school kids are being either channeled toward college (thus a non-farming life) or towards nothing. Yes, kids graduate high school here with zero skills, zero training in how to support themselves, and zero job openings to apply to. I really wish there was vocational training here to train the kids a skill, or how to grow things. The kids pictured here may or may not grow up to be farmers, but they are learning valuable skills & knowledge they won't be getting in any modern school around here. They are going to do just fine as adults. 


Tuesday, December 25, 2018

Monday, December 24, 2018

Totals 2018 -- Final Planting Frenzy

One final push to get things planted this year.....

...1/4 acre of oats for pasture grazing
...10 banana trees
...126 sq ft taro
...14 pineapples
...about 500 onion seedlings
...35 chaya cuttings
...400 sq ft sweet potatoes
...22 pipinola
...10 sugar cane starts 

So here are this year's totals: 

Single plants : 
4 moringa
34 bananas
2 citrus
135 pineapples scattered about the farm
52 pipinola scattered about the farm 
500 (about) onion seedlings
35 chaya 
10 sugar cane

Sq ft of garden space planted : 
699 turmeric
18 yacon
45 potatoes
634 sweet potatoes
30 cholesterol spinach
66 pipinolas
30 chocolate mint
1076 taro
72 peas
305 fresh green beans
396 pineapple


Saturday, December 22, 2018

Homemade Fermented Chicken Feed

This year I'm trying to fine tune my livestock feed. My major focus is on time and energy, meaning that I would like the feed preparation time to be much less, and come up with methods that don't require the use of lots of expensive energy (electricity, propane, gasoline, firewood). 

Time is the thing that I'm always short of now. I'd like to become more time efficient....but....I don't want to do it by spending more money. The easiest way to cut down in time is to throw cash at the problem or task. Such as : cook with propane instead of wood, use a tractor or backhoe to get big jobs done instead of hand tools. Yes, I could do that, but I prefer the idea of doing things with small tools. Crazy....yes. Satisfying....Yes! 

So I've been toying around with ideas and doing some experimenting. I recently discovered that I could use fermented banana trunk as as pig feed. So I wondered if I could cut down the prep time for the taro that I use for the chickens by fermenting it. 

Why ferment taro? 
...first of all, the chickens readily eat fermented foods. In fact they eat spoiled garbage with relish. Fresh pumpkins are ignored, but let them rot a bit and the hens greedily gobble them down. That's so nasty watching it that I have to walk away, otherwise I'd gag. Boy am I glad I'm not a chicken! 
...fermented feed can be stored for weeks without refrigeration. 
...fermenting taro significantly reduces the oxalate crystals, thus eliminating the need to cook the taro.

My original method.....
...chop up the taro and cook it
...send the cooked taro through the blender to mix with chicken mash 

Next method.....
...send chopped up taro through the garbage disposal 
...cook the ground up taro
...mix it with the slop & glop

Current method.....
...send the chopped up taro through the garbage disposal
...store the ground up taro in sealed air-free 5 gallon buckets
...ferment for 1 to 2 weeks (can be stored for at least a month, maybe more)
...mix uncooked fermented ground taro with the slop & glop

This newest method is working. What's nice is that I can work a taro patch, harvesting the trimmings for feed. Then I'll grind it all up and store it in buckets, giving me anywhere from 1 to 4 weeks worth of fermented taro to add to the chicken feed. So I'm not harvesting and cooking taro every day. Whew, what a relief! 

Above, fermented taro ready to mix with the normal slop & glop. 

So I've got a good working solution for taro. What about other crops? I looked to pipinola next. 

Pipinola can be fed raw or cooked, though they get more out of the cooked stuff. Thus I've been cooking it. But I started wondering if I was really gaining enough nutrition and digestibility benefits to pay for the effort and time of cooking and grinding it. Although I found no statistics for pipinola specifically, I found information on other fermented foods for livestock. Fermenting definitely had its benefits over foods being fed raw. So I gave fermenting pipinola a try. 

Just as with the taro, I coarsely chopped the pipinola and sent it through the garbage disposal. The resulting pulp sans the excess liquid was sealed in an airtight 5 gallon bucket. I let it ferment for a week and gave it a peek. Looked and smell just fine. Then I let the chickens and pigs give it a taste test. Yup, they ate it. Ah-ha, two thumbs up! I found a way to process and store the abundant pipinolas so that I wouldn't lose them to rot. The fermented pulp should last for at least a full month in the buckets without refrigeration, maybe longer. I presently have 3 week old fermented pipinola and it still looks and smells fine, and both the chickens and pigs willingly chow it down. 

Above, fermented pipinola pulp ready for feeding. 

So far, I like this method. It is saving me time, I can process a month's worth at a one time if I need to, I'm not tossing excesses into the compost bins,  I'm not burning up a lot of firewood, and I'm not using the refrigerator. That's all fine with me. 

Thursday, December 20, 2018

New Kittens

Hubby has a kitten fascination. Being that we have plenty of room, he sees nothing wrong with adding kittens to the family. And since we need cats for rodent control, I have little objection considering that most of our current cats are getting elderly. Sooooooo.........we have several new ones. 

(The first 4 are too feral for me to get photos of yet.)

1- Ro-meow : a black male, 6 months old. One of a group of kittens that had to relocated from their birth location. They desperately needed a place to call home. 

2- Chrome : blue cream tortoiseshell female, sister to Ro-Meow. 

3- Shadow : grey male, brother to Ro-Meow and Chrome. 

4- Jewel : black & orange tortoiseshell female perhaps 7-8 months old. Just showed up here one day. 

5- Marco : 10 week old brown tabby & white boy from a litter born in Pahala, I had taken in 3 kittens that needed homes and successfully found one a home before hubby started naming the others. Whoa, red flag!!!! Once something gets a name, it never leaves here. 

Marco

6- Benji : black & white male, Marco's brother. 

Benji and Bosco

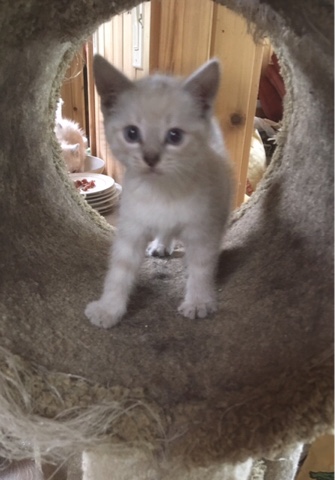
7- Bosco : dark Siamese marked male, 6 weeks old. 

8- Pepper : light Siamese marked (mackerel tabby) male, brother to Bosco.

Pepper 

9- Nami : light Siamese marked (marble tabby) male, brother to Bosco. (pronounced nah'-me)

Nami

The Siamese marked kittens are part of a litter born on my farm, from a feral mother cat. (Mother is now spayed and released back to her territory.) I found a home for one of the litter before hubby announced that he wanted to keep the kittens together....that translates into keeping them here. They spend their days playing with Marco and Benji. 

9 kittens!!!!! You talk about a population explosion! But they will all be neutered, thus be the end of their lineage. I'm hoping that some of them will become topnotch ratters. Right now the feral ones are living outdoors right by the house. The tame ones are living inside for now until they get a bit older. Yes, I'm going through a lot of kitty litter, not to mention cat food. 

Are we crazy to take in 9 kittens? Most likely. But with a farm that has a constant rodent problem due to living next to an old macnut farm, these kittens will become valuable assets. I don't use rodent poison on the farm (dead rodents around could poison the endangered Hawaiian hawk plus other innocent creatures), nor snap traps which could injure the dogs, cats, and chickens. The old trashcan full of water trick doesn't seem to fool these rats. So cats are the best option. 

Wednesday, December 19, 2018

First Lamb

The first lamb of this lambing season was born 2 days ago. Mom just brought him forward this morning to join the flock.


A boy, you heard right. Sigh. I wasn't looking forward to another ram. This guy is strong, active, and huge. And really pretty, so I might keep him as a back up ram just in case something happens to one of the other two. So I guess I'll need to think up a "ram name", rather than "Freezer Lamb #1". 

Tuesday, December 18, 2018

My First Taro Giveaway

Something I enjoy doing is encouraging other folks to try growing food. So with the local Volcanoes Park unit having a holiday event, I saw it as an opportunity for a taro huli giveaway. Perhaps some gardener out there would be successful and develop an interest in growing taro too. 


I figured on taking a dozen different colorful types, ones that might catch someone's eye. Plus I chose the easiest ones to grow. 

Each huli needed to be gathered then trimmed up. And since these were heading to the National Park, they needed special preparation. Each had to be hosed and washed, removing all the soil. Then they were soaked in a bleach solution for 10 minutes. Once dried, they were then dipped in a sevin solution. All this was necessary to make sure that diseases and pests wouldn't be taken into the park. Without these procedures, the taro would not have been allowed onto the park grounds.

The white and orange survey tape serves as labels. Each huli was labeled with its Hawaiian name. 

 I brought 100 taro starts. Being that it was my first giveaway, plus the fact that I couldn't stay to attend the event to answer questions and offer help (I had an obligation elsewhere), I thought I'd start small. It would be a nice test. And if there were any left over, I wouldn't be swamped with trying to get them replanted into my gardens. 

ps- Update : all the taro starts were taken. Whoopie! 

Monday, December 17, 2018

Naalehu Holiday Parade

Night time holiday parade in town. Wow, how crazy, no? But boy, it was fun! 


Lots of families came out and lined the street. And to my surprise and delight, there were plenty of parade participants. 


And while the parade route was short, it was just long enough for everybody to get a front row seat. Ending up in our community park, everybody headed over there for free chili & rice  while plenty of children hit the playground. It was a special time for the children. I'm sure that playing in the playground at night plus seeing Santa Claus will be a fond memory for a long time. 


Plus the lite up trucks, tractors, fire engines, and ATVs were enough to excite even the child living inside the adults' hearts. 


Ya know, things like this make my small town something special. 

Saturday, December 8, 2018

Clothes Washer Greywater

I met "L" at the dump the other day and she asked me how I get my clothes washer water to my gardens. She was tired of carrying buckets and was envisioning an underground irrigation system. That surely would work, but I haven't yet gotten to that point. Considering that my gardens are scattered about an area of 6 acres, an irrigation system would have to be pretty extensive.....and expensive. So I have other ways of utilizing my washer water. 

First let me say that the past 3 years have been "wet years", thus irrigation water isn't a high priority. But I still tend to utilize greywater because I believe it's a good habit to be in. During drought years, I become fanatical about using every drop. 

Our wash machine is located in an outdoor shed between the house and driveway. This is Hawaii, so I don't need to have the laundry area inside my living quarters. The water discharge runs out via a long 1 1/2" diameter hose (a swimming pool vacuuming hose) which I can move about the yard. When I don't need irrigation water, I simply let the washing machine discharge directly around some trees, moving the hose so that one spot doesn't get overly saturated. But when I need the water, I either discharge right into a nearby garden or I do something different. 

1- (an old method I no longer use) I run the hose into a large trashcan, then use a bucket to hand dip that water and carry it to a garden spot to water individual plants. Time consuming. Labor intensive. Once upon a time it seemed a fine solution, but my shoulder joints are wearing out so it was time to come up with a less painful method. 

2- Run the hose into the trashcan, BUT rather than hand dip the water, I use a sump pump and a garden hose. The trashcan can hold both the wash and rinse water from one load of laundry, so I don't have to be right there to use the water between wash and rinse cycles. The sump pump (with its dedicated hose) lives in the trashcan, so I don't have to set it up each and every time I need it. Yes, that's a lazy approach, but it's a time saver too. Far, far quicker to just turn on the pump compared to the alternative. 

Now for more distant gardens. I tend to produce more greywater around the house than I need for the house gardens. So I need to get that water to more distant spots. The method I'm currently using involves a trashcan in the back of the pickup truck, a sump pump & garden hose, and my portable generator to run the pump. This means owning two sump pumps and two hoses. Sump pump #1 was given to me by a person who was moving away. I actually broke down and spent money for pump #2 because it made my life easier. (Gosh, I can be such a cheapskate sometimes!) 


Above, here's my set up. Trashcan, pump with hose, generator, truck. I transfer the laundry water into the trashcan, and put a lid on it to keep most of the water in while I drive to the distant location. Pump goes into the water, generator runs pump, garden gets watered. 


Above, the pump actually goes all the way in and sits in the bottom. 

With this system, I can add fertilizer teas to the water before pumping. An added gallon of manure tea or urine will give the soil a bit of a nutrient boost while it's being irrigated. Or I can use fresh compost tea as a foliar treatment to apply microbes and foliar nutrients. 

Oh my......I can hear the screams and warning even now. Egads girl, that's WASTE water. It's "toxic". You're gonna die a thousand deaths from every bizarre disease imaginable. First if all, I don't use toxic chemicals so they are not going to magically appear in my laundry greywater. Yes, there will be some micro cloth particles and biodegradable detergent in the water, and some human skin cells and skin bacteria, a minute amount of residual leftover textile chemicals, but good lordy, that's really not a problem. My soil is teeming with micro organisms who deal with much of it. What they might not deal with will be far less dangerous than wearing the new clothes in the first place, since the cloth is coated with textile chemicals which we tend to absorb into our bodies via skin contact. Yes folks, modern industry poisons us and our world at the request of its customers. Nothing I can do about that, except apologize the earth for our species fouling its own home.  

I'm sure someone out there will warn me about rain splash, but since I wash all my vegetables before eating/selling/trading them, I don't see a problem here. My veggies are far cleaner than the ones you are buying in your supermarket. 

Someone else will tell me that's it's illegal. Yes, it most likely is. (I've become a bit of an outlaw in my old age.) But since it's not a constructed system, I don't think the health department is going to arrest me, nor the hundreds of other gardeners in Ka'u who also do this. 

Urban people especially seem to have a phobia against using greywayer of any quality. While I agree that some types of greywater is not suitable for garden irrigation, I don't have a problem with using my own laundry water. And besides, here's something to think about as you go to sleep at night. Where does your municipal drinking water come from? What's in it? It's not pure H2O. Many urban areas are now utilizing heavily polluted ground water, recycling their greywayer, and (gasp) eyeing up their blackwater! No, it's simply not feasible to remove all the toxic waste from that water you're now drinking. (It can be done on a small scale, but not for a giant population.) Your own bodies become the final filter to remove trace amounts of a vast assortment of every sort of chemical that goes down the drain into the sewer system, including industrial chemicals, medications, animal poop, etc. Yikes. Yes, I conclude that my washing machine water isn't an issue considering the scope of things. 

Friday, December 7, 2018

Noodles Skeleton

Been having fun with Noodles once again. This time he became a walking dog skeleton. But about half way through the dye job he lost interest and wanted to get going. So he ended up being partial skeleton, but that's ok. 


Off he went to KaLae Coffee to play with his doggy friends, in this photo -- Luna, a 5 month old puppy.


Thursday, December 6, 2018

Feeding Pigs - Fermented Banana Stalks

Homestead pigs ---- What to feed a full time pair of pigs? That's the question I'm working on. What can the homestead farm produce? While I do get some feed given to me, I don't want to rely upon commercial feed as a permanent crutch. And while I'm not yet totally committed to keeping Lava and Shelly as full time breeding pigs, I am heavily leaning in that direction. If those two stick around, I'm going to be hard pressed to feed them (and any future babies) in a self sustainable fashion. I don't wish to get back into the rut of depending upon commercial feed. So I've been researching my options. 

1- Use a larger pasture. . I definitely plan on this. The two pigs will be moved to a larger pasture where they can graze more grasses without depleting the pasture. I'm in the process of pig-proofing (is there such a thing?) a one acre pasture that previously was used for the sheep. 

2- Grow more feed. I've already got this in the works. I'm adding more banana trees as I have extra keikis. I'm planting more sweet potatoes and taro. Propagating more sugar cane, pipinola, and chaya.  

3- Expand into new feeding options, specifically, fermented banana stalks. 

"T" mentioned to me that he had heard of someone in Hilo doing an experiment in feeding pigs fermented bananas. Doing a bit of Internet research, I came upon several mentionings of chopping up banana trunks and fermenting them.  I haven't stumbled upon specific details yet, so I'm doing my own experimenting. 

Initially I cut up a small banana tree (just the truck, not the leaves and leaf stems yet) and sent it through the garbage disposal that I use to process chicken feed. It worked but was time consuming. I put this ground up banana stuff into a 5 gallon bucket and sealed it. After 7 days, I gave it the smell test. It looked fine and smelled sweetish, banana-y. Next, the taste test....not me!!  I mixed it 50-50 with the pigs' usual slop-n-glop and the they eagerly chowed it down. Bingo. I was onto something. 

Since grinding via the garbage disposal was too time consuming, I wondered if the pigs would eat it simply chopped up into sections not more than an inch wide. I had seen examples of this on the Internet. So I hacked down my next banana tree, chopped it up, stuffed it unto 5 gallon buckets, added water (I use rainwater) to completely fill the bucket, and sealed it with a lid, excluding all air. Left for 7 days in the shade, I opened one of the buckets. Looked and smelled fine, though not as sweetish. I guess the extra water diluted it. I could add sugar cane juice if needed, but that will be a future experiment. 

Above, hand slicing a piece of banana stalk. 

Above, what a sliced banana stalk looks like. 

Above, I'm making the slices 1" to 1/2" in thickness. 

Edibility test. Again I mixed these banana slivers half n half with the normal slop-n-glop. The pigs snarfed out the slop-n-glop and left the banana slices behind. During the day they returned off and on the eat some of the banana slices, but wasted about half of them. Not the reaction I was hoping for. But I persisted, hoping they would get use to the texture. No luck. Even after a week they were wasting about half the fermented banana slices. Not good. Back to the drawing board. 

Above, a full 5 gallon bucket ready for water and sealing. 

I know that they will eat fermented banana stalks, but the texture appears to be the issue. To prove that to myself, I put the rest of the slices through the garbage disposal. The pigs ate the ground stuff with no issues. Ah-ha, so it was the texture. They preferred ground to slices. 

One thing that I discovered by doing this was that the fermented slices went through the garbage disposal far quicker than fresh slices, plus they didn't clog the disposal at all. The fresh ones would would make a clog in the outlet pipe if I went too fast. So my thoughts are that I will ferment the banana slices first, grind them, then reseal them in buckets for further fermenting and storage.  

Next issue....cut the time and labor in cutting up the banana stalks. When I was experimenting I used a knife to cut the stalks. But that's labor and time intensive. So I'm now using my trusty sawsall. It cuts through the stalks like butter. Very quick. I can wack down, chop use, and seal in buckets a whole tree in minutes rather than close to an hour. 


The sawsall makes this whole idea workable. The plan is to....
...harvest the bananas
...cut the tree down 
...using the sawsall, chop up the entire stalk 
...ferment the pieces for 7-10 days
...run it through the garbage disposal 
...repack the buckets with the ground banana stalks. 
...continue to ferment until it is needed for feeding. 

Currently I'm only harvesting one banana bunch at a time. So chopping up the stalk won't be a big deal. If it's a small banana tree, I should get 3 days of pig feed out of it. A really big tree should yield a week's worth. In the next couple of weeks I'll see how accurate that prediction is. That's just a gut guess, so I could be far off on my estimate. 

ps- Since the chopped stalks get watered down in the 5 gallon buckets, I've decided to add some fresh cane juice. I plan to start using one large cane stalk of juice to one banana stalk and see how that turns out. I'll keep you posted. 


Wednesday, December 5, 2018

New Deck

I'm still working in our house, though I'm almost done. Still have the bathroom to finish, but we got a bug in our butts about wanting a hot tub to soak in. So suddenly the outdoor deck became the priority job. 

A low deck is rather simplistic. Well, it feels that way after building most of a house. A few strategically placed concrete pier blocks, a few extra for supporting the weight of a full tub. Level everything up. 4x6 beams, 2x6 cross whatevers (I don't know the correct name for them), then 2x4 deck planks. Prime everything, two coats of deck paint (did the priming and first coat before the pieces were nailed together)....wallah! Deck. Oops, forgot to make a step in front of the sliding door. No problem. That's easy. Had time to prime the step, but the painting will get done later. 


The most difficult part of this job was getting the lumber here. And working with the 4x6s. They are heavy. Thankfully I have a helper to do the heavy stuff. 

Tuesday, December 4, 2018

Driveway Gate Maintenance

Another of those tasks I tackled during this dry spell was the main driveway gate. It's been needing painting for months now, but where could I assure two days of no rain? Fat chance of finding that! Anyway, it's finally happened. Two days ago I made my move. 

Day 1.....
...remove the "keep stray dogs out/keep my own animals in" fencing off of the gate 
...sand away any rust. Luckily there wasn't much except for the lower corner where it rubs the ground, snagging lava along the way. For some reason I can open and close the gate without it dragging on the ground, but nobody else can. Nobody = hubby, Adam, & my next door neighbor. Is it because they're not the ones who will have to fix a broken gate? Or shall I be sexist and say it's a "man thing". Ha! 
...wash off any rust and mold. Lightly sand. Apply os-pho to any rust spots and specks. 
Day 2.....
...paint the gate ........bright yellow. Bright screaming yellow gates are fun! And it makes it easy to give directions. 
Day 3....
...attach mesh to the gate for critter control. The last time I used some 3"x2" welded wire fencing, but it proved not to be the best choice because it snagged in the ground, plus it rusted. This time I'm trying plastic chicken wire. We'll see how well that holds up. Attaching it was simple. I used zip ties. Since it's not the primary fence, the zip ties work just fine. 


Done. Another long awaited task done. 

Monday, December 3, 2018

Sq Ft Totals to Date for 2018

Recently I've planted :
16 banana trees
60 sq ft of sweet potatoes
20 pineapples 

This makes the totals for the year so far..........

Single plants : 
4 moringa
24 bananas
2 citrus
121 pineapples scattered about the farm
30 pipinola scattered about the farm 

Sq ft of garden space planted : 
699 turmeric
18 yacon
45 potatoes
234 sweet potatoes
30 cholesterol spinach
66 pipinolas
30 chocolate mint
950 taro
72 peas
305 fresh green beans
396 pineapple

As you can deduce, there's not been much veggie farming this year. It's been unusually wet, so much of what I planted rotted, got mildew, or was destroyed by slugs. Thus I've done a lot more food buying than I had planned on, but still got quite a bit from the farm via what I had frozen, dried, and already growing. But things are now looking up. It's drying out. I've ordered onion plants. I'm starting seeds in the mini greenhouses. I'm an optimist. 

Sunday, December 2, 2018

Making Hay While The Sun Shines

It's been another one of those stretches where things have been quiet on the blog. Again, I'm not sick or dead. I've been working getting things done while it's sunny....well at least not raining. It's been so wet the past couple years that I get into a work frenzy when it's not raining. 

Chores accomplished.....
...create spots for more crops, particularly margins along the driveway
...plant 6 banana trees
...plant 60 sq ft of sweet potatoes
...plant 20 pineapples
...pull or weedwack down ferns in the pastures. Over 2 acres cleared!!!!!
...empty and refill 2 compost bins
...mulch all the taro beds
...refurbish the small utility wagon - sand, os-pho, and paint
...fix the main driveway gate -- shore up the deteriorating corner, os-pho & paint it
...move the sheep to new pasture (believe me, it wasn't easy this time!)
...start harvesting the turmeric
...work on the new deck
...clean out my truck. If you saw the truck you'd understand it's like cleaning out your overstuffed toolshed. It was time to go through all the stuff crammed behind the seats and sort it out. 

Wish I had gotten more tasks done, but I always seem to put too much on my plate. Lofty goals, I suppose. 


Friday, November 23, 2018

Using My Margins

Margins are those areas along defining lines that most people don't utilize. Places like.....
.....the foundation around buildings
.....the edges along a driveway
.....the space between a fence and building or orchard
.....the strip along a pasture fence
.....the ground between two greenhouses 

I became aware of using margins because I lacked decent soil to make enough in-the-sun garden beds to satisfy myself. So any and all land with soil that was a sunny location was pressed into growing space. Since then, I've gone into making gardens in margins because they are accessible and I can add soil to the low spots. Thus the driveway margin beds. 

On the other side of the rockwall, most of the ground is low. Not all, because the rockwall was built right into the raised ground in some spots. Where the ground is low I've been filling in. Layers of coarse vegetation, cardboard, waste paper, fresh grass clippings, chicken pen litter, pasture manure, compost, and soil gradually fill in the future garden bed. After a few weeks of filing, watering, stomping, the low places get filled up. I'm aware that this fill will reduce in depth significantly, so I plan on refilling in a couple of months. It will take several months before the new beds are ready for their final planting. 


The above pictured area is still in the settling process, but I said what the heck and planted sweet potato cuttings today. When I comes time to add more fill in a couple months I'll simply harvest the vines to feed to the livestock. That way I'll get a harvest while I'm waiting for the final garden bed to develop. 

This area I'm now working on ........

It was about a 2 foot deep and 3 foot wide hole behind the rock wall. It's ready for planting and will be first planted with a banana tree, some shade tolerant taro, a few pineapple plants for the sunnier spots, and sweet potatoes as the ground cover. After the taro and sweet potatoes are harvested out, I could grow other semi shade crops such as cholesterol spinach and turmeric. Or switch gears completely and make a perennial bed with bananas and chaya.  Who knows. I can let you know next week what got planted, 

Thursday, November 22, 2018

Continuing With a Rock Walls

It seems the just about every project I get involved with ends up with a pile of rocks. No problem. There's always a rockwall that can be added. 

I've been working on making new garden beds along the driveway margins. Plus I've been removing surface rock from the pasture areas I'm improving. An almost constant source of rocks. 

Here's the new stretch of wall going up along the driveway. It's far from being done, but it's on the way. 


For years I've been adding walls to line the driveway, and I'm not even close yet to running out of driveway. Yes, I've got a really long driveway. But you know, it's starting to look really nice. I find that driving up toward the house, with rockwall and gardens lining each side, is really "rich" looking. 

Wednesday, November 21, 2018

Rats!

Living rural, rats are always a problem. Living next to a macnut farm, rats can be an absolute nightmare. Rats are the reason why this farm maintains a dozen or so cats. We really need them to deter a rat invasion. 

Last night some bold & brazen rat got my window screens. 


Lucky for me, the windows were shut. Otherwise I'd be dealing with a rat in the house. Egads, just what I need. But what really annoyed me was the the buggah went around a chewed holes in 8 screens!!!!!!!!! Not fair. 


I showed the holes to Crookshank, my best rat catcher. He was mightily interested in the smell. Let's hope he does some rat hunting tonight, 

Tuesday, November 20, 2018

Problematic Gate Post

When the new rotational pasture fence was being put up, we ran into a section where the pahoehoe lava was real close to the surface. As a result the fence posts couldn't be properly pounded in. For much of the fence, it didn't really matter. Sheep don't tend to put much stress on a fence. But the gate was another matter. 


The post supporting the gate needed to be firm. I could have had a neighbor bring over his skid steer with a hydraulic hammer to bust a hole........or I could cop out the quick & dirty way by pouring some concrete. Being impatient, I dragged out the concrete. It may not look neat and pretty, but it's dang functional. It gets the job done. That fence post surely isn't moving anywhere soon.