Sunday, December 24, 2017

Appeal Update

I want to personally thank those of you who have donated to the O Ka'u Kakou fund raising efforts for the Naalehu senior housing project. 

Thank you !!!!!!!!!!!!!!!!!!!!!!!!!!!!!!!!!!!!!!!!!!!!!!!!!!!

You can feel good knowing that you are now part of a much, much needed project that will dramatically improve the quality of life for needy seniors in our area. We are in poor, rural community rather ignored when it comes to improvements. Therefore this is a project that area residents had to jumpstart on their own. Thank you again for being part of this. 


At this moment, $20,000 has be donated via the various appeals. We have a long way to go, but we're not done yet! Wayne starts his epic 100 mile walk (in slippahs) on January 2nd. That will hopefully draw more attention. 

(Donation link) ............

Thank you everyone.......and here's a wish for a good holiday season for everyone! 


Saturday, December 23, 2017

Homemade Plant Wire Ties

A friend of mine uses an oxygen concentrator machine to help treat his lung condition, and as a result he frequently needs to change the tubing. Rather than throw them away in the trash, he asked me if they were something I could put to use. Being the scrounger that I am, I gratefully took them, figuring that they'd be good for something or other in the future. Well, it's now the future! 


Truthfully, I wasn't the first to come up with this idea. I was chatting with this friend about my garden, the facts that I'm getting the greenhouses ready for growing cucumbers and that I'm making trellises for pole beans. He suggested using the tubing to make plant ties. Not just using it like string and knotting it up, but rather, run wire through the tubing. That way the ties would be quick & easy to use, plus reuse over and over again. Dang, wish I had thought if it first! (just kidding

So I started out with a pile of tubing (photo above), a roll of wire that I use for the livestock electric fencing, plus a wirecutter. ) 


After cutting the connectors off of the end of the tubing, I ran a wire down each tube as far as it would go with a bit of coaxing. Often I could get the wire through about 20"-24", but other tines only 12'-15". 


Once the wire went as far as I could get it, I'd cut it off flush with the tubing. Wallah! Plant tie. 


I think I have over 100 of these ties so far. I've already tried them out and like them. They're flexible, keep their shape, can be twisted all sorts of ways, and don't seem to damage the plants. They're winners! 

Up until now I've used strips of cloth and surveyors tape for tying plants. I'm ditching the cloth ties and replacing them with these tube & wire ties. I'll still use surveyors tape when the situation calls for it. 

Friday, December 22, 2017

Hawaiian White Christmas

It snowed!!! Both Mauna Kea and Mauna Loa are snow capped. The observatories atop Mauna Kea got several inches.....

From Hilo, snow can be seen atop that mountain....

And from my side of the island, snow can be seen capping Mauna Loa. Alas, clouds were hiding more than half the peak when I tried getting a photo...

There seems to be snow further down Mauna Loa than Mauna Kea this time around. Snow usually brings chilly nighttime temperatures. It was 56° last night. I bet it will be colder tonight 

Thursday, December 21, 2017

Greenhouse Back Online

I'm covering my greenhouses in greenhouse plastic. As you recall, I initially used off-the-shelf, run of the mill poly plastic, but it is not UV protected. So it lasted less that a year.  After looking around, I found a source for greenhouse poly who would ship it to Hawaii at a reasonable cost. I bought 4 rolls. In hindsight, I should have ordered 6. Oh well. 


The first greenhouse is now recovered. Without much hesitation, I went about adding fresh compost to the beds and lightly tilled it in. 


All these bags were half filled with compost, so I used quite a lot. Why? The beds inside this greenhouse only had a few inches of soil, so I needed to add volume. 


After tilling, it didn't take me long to drag out the veggie seeds. The little blue sticks indicate where I planted them so that I will know where to target the watering hose. 


This house will be growing cucumbers, tomatoes, and zucchini squash. Both the Dukes and the squash are parthenocarpic. Tomatoes self pollinate. If you recall, I have the ends of the greenhouse screened. This is designed to exclude the pickle worm moth and fruit flies. Thus I'm going with veggie varieties that I don't need to hand pollinate myself. 


ps- 12-22-17 greenhouse #2 got covered in be greenhouse poly


Wednesday, December 20, 2017

Old Cooler Container Gardening

"P" emailed to ask, "Do you use the coolers in the greenhouse, or only outdoors?" So far I'm only using them in the mini greenhouses, but there's no reason that they can't be used outdoors. In fact, one blog follower is a big user of coolers for her outdoor gardens. They are old picnic coolers, both the styrofoam ones and the hard plastic ones. The insulated sides help protect the plant roots from getting too hot. Plus it helps prevent the soil from drying out over rapidly. 

I'm a collector of old coolers. The trash dump thrift store keeps an eye out for them, but I've discovered that I have competition for them. Guess somebody around here got the same idea or read my blog about it. But I do manage to snag a few more each month. They can be broken, worn out, missing lids, I don't care. Punch a few drainage holes in the bottom, fill them with potting soil mix, and they are ready to go. 


I use them to grow "eaten raw" veggies in the mini greenhouses. Lettuces. Kale. Asian greens. Any other thing used for mixed salads. I'm also growing carrots in them because my garden soil is too stony for them. 


I don't have nearly enough yet for my needs. So I also use sturdy cardboard boxes that I line with a heavy duty trash bag. The black box in the middle (photo above) is a cardboard box that bananas were shipped in. So far I have 11 old coolers in service. 

Tuesday, December 19, 2017

Back To Work

Oh no....it's not me that I'm referring to (as you gather by now, I seldom stop.)  It's my mini greenhouses. They've been idle for some time, awaiting new plastic covers. Now that they're back in shape, they are also back in service, Two weeks of using whatever spare time I could scrap together, and now I have 8 of the mini greenhouses back in production. 6 of them are holding freshly seeded trays........


Cabbage, Chinese cabbage, broccoli, kale, onion, leek, radish, lettuces, spinach, Asian greens, bok choy, cilantro, dill, basil, beets. The first seeding was on the 6th. The next was on the 12th. And I just seeded a bit more yesterday. Some of the seeds have sprouted and I've transplanted to little seedlings into growing trays or individual pots already. 


Above, newly transplanted seedlings. I transplant them as soon as the develop substantial cotyledons. So far two of the mini greenhouses are holding little transplants. Chinese cabbage. Cabbage. Broccoli. Bok choy. Radish. Kale. Lettuces. Within the next two weeks these houses will be busting with seedlings. I'm planning on getting at least 16 of them full by the end of the year, hopefully more. 


Many of the seedlings will stay put to grow in the mini greenhouses up to harvest time. Lettuces and other things being grown for young salad greens: kale, spinach, Asian greens, bok choy, tatsoi, radish, lettuces. These mini greenhouses are protected from slugs, and with the danger of rat-lung disease, I feel it's important to grow salad and raw foods slug-free. While some places in Hawaii are very low or non-existent slug populations, that surely isn't this farm. Slugs are common here. 

The seedlings that are in individual pots or plant cells are destined to either the garden or for sale at the farmers market. . 

Monday, December 18, 2017

Do Rocks Have a Sex Life?

Today looked like an excellent rototillering day. We got a very light sprinkle overnight, the sun was shining, and no wind, I've been priming a bed right outside my front door, getting ready to plant it. For the past few weeks I've been shallowly flipping in all of my non-livestock edible garbage. Time to till! 


This is the 6th or 7th time this specific area has seen the rototiller. So it's not like I've been using a shovel or digging it just hit & miss. But every time I till, the tiller complains about rocks. I faithfully remove each one the tiller finds. Yet still, here I am finding more rocks yet again. If I were back in New Jersey I'd be saying that frost heaves each winter were bringing more rocks to the surface. But that excuse simply doesn't carry weight here in Hawaii. Geez, you'd think that after 6 times through this bed I would have found all the rocks by now. Guess not. At least the rocks I'm finding are getting smaller. 


But one asks, why do I keep finding rocks? No frost heaves. Nobody around here chucking rocks into the bed. And I remove rocks when I come across them. What else is going on? As one uncle told me as a kid, the rocks are reproducing....having baby rocks. Yes, back then I believed him. Egads, from an adult perspective, that means that they're have sex right under my very nose! Or maybe they are like yeasts, budding and subdividing. Cloned rocks? Could it be? Naw. But yet again......????? 


By the way, all that added garbage made for a worm population explosion. At least SOMETHING is indeed having sex in my garden.  


And for the curious, here's a picture of my current rototiller. I'll have to tell you about it some day. 

Sunday, December 17, 2017

My First & Only Crowd-funding Appeal

If you're Scrooge, don't even bother reading this. 

As you've gathered by now, I live in a quite rural area. Naalehu is about a 2 hour drive away from most governmental offices, so the region gets pretty much ignored when it comes to support services. Monies earmarked for improvements here mysteriously disappear and get reassigned projects in other districts. The vast majority of the residents are poor or retirees on limited retirement income. But folks here generally don't whine about it. When something gets their attention that the area really wants, they go about getting it done. They work on fundraising, banding together into work teams, everybody putting in their own little bit of effort in order to achieve a larger goal. The Ka'u residents solicited and earned money to help buy land for a coastal park, saving it from a condo developer. They annually raised money to buy heart monitors, lab equipment, digital x-ray machine, plus many other much needed items for their little local hospital. They worked to attain a passenger van for the little and only medical  assisted living facility (a.k.a. - nursing home). Individuals and churches collect and distribute food to those in need. E-readers get obtained (donated) and given to the tiny library in town. The people come together to clean highways and beaches. The list goes on and on. People here work to help themselves and their neighbors. 

Now....let's cut the chase and get to the point. Naalehu has ZERO senior housing. But the town and close surrounding area has a high need for it. Now.....there's this piece of land on the market now right in the middle of town. It would be a super location for senior housing --- in town, walking distance (even for seniors) to food shopping, hardware store (more like a general store), post office, bank, laundromat, dentist, Doctor, hair dresser/barber, coffee shop, town farmers market, bus stop. Not only is the problem the purchase price and construction, but the existing brokendown buildings and gang cesspool need to be dealt with, an expensive proposition. Plus there will be a slew of county permits required. 

Our local non-profit, OKK (O Ka'u Kahou), helps Ka'u residents. Right now it is attempting to create housing opportunities for our seniors in need. They have secured pledges of help via physical labor, use of heavy equipment, but the real need is plain cash to get the down payment together for the land. Once that's done, additional help and funds will become available for down the road. OKK came up will a brilliant fundraiser to hopefully attract attention to this project. The OKK president, Wayne Kawachi, will walk 100 miles in SLIPPAHS from Honoka'a to Na'alehu. People who can afford it have been pledging money for each mile and thus far $4,000 has been pledged. Wayne himself has pledged $10 per mile. Regretfully $5,000 isn't near enough, so Ka'u residents are rallying to raise funds. This is a very, very important project to them. 

Soooooooooo, if any of you are in the holiday spirit and would be willing to donate a few dollars to a mighty good cause, please visit the donation website. Truthfully, even a $5 donation would be much appreciated. Now just to goad you, or shame you, whichever applies ....... My farm has donated $100. Our Wwoofer, Adam, is donating one of his day's take at the farmers market. Now there's a good soul, poor as can be, donating an entire week's income. It's a case of having personal pride in participating in  a good cause. 

So I've shamelessly promoted OKK's latest endeavor. I fully support them! Below is the link to their donation website. The little video is Wayne himself. As you can see he's no spring chicken. So-- when's the last time YOU walked 100 miles in flip flops! Wayne is one dedicated fella. 

Saturday, December 16, 2017

This Week's Harvest

I'm often asked what were harvesting right now.....or slightly differently worded, what we are currently growing. Just like my readers, I'm ever curious about what others are doing on their places. So from time to time, I'll post what's coming out of the numerous farm projects. 

Fruits:
Lemons
Honey tangerines...my first! Just 10 tangerines for the first harvest.
Oranges
Mini guavas
Bananas
Lilikoi
Above... little but delicious, the mini guavas. I don't know what their common name is, but they are small, yellow skinned, pale yellow flesh, sweet & tasty. 

Veggies:
Snap beans - yellows, greens, and purples. Both round podded and flat romano type.
Peas - snaps and snows 
Potatoes - golden fleshed
Sweet Potatoes - orange fleshed
Green onions
Leeks
Kale
Turmeric
Pumpkins
Amaranth greens
Chaya greens
Sweet potato greens
Okinawan spinach
Broccoli
Taro
various herbs

Above, my first honey tangerines. 

We still have plenty of various meats in the freezer, so we won't be harvesting any livestock for quite a while. 

What have we started this past week? .....
Lettuces
Radishes
Several bok choys
Various Asian greens
Onions
Spinach
Beets
Broccoli
Kales
Beans
Peas
Basil
Cilantro
Dill
Carrots
And in the greenhouse : 
Cucumbers
Cherry tomatoes
Zucchini squash

Above, another bunch of bananas ready for harvest. I will cut the bunch down now and let them hang in the shade until they start turning yellow. It won't take long. By harvesting them green but mature, I can prevent the birds and rats from eating them. 

Friday, December 15, 2017

Fledgling Market Project

Every Wednesday Adam is taking his garden surplus to the local farmers market. If you recall, Adam is our farm's Wwoofer. These past few weeks have been discouraging for him, as he's learning the difficulties of dealing with uncooperative weather. But I have high hopes that he'll slug it through and eventually be able to support his simple life. 


This past week he sold all except one pound of beans, which one of my neighbors purchased after the market. So he did ok. Each week he plans to bring more than the week before, gradually figuring out what his customers want to buy. Rather than having surplus that might go to waste, he's decided to start out slow and gradually build up. 

Sure, this is a very modest start. But Adam doesn't want to live a life revolving around money. Thus his needs are low. Looks to me that he'll do just fine and be self supporting in a few months. This past week he's been spending part of his free time expanding his garden and building compost bins. Yes, he is planning on selling compost too. Looks to me that he's going to need a bigger market table! 

Thursday, December 14, 2017

Kapapala Ranch II - Another Ranch Day

Come to Kapapala Ranch and you'd never suspect you were in Hawaii. A large mountain backdrop, hills, cattle pastures, trees -- not a palm tree in sight. Working ranch horses, ranch atv's, cow working dogs, and 520 cows waiting in a corral to be pregnancy tested. And that's only one herd, there are several more, but it's the only one being worked with today.

If you're especially lucky, you'll get invited out to the ranch in a working day. Today I was lucky! Not that I participated in actually working the cattle, but I sat right in the middle of a few hundred pregnant cows  and watched the goings on....though I'm not sure who was watching who. The cows seemed pretty curious. 
Above, yup we are right in the midst of things! 

Starting at 7 a.m., the crew calmly and respectfully worked ....yes.....520 cows through the pens and chute. Each was hopefully 3 to 5 months pregnant. And actually, over 90% of the herd proved to be positive. One by one they were directed into a squeeze chute. Surprisingly most voluntarily entered with mild or no coaxing...just an open gate, a few whistles or the touch of a hand, or the shake of a paddle against the fence. Yes, some required stronger prodding, but as with other Kapapala Ranch operations, no cattle were harshly treated. It was amazing to see these 1400-1500 pound animals generally cooperating. Not that pregnancy testing is enjoyable, but they objected more to the oral deworming medication than anything else. 


Each cow was visually checked, pregnancy checked, dewormed, vaccinated, plus any other needed servicing before being released into the corral with their other herdmates. The older more experienced cow had been through this before and it showed. They mostly simply walked out the chute, found a place to lounge and chew their cud. 


Above, a cow walks out of the chute. 

The cows enter from the left. The white gate is a calf catcher. There were a few wayward calves in the group that evaded round up in October. So today they were captured in the white pen as they walked through. The idea was to protect them from being injured by a cow in the squeeze chute. Once the cow was released, the calf is directed into the open area with the cows heading to Ponoholo Ranch on the north side of the island. 

The grey structure is the squeeze chute, a hydraulically operated cow restraint. The cow enters and the exit gate partially closes, capturing the cow around the neck, preventing her from backing up. The sides of the chute now move inward to snuggly hold the cow still. With the cow safely held, the brave veterinarian can now reach inside and preg check the cow.....a not all that pleasant task of reaching up inside the cows rectum to feel for a developing calf. Yup, it's a shitty job! Thankfully it's over in one second flat. 

A few cows wandered past us and nibbled on grass around the edges of the corral. They surely didn't seem all that upset by what just happened to them,


The inexperienced young cows were surprised by the goings on. They charged out of the chute, huffed, kicked a tad, and were thoroughly miffed, panting for a couple of minutes before calming down and finally following the example of the older cows. And it was these young punks that were the troublesome ones getting into the chute. 

One older cow was quite enthralled by it all. She calmly walked out then promptly turned 180° in order the watch. For the next 2 hours she studied each cow leaving the chute and often got so close to the workers that she needed to be shoo'd back some. One curious cow! 

Did I mention that I was in the middle of these cows? Right! Sitting in one of the ranch vehicles with a friend, we had front row seats. In fact, the front row often came right to us! Whoa....is that an earthquake I feel? Oh, it's just a cow scratching it's chin on the back of the vehicle. 


So how long does it take to deal with 520 cows? 5 hours. Subtracting break times for snacks, that's 2 cows a minute. It takes one second to preg check, 15 seconds on average to do the rest. Moving the cattle takes up the rest of the time. Quite a slick, fluid operation, I'd say. 

Over 90% of the cows came up pregnant. A few of those cows were elderly (12 years of age) and carrying their final calf. To make life easier for them they were to be moved to a softer pasture on the north side of the island. Having brands on their hips that coresponded to their birth year made finding the older cows easy. Below, this cow has the number 4, which equals 2004. 


The cows that came up open, that is, not pregnant, go back to the owner's ranch to be rebred, sold, slaughtered, or whatever is their destiny. Owner not Kapapala Ranch? No. Two ranchers cooperate with these 520 cows. They have a deal where they share the calves that are born. 

The calves from this herd are destined to become beef for Whole Foods. Kapapala Ranch goes the extra mile to be GlobalGAP certified so that their calves can be available for the special market. GAP stands for Good Agricultural Practices.


With the work done, one of the dogs takes a break in the shade. The dogs are imperative for an operation like today. They keep both people and cows from getting injured. 

Wednesday, December 13, 2017

A Busy Week on a Farm

"I want to farm", she said. 
"I want to build my own house", she said. 
"I want to create a homestead", she said. 
"I want to be my own boss", she said. 
"I want to be self reliant", she said. 

Oh, sister!  Be careful what you ask for! 

I have little regrets. Yes, there's a few. But it has been worth it. Would I do it again, knowing what I've learned so far? Of course, yes. But let me tell ya, it's work! And time! Not for the lazy. 

This past week has been fairly typical of life around here....
...A stretch of the fencing rotted through, so I had to immediately drop everything and make repairs. Ha, so much for adhering to a work schedule. 
...Then the lawnmower started acting up....spend a morning getting parts and repairing the buggah. Around here that mower gets worked to death, so working on it is common place. But don't ask me how a spring for the speed governor disappeared in the grass somewhere. 
...Opening my email, I find a notice that my onion seedlings have been mailed. Yikes. Rush to prepare the garden beds for them. Yup, another glitch in my work schedule. 
...Sadly surveying the gardens, I rue to lack of sunshine. But the past 3 days there's been some sort of blinding, surely nuclear process going on in the sky. Geez, is that really the sun? I rejoice and have this crazy urge to dance in the garden with joy......perhaps sans clothes to appease and thank the garden gods.  
...Recovered one greenhouse with the proper plastic, so I give in to my urge to seed it immediately. Yup, it wasn't on the work schedule. But it's now seeded with cucumbers, squash, and tomatoes. 
...Last Friday night the generator for topping up the solar batteries crapped out. I have no nice words to say about that aging generator, nor the lack of sunshine lately. It was a good generator, and I said nice things about it up until 5 minutes after it died. Because of zero sun, we've been relying on that generator. What to do? Drop everything, of course, and run up to Kona and purchase a replacement. Oh my, the gods are now laughing, because we've just had several days of strong sun. I could have had that old generator repaired. But such is life. Looks like we will now have a back up spare. Perhaps someone else is in more need of it than ourselves? I'll ask around. 
...It's been cold at night, down in the low 50s. With the house not insulated and windows that don't really shut all the way, that means we wake up to a chill. Thankfully I'm prepared with lots of stockpiled firewood.....past effort well spent. I'll just need to gather more wood to replace what we're burning now. Add it to the job list. 
...Trying to keep to the planting schedule, we successfully sowed peas, beans, kale, radishes, lettuce, bok choy, leeks, broccoli, beets, chard, cabbage, and various herbs. Plus marigolds -- gotta have color in the garden! 
...With a couple days of sun, I got the chance to get in some painting jobs done. They've been put off for weeks now. And don't forget the laundry. Sun = dry clothes. 
...A plus..... for me that is. I actually got my Christmas packages packed and ready for mailing. I almost fainted with pride. This has got to be the first time in years and years that I got them ready to mail before the actual holiday! Of course this means that I didn't get the donkey's hooves trimmed today. Gotta get to that tomorrow first thing. 


Monday, December 4, 2017

Attaching Greenhouse Plastic in the Mini Greenhouse

"D" wrote to say....."Hi Su,
I am in Honomu and your mini greenhouse is EXACTLY what I need.
Would you please let me know what you used as clips to hold the plastic to the PVC?
A post on your construction method would be great too...."

I tend to keep things simple and cheap. So I use an old worn out garden hose. Using a pruning shears, I cut 3" long pieces. Then using the shears, I cut I slit the full length of the piece. 


I don't bother to drill a hole for the attachment screw. The above pieces are being reused, thus the reason you see a hole in them. 

I guess you could use just about any kind of screw, but I had these little screws with wide heads. I tend to use whatever I have on hand, get for free, or pick up cheaply at thrift stores or yard sakes, 

 
I use screws instead of nails because they are easy to punch right through the hose and pcv without pre drilling a hole, plus they grip well. 

I apply the greenhouse plastic, then slip a piece of hose over the plastic and over the pipe. Then drill the screw in. I use one of the battery operated drills because I'm working in a spot with no electricity. 


I've had a couple of episodes of quite strong winds and the plastic stays in place. I have the mini greenhouses oriented so that the prevailing wind blows through the tunnel, not against it. Thus I haven't had any problems with the greenhouses blowing over. 

As for the construction, again, I keep it simple. So simple that it drives hubby nuts. He would make them far more substantial. I simply nail two 2x4s to each corner of a pallet for each leg. The two pieces are first nailed together in an "L" configuration then nailed to the pallet. It's not real strong, but I'm not moving the pallets around, so it's stable enough. These are just quick and easy legs. 
Then I bend the 1/2" pcv pipe and screw each end to each corner, one pipe per side of the pallet. I think I used 8' or 9' pipes. But any length would do depending upon high tall you want the arch. For stability, at the top I screwed a top cross bar, connecting the two pipes at the top of the arch. I used pcv so that this brace would be smooth and not tear the plastic. Then for more stability I added four braces (two each side of the pallet table top) going from the middle of one pallet side up to the pcv pipe before I got too far along in its arch. I used guava sticks.....for a few reasons. Guava is free. The sticks are fairly smooth so as not to tear the plastic. Guava is fairly durable. It's easy to work with. So now the pcv arch is fairly stable and ready for plastic. I painted to wood because it made hubby happy. 

The cost was low. For most of the mini greenhouses I used free, reused materials, or things I had in hand. For the last few I had to buy the pcv pipe. 

Sunday, December 3, 2017

Bean Damage

After quite a long period of little sun, lots of rain, and cool temperatures, I went to harvest my Golden Gate yellow beans. Very unhappy to see the amount of damage in the beans themselves. The plants look fine, in fact, robust. But the beans are showing signs of slug damage plus something else. 


The curling of the pods was to be expected. This is a pole variety that I accidentally planted in the bush bean bed. So it didn't get trellised. If grown on a trellis, the pods would have been straighter. But it's the brown marks that concern me. 


And I've never seen the brown discoloration along the top "seam" of the pods before. 

So what's the problem? Wrong variety for the weather conditions? Too wet? Too cold? Not enough sun? Some sort of disease? Just not a good variety for this farm? 

I'm ending up with 80% loss. That's right. Only 20% of the beans are sellable. 

I still have about a pound of seed for sowing. I think I'll wait until late spring to plant it .......and along a trellis this time! (oops) So I'll see how this bean performs in warmer, sunnier, and hopefully drier conditions before I give up on it. By the way, I cooked up the damaged beans for the chickens and they smelled delicious. At least this one has good flavor going for it. Plus the pods are very low fiber, thus they are quite tender when cooked. 

Saturday, December 2, 2017

Mini Greenhouse Fixes

My Initial experiment with the mini greenhouses were a success. My hubby saw them as failures because....
....the plastic shredded 
....the ground cloths became slug motels 


Those two problems just need tweeking. Since I plan to keep using these mini greenhouses, I'm upgrading to greenhouse plastic. Greenhouse plastic is thicker, stronger, and UV resistant. Between the winds here and the tropical sun, I don't expect to get 10 years out of it, but if I can get several years I'll be happy enough. 

Covering the ground was good for weed control, but bad for dealing with slugs. When I pulled back the ground cloth just to check out of curiosity, YIKES! It was a slug haven. They must have been having weekly orgys because there were slug eggs here, there, everywhere. Hundreds, no thousands, of slugs. Ok, the ground cover was a real bad idea. It allowed water to drain through it and create a nice dark, moist environment. So it had to go. I'd rather deal with weeds. 

Recovering the mini greenhouses wasn't difficult, it just took time. Lots of backing out screws then re-screwing in order to reattach plastic sheeting. Working at a good clip, it took me 20 minutes to do each mini greenhouse. 

At-da! Job done. Ready for replanting. 

Thursday, November 30, 2017

Rain

No rain up until this past week. Only 0.1" the entire week before. Nothing the week prior to that. Not good. 

When growing vegetables, constant soil moisture is real important. Two weeks of almost no rain has kept me watching my soil closely. But combined with that no rain has also been a general lack of wind and sun. Thus my two major moisture robbers have been absent. But finally I was getting concerned. Yesterday's checking indicated that it was time to irrigate. 

So what did I hear the weatherman say? Flash flood warning for all of Big Island? Whoa baby, rain! Yes! Sometimes I luck out. In the past 3 days the farm has gotten over 4 inches of rain. Wow. End of dry spell for now. 

Weather is real iffy here. While rainy spells seem to have a season, the yearly trends recently haven't kept to the script. The past few years have been much wetter than what I use to expecting. And the rain has been happening thorough out the year, rather than primarily at a particular season. 

If this were the rain pattern all the time, farming would be much easier. But no. Sometimes years are significant drought, which puts a real monkey wrench into farming. Drought has its benefits though -- lots of sun, warmth, available days to get work done. But it also means that water must be hauled if the stored catchment tanks get used up, which usually happens with long droughts. 

For some reason, folks who want to get into farming or serious gardening don't realize just how much the weather affects growing plants. I sort of knew about it when I got started, but the reality really hit me during my first drought. Then again during my first extended rain period. And I'm still working on ways to deal with the weather ....
...storing extra water
...incorporating more compost into the soil
...learning how to manage the mulching better
...discovering which varieties need extra moisture, or conversely, preform better during dry spells 
...experimenting with shade tunnel
...experimenting with rain protection tunnels
...using greenhouses
I haven't gotten into exploring drip irrigation yet, but it is something I really need to try. 

Tuesday, November 28, 2017

Snowing in Hawaii

First big snow of the season in Hawaii. In fact, both summits are seeing snow. Pretty cool! 

Last night I noticed a dusting of snow on one of the webcams. By this morning the snow was obvious. Plus the summit road was closed, a sure sign of snow and ice. Since it's suppose to snow more tonight, the road will stay closed until the plow clears it. Yes, Hawaii owns a snow plow! 


According to the weather service, they are expecting around 6" of snow, give or take. But sleet will most likely be mixed in at times, making the snow cover icy and as hard as a rock. Not the fun sort of snow to play in. But no doubt people will go up there for some early winter fun, and you can bet there will a snowman built down by a beach somewhere, or possibly some kid's front yard. 


Tomorrow I'm going to be occupied, otherwise I'd drive to a good vantage point to take some photos. Some years the snow caps the mountain and makes for some stunning photos of the beach in the foreground and the snow covered volcano in the distance. Always a great picture to email to friends. 

Monday, November 27, 2017

Expanding the Growing Space

While I have plenty of growing areas to produce all the fruits and veggies that we need to survive ourselves, it's the extra cash crops that I'm focusing on. Thus the reason I need more garden spots. But looking around my farm, I see that I'm limited as to available open, sunny areas. Resale veggies are ones that require sun. So the flat, open area in the front of the property will remain the primary growing area.  The problem there is the lack of soil depth and lots of rocks. I've already spent years removing rocks, and it looks like I'm going to be doing more once again. Gee, my first thought was, "Where do I need more rock walls?"

I'm actively working to expand. Besides looking for more nooks and crannies, I'm also coming up with ways to expand the main garden. By removing the grass aisles, I'll gain over 33% more actual planting space. So that looks like a viable option. Plus it would be the fastest way since most of the rocks have already been removed from previous gardening activity.

Above, the aisleway has been turned over, then compost was tilled in. 

Another option is converting the ornamental taro growing area into veggie beds. That's a real tempting option too. 

Down along the chicken pen is a 20' x 15' spot that gets decent sun and has adequate soil. I could move taro to that area, thus freeing up better locations for more veggies. 

Much of my grassy, pasture zones get plenty of sun, but are full of rock and poor soil. Those spots would take some serious work. But it's a thought in the back of my head. 


Above, I've prepared the soil along the back edge of a low rock wall and planted a little taro. Utilizing the narrow, small margins helps increase my production. 


Above...here's another "edge" garden site. I'm putting 20 pineapple starts along one of the concrete pathways around the house. Noodles helped me remove rocks and till in the compost. Gee, I had to be careful not to run him over with the tiller. He's not afraid of motors, obviously. 

Some of the new areas will be used for vine crops .... pipinola, pumpkins, gourds. So I'll only need to prep the spots where the individual plants will be growing, not the areas in between where the vines spread. At least for now, that's the plan. I can prep more ground after the harvest. 

As for row crops, for virgin garden spots I'm preparing just the actual row only for now --- not the space between the rows. Eventually I'll expand the 12" rows into 3' wide beds, but not immediately. Why? Lack of time. First step is create a row and get a crop in and growing. Then as time permits, I'll remove rocks and add soil amendments to the aisleways. Rather than prepping the entire area first, it's more important for me to get a crop growing. Thus prep will happen along the way as I'm harvesting crops for market. I know that lots of people advocate...actually insist on... getting the garden area fully prepped first, but that would mean working the soil for three years before growing my first crop. A year of rock removal and bed creation and two years of building the soil fertility. Keep in mind that I'm not using commercial fertilizers, which would give me an instant boost now but would interfere with the development of a long term healthy soil system. No, I'm not going to wait for 3 years. I need the crops now and will simply work with what I've got, improving as I go along. And ya know, I'm no spring chicken anymore. Waiting years to get a new crop going isn't in my favor anymore. I want to see these crops getting harvested before I'm too old to do it! 

So here's my task list....
...choose a spot with at least 3" of soil (even if it's just between the rocks) and gets at least 6 hours of sun
...mow the grass down as close as possible. 
...run the rototiller shallowly over the surface to cut most of the grass plants off at the soil surface. 
...mark where the rows will be
...use a mattock to open the soil along the rows, removing the rocks as I go along. Remove any Bermuda grass roots that I see. Open the row about 12" wide. 
...top the row with compost, manure, and other soil amendments. Work them in with a mattock, shovel, or tiller (whichever does the job). 
...plant beans, peas, or potatoes

There will be lots of more work in the future. Things like building the soil volume, increasing the soil fertility, eliminating the Bermuda and kukuya grass, removing more rocks to widen the growing area. But the goal I'm keeping in mind is growing sellable veggies ASAP. 

Sunday, November 26, 2017

Kapapala Ranch

Last day of my Thanksgiving vacation proved to be special. I was invited to Kapapala Ranch for a picnic & tour. What a treat! 

Kapapala Ranch is a large (34,000 acre) working ranch in my region. Yes, it's huge. 90 miles of ranch roads, 350 miles of fence line. It hosts 2400 breeding cows (plus bulls and calves) and 2000 Spanish meat goats, several donkeys, and numerous ranch dogs. It's an amazing operation. Unless you've seen it, it's difficult to imagine the incredible terrain, the beautiful vistas, the forests and wildlife. Seeing this vast ranch just blew me away, for real! 

Starting out from the ranch house, ...

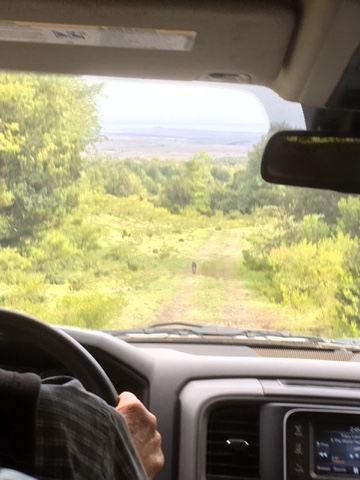
we climbed aboard one of the ranch trucks .....along with 6 of the ranch dogs. Their choice to go along, while several others decided to stay behind. 
3 of the dogs opted to hop out and run the whole distance, one chose to ride the whole trip, and the others hopped off and on like we were a San Francisco street car. 
I got the feeling that those dogs were hoping to find a job along the way, but no luck. This was a day off. Can't call it a day of rest, since several of the dogs trotted miles and miles. 

First let me say that this wasn't like any Sunday drive I've ever gone in before. We travelled the ranch roads at a dog trot speed (8 mph, yes the dogs trotted along with the truck the whole way), so rough that it was impossible to keep one's elbow on the armrest. The road started out pleasant enough, but the higher we got in elevation the rougher the road became. 4 wheel drive LOW was required! 


The open pastures were once planted all in sugar cane back in the plantation days. Now they support cattle. One thing I was surprised to learn was that sugar cane had been planted at rather high elevations. And rather far away from the processing plant. Some of those more remote fields had been abandoned earlier than the closer fields, and while they now sported some tree regrowth, they were still predominately grassy. Interesting fact -- clumps of banana trees exist here and there in the fields. They had been used as markers in the cane fields to warn of dangerous situations for the heavy equipment. When the cane fields were burned off for harvesting, the bananas did not burn. Thus there was a clear warning of existing pukas and fragile lava tubes. Pretty clever solution. 

Around every turn there seemed to be another amazing nature scene. 
The higher we climbed, the more native the forest got. By the time we reached the top of the ranch (5000' elevation), the forest had changed to koa and ohia trees, the home of the i'iwi (a threatened Hawaiian bird). While I spotted i'iwi, there's no way I could get a photo of one. But what a thrill ---- I actually saw my first i'iwi!!!!!! 

Our destination was the ranch reservoir. 

Manmade of course, it supplies the ranch with quite a bit of valuable water. The reservoir looks to hold about 4 million gallons and gets its water from a 3 acre catchment field above the reservoir itself. From here, 9 miles of pipe send the water down to the lower ranch where it is needed. 

It's a great location for a picnic. Up here in "god's country", miles from civilization. 

Heading back down after lunch, we passed the goat herds being guarded by several large guardian dogs. 

We also visited the Ainapo cabin along the way. 

This little cabin was built in 1840 and is quite historic. Isabella Byrd stayed here in her trip up Mauna Loa, though I don't recall the year off the top of my head. This site was an established camping area prior to the cabin being built here, and it still retains its charm to this day. 

Coming downhill, the coastline views are impressive. One turn after the other revealed spectacular vistas. And usually we had at least one dog leading the way. 

What a grand trip. I am ever grateful for being invited along. Mahalo nui loa !!!