Tuesday, April 29, 2014

The Daily Drivel

No time today to work in the gardens. Or go to the seed farm. Nor build the house. And the livestock simply got fed, watered, and a quick glance. Today was canine spay day. Up before dawn, quick get the necessary jobs done, then head to the clinic location. Today it is being held at a local church that is truly and very community oriented. Thank you St Jude's! 

The church building is small but perfect for the surgical jobs. But the check in, waiting area and main recovery set up is outdoors. That usually poses no problems. But a tent is set up just in case of a rain shower. Not all the dog cages can fit under the building eaves, so the tent is a good back up, just in case. 
The surgery and intensive care recovery goes on inside the building. The veterinarians determine which dogs need close attention and the volunteers then hover over their charges, keeping them warm. 
Most of the dogs do fine. Sometimes one wakes up rather startled by the lights and sounds around it. Covering their eyes and ears helps calm them. 
Indoors we can set up multiple work stations so that every dog gets constantly monitored, every dog goes smoothly from one station to the next. 
To the novice, the above photo may be distressing. But everything is normal and ok. The dog comfortably lays on its back on a padded table. The pad supports the head, spine, and hips. The sand bags gently hold the dog in position. A blanket tucked around the chest and neck help keep the dog warm. The dog has already received an injectable anesthesia, so it is asleep before it is placed onto the table. Gas anesthesia keeps it asleep while the surgery is performed. 

Today I believe we did 50 dogs. So it was a long day. I got to leave at 7 pm. 

KARES announced that at the end of today's clinic that they have now spay/neutered 400 dogs this year already on Big Island. Wow. That's 100 per month! Pretty impressive. 

Sunday, April 27, 2014

How I Start Sweet Potatoes

Living in an area without freezing winters, it's easy to start new sweet potato plants year around. We don't have to grow slips from tubers. It's faster and easier just to make cuttings from my established plants. 

Today I finished two new grow boxes and want to use them for growing sweet potatoes. In truth, I want to propagate the sweet potatoes, making new plants and rooted cuttings for resale. Whatever tubers they produce will be a bonus. I have some varieties that produce their tubers right under the plant, so they are excellent candidates for the grow boxes. 

Step 1- I took cuttings from the plant. I cut a 12 inch piece off the tip of a robust vine. Then I removed all the leaves except for the 2-3 on the very end. This is what they ended up looking like......
I then scooped out a hole in the soil about 3-4" deep and placed the stem into it, like this.......
The stem lays sideways in the hole rather than straight up and down. 

I pour a cup or two of water into the hole to well moisten the soil, then fill the hole in with dirt. Only the very end tip of the cutting is above the soil, like this........
Once the entire box is planted, I'll give it a good watering, then a light covering with grass clippings so that the soil surface is shaded from the sun. 
I've planted the cuttings quite closely in the box, perhaps 12" apart. My goal isn't tuber production so the close planting won't matter. I'm looking for plants to take future cuttings from. In 6 months I will be opening these boxes, harvesting whatever tubers developed, using the compost and soil elsewhere, then reloading the boxes with fresh biomass. The cycle repeats itself. 

If you've read previous posts about my pallet grow boxes, you'll recall that only the top 6 inches is garden soil. The majority of the box is filled with assorted chopped up biomass. Not a true compost pile in the sense that it will heat up. Heat is something I don't want because it would kill the young sweet potato cuttings. So I don't include much in the way of manures, but I do inoculate the layers with some garden soil that has active micro organisms so that decomposition can take place over the coming months. 

Grains and Seeds for the Chickens

One of my goals for this homestead is to be fairly self reliant. Thus buying outside livestock feed is not on the roster. But raising egg laying chickens without commercial feed is challenging, assuming that one wants to get a decent number of good sized eggs. Yes, I know people who buy zero feed for their hens and "feed" them by simply letting them free range. But then they don't get very many eggs either. Plus they have to have enough open space for their usually only few hens to forage in. And a bigger factor...no gardens that the chickens can get to. Chickens eat up or ruin a garden in no time flat! I have 50+ hens (currently 79 but not all laying) and plenty of gardens that can't be protected by 6 foot high fences, thus not the right situation for letting birds run amuk. 

Plus my girls are penned every morning until lunchtime so that the majority of the eggs are laid in the nestboxes for easy gathering. They free range in the afternoon and return to their roosts in the pen each dusk. So they need to be fed every morning and supplemented in the late afternoon. 

Mornings they get Mama's famous chicken slop & glop, as I like to call it. Some ingredients are cooked. Others are ground up in the blender. 

All sorts of greens, kitchen waste, garden waste, foods specifically grown for them, foraged foods, and cooked brown rice mixed together. Though you may not believe it, the girls love slop & glop. If presented a bowl of layer pellets beside a bowl of slop & glop, they eat the slop & glop first every time. Their afternoon snack consists of grains plus meat if I have it. Most of the grains presently are purchased. But I'm gradually growing more and more of my own. 

What sort of grains am I interested in for the hens? .......

....Corn (my chickens love it). I've been fairly successful growing corn. Now I just need to grow more of it. They will eat it whole so I won't need to crack it. My girls actually prefer it fresh on the cob. Feeding it fresh like that cuts down on the work and time I have to put into feeding them. 

....Wheat (another grain that chickens love). This year I'm growing good sized blocks of wheat. I haven't had to thresh it. I harvest the heads, let them dry. The hens will peck the kernels out themselves. 

....Rice and sunflowers. As with the wheat, I'm growing a lot more this year. I'm having problems with sunflowers though. Pollination problems. So I'm grinding the heads just before they start to dry, mixing it in the slop & glop. I'm finding about half the hulls have no seeds in them. 

....Flax, sesame, barley, and quinoa are new crops for me this year. We'll see how well they grow here.

....Oats. This year I'm going to try hull-less oats. The hens weren't all that interested in regular oats.

More experiments for grains includes Job's tears, amaranth, field peas, and lentils. The girls already get various beans, peas, and cowpeas that are cooked in the slop & glop. I don't know if chickens will eat pigeon peas or buckwheat but I've got some growing down on the seed farm this year. 

I've had people ask me what my formula, my recipe, is for a scratch mix. At this point, I don't have one. The girls just get what I have on hand. Since they are already getting a very wide assortment of foods in their diet, I'm not concerned about getting the perfect scratch formula. To date I haven't had extra grains and seeds, so they get everything I have. 

Why do I use scratch grains? #1- the hens love them. #2- It's a simple way to get them back into their pen at the end of the day. #3- It's good nutrition. 

New Kittens !

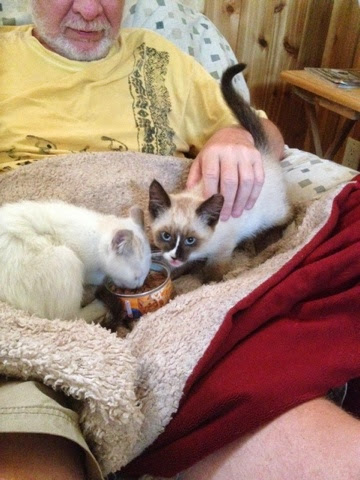
Well, we did it again. Crazy us added two new kittens to the family. Our older cats have become rather sedentary and stodgy, so it seemed like a good idea to jazz things up. We have plenty of room here on the homestead for more residents, and we can afford to care for them. So why not? These two little guys needed a home. Thus we have welcomed them into the family. 
They're both little boys that we neutered at the local spay/neuter clinic two days ago. The surgery hasn't set them back, but changing homes has unsettled them. But kittens are resilient, so it shouldn't be long before they start exploring and acting like kittens. 
So far the rest of the house menagerie hasn't been too interested in them. Just mildly curious. 

Now...what to name them? 

Friday, April 25, 2014

DIY : Do It Yourself

I'm a big proponent of DIY. I bet you figured that out by now. Pretty observant! It's a major foundation stone for self reliancy and a homestead farm. Without a healthy dose of DIY I'd be destined to fail. I'm not independently wealthy. Besides, I WANT to see what I can do for myself. 

This blog draws a number of sideways advertising .....posting a comment that includes a warning or suggestion to use a "professional" or else face doom at some level. Most of these ads I delete not because I'm against self advertising, but that this blog is about self reliancy. Promoting fear by trying to scare me into hiring others, just isn't appropriate. 

Do I need a contractor to build my house? Not really. Is hiring a licensed plumber the only way to go? Well according to my County building department it is, but in reality it isn't. Come on now, just how highly trained does one have to be to install plumbing? In my opinion Hawaii's requirement that all plumbing and electrical, 100% , must be done by a licensed professional is there to protect those trades, to give plumbers and electricians jobs. A friend of mine wanted to put in another outdoor hose faucet. A job that could have taken an hour and cost less than $20 ended up taking weeks, paying for a permit, hiring a plumber, and costing a bit over $200. 

One further word on licensed pros.....as required, we hired a licensed electrician for the house. $4000 later we ended up with a house that passed Hawaii County inspection, BUT when the circuit breaker was flipped to start up the system, it snapped off. Every time. Seems that our wonderful professional crossed circuits not once, but twice. Hubby ended up rewiring the house, fixing numerous mistakes. He found a number of cost saving shortcuts that were highly questionable especially since we are in an active earthquake area. And several structural beams had been compromised in the process. A piss poor job. Sorry Pros out there, but we could have done a far better job ourselves. I have no objection to our work being inspected, but I'd rather DIY to get the job done with care and quality. Snobbish, aren't I? But realistic. 

Not going with a licensed contractor surely has its risks. I could screw it up. But if I do it wrong, I'm a big enough girl to accept the blame and consequences. I recently replaced a section of roofing where the previous owner goofed. So, am I going to drop by his current residence and demand compensation? Oh ya gotta be kidding. No, I live with it and learn from his mistake. His goof has caused me to sit down and learn more about metal roofing. That's good. 

As soon as I mention DIY, get get tons of emails. So feel free to write. Doom and gloom, doom and gloom. Sorry folks, but I'm too old now to be scared into avoiding DIY. I'm past the point where I want to live my life with fears. And I'll accept blame for mistakes and put the time and money into fixing them. 

I'm having a blast learning to be self reliant. Mistakes along the way make for good stories to tell around the dinner table or over a cup of coffee. With the Internet nowadays, learning about a job before undertaking it has become easier. YouTube is a good source of info. 

In the UK they have stores called DIY. They make no bones about it. 

Ok, I'll concede that if a builder-owner doesn't take the time to really learn about the job then he could end up with a very dangerous or hideous house. But I'm not talking about idiots here. I'm saying that if I make the effort to learn as much as possible about a project and feel it is something I'd like to attempt myself, then I should be allowed to do it. And as I said, I wouldn't mind the work having to pass an impartial inspection. "Impartial" is an important point because around here the county building inspectors are noted to be vindictive, making owner-builders jump through hoops that contractors don't need to and getting into "testosterone" fights (or call them one-upmanship or bullying, whatever). 

Anyway, I'm a do-it-youselfer through and through. It's this self reliancy kick I'm onto.  

Wednesday, April 23, 2014

The Daily Drivel

Back in March...March 24 to be specific....the Daily Drivel took you to the dog spay/neuter clinic. Since then I've gotten 8 emails wondering why I either don't help at cat clinics or asking if there were clinics for cats. Well, here's your answer. YES - YES. I am definitely a glutton for punishment and have volunteered to be tortured at a number of cat spay/neuter clinics in my area. And here I am yet again doing another day of community service, voluntarily, nobody has a gun to my head. Guess I just can't give up veterinary medicine. It's in my blood. 

The Advocats group here in Hawaii is amazing, absolutely amazing. They arrange these totally free clinics (donations happily accepted) where cats are neutered, vaccinated, earmite treated, flea treated, dewormed, ear tipped, microchipped, plus whatever else the individual cat needs. The vast majority of cats are ferals, but owned cats are also welcomed. Often these cats are from colonies where some kind soul in the community is feeding them. 

My own contribution to this day's clinic is eleven feral kitties trapped down at the local dump. I saw at least six more there but I ran out of traps. So those extras will have to wait until, hopefully, another clinic is held. What's amazing is that when I arrived at the clinic, I discovered that another person trapped 21 more cats at the same location after I left with my haul! And they said they saw a half dozen more but that they had filled all their traps. So it seems that we have made a major dent in the cat reproduction pool at the dump, but the job isn't finished. 

I've located two more pockets of feral cats that need neutering, again future victims. Five in one colony and 12+ in the other. Regretfully some of the females are pregnant, so the number of cats will increase by the next clinic date. But all the neutering that has been going on is making a difference. I haven't seen ads for kittens on the local bulletin board of my town in over a year. 

How many cats are done in a day? Usually at least 100. The last clinic I worked we did 168! Today we had 101 cats brought in. Up in Kona yesterday they did 116. 

So what goes on? Here's the skinny -----

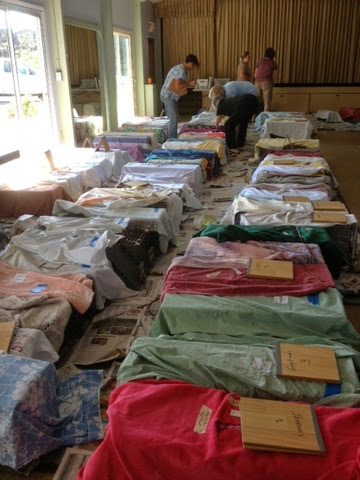
6:30 am - Volunteers have already been on site getting things ready. The floor is tarped. Newspapers spread. Tabletops protected with paper. Supplies lined up. Working stations set up. And breakfast snacks arrive. 

7 am - Technicians and all volunteers arrive and start setting up their stations.

7:30 - Cats start arriving, all in traps. That's a must. No cages. The vet tech has to be able to give an injection through the mesh trap. 99% of these cats are not handable. Traps get labels then are covered with towels. The towels give the cats privacy and calm them down. 

8 am - Veterinarian arrives. 

8 - 9:30 - All paperwork is filled out, worksheets arranged, equipment in place, cats labelled and organized, volunteers instructed as to their duties. 
(Cat being weighed after spaying. At each station down the table, the kitty has something done until it reaches the end, where it moves to recovery.)

9:30 - The action begins..............RIIIINNNNNGGGG ....AND THEY'RE OFF !!!! It's number one breaking from the trap first with number two close behind. Number three is moving to the table next.....oh yes, sorry, this isn't a horse race is it. But when the command to start is issued, it's only a matter of 30 seconds before the first six cats have had their anesthesia injections. The action is quick. 
(Kittens in ICU recovery. Kittens need to be closely monitored, kept warm, hydrated, and as they begin to wake up they get fed.) 

For the three hours everyone is focused on their task. Then thankfully there's a brief lunch break. Before long it's back to work. 
(Recovery cages.)

Today moved smoothly. We got done early. No problems. 

This little kitten woke up just fine. One of a litter of four, she still needs a home. 

It amazes me that at most of these feline spay/neuter clinics that 100+ cats are brought in. There's just that many cats out there that need neutering. The first few years the Advocats project didn't seem to be making any dent in the population problem, but now I can see a difference. It has taken a long time. But alas, every time a person just dumps an unneutered cat off, it just starts the cycle again. Two dumped cats find each other and wallah....more kittens. If the people would only not be so lazy and irresponsible. Geez, the spay/neuter is free for crimey. But there are always jerks around who just don't care, though they complain bitterly about feral cats. I know that for a fact because my mother's neighbor is one of them. What a jerk! 

Using Old Metal Roofing

The vast majority of houses around here have a metal roof. With the volcano erupting, the rain has been especially acidic, causing the rooves to rust away. While people patch their leaking rooves as best they can (Ace Hardware stocks plenty of gallons of Henry's Roof Patch all the time now), eventually the time comes when it needs to be replaced. We're no exception. The older roof, now ten years old, was never properly flashed by the original owner. So unknown to us for several years, it built up debris where the flashing should have been between the two roof slopes, and eventually rusted away. A can of Henry's roof cement helped for a while, but we finally gave in and replaced it when we could no longer stop the leaks in heavy downpours. 

I'm not one to throw away anything reusable. I'll find a use or give it to someone who can. Giving the old roofing away never crossed my mind for one second. I had the perfect job for it. Put a solid roof over the dog pen and parking area. 

Quite a while ago we had made a roof frame out of tree trunks and recycled 2x4's. Up until today we used tarps over the frame. But tarps wear out quickly in the tropical sun and whipping tradewinds. I've been keeping an eye out for old roofing material, but everyone around here also puts old roofing to use. So far, no luck. 

Ah-hal got my OWN used roofing panels ! So today they went up onto the frame. 
Had enough to do 20' with some short leftovers, which will be saved for some other project. 
Hubby's little VW would fit if we remove the big lava rock along the back wall. The farm ATV will also fit comfortably under the roof. 
The dog pen (for the two incorrigible chicken slayers who can only run loose on the farm under supervision) has its own roof. Once I locate more roof panels, we'll run the metal roof all the way to the end. 


Tuesday, April 22, 2014

Unusual Chicken Eggs

Anyone who has had chickens for eggs knows that sometimes eggs come in strange shapes, sizes, and coloration. They all don't come out looking like those grade A large eggs you get at the supermarket. I've had my share of strange eggs and I wish that I had taken photos of them. Those pictures would have been fun to share right about now. I've had wee tiny eggs the size of a jumbo marble. And others in the opposite extreme being so large that I'm shocked that a hen could lay them. Some eggs come out completely perfectly round. Others are long and narrow like a torpedo. Some are bumpy. I saw one that was wrinkled all over. Others just wrinkled on one half. I've even see eggs that are soft and leathery because they have no hard shell.
Today a hen laid the egg on the left. It's far bigger than the extra large normal egg on the right. Plus it's misshapen, being flat on one side and no round-end/pointed-end. 
Looking down from above you can see how the egg compares to the normal egg on the right. 

I can't sell this egg because its too large. Won't fit into an egg carton. So we'll be eating it ourselves. Whatcha wanna bet it's a double yolker? Do triple yolkers exist? 

By the way, I checked the hen that laid this egg. I was really concerned that she might have injured herself. But she appears to be fine. Wow, SuperChicken! 

Postscript: I just cracked the egg for dinner tonight. Only one yolk, but it was a whopper. 

Sunday, April 20, 2014

Controversy -- Working Animals

This is an update on the NYC carriage horse controversy being covered by Jon Katz. The outcome of this issue could have far reaching repercussions. Could the future hold an America without working animals and ultimately without pets, the ultimate goal of most "animal rights" groups? Here's the link to Jon's post, or you could go directly to his blog site at www.bedlamfarm.com and look for 4/19/14 posts. 

Farming Is A Bloodsport !

Another blog writer (Jenna of coldantlerfarm.blogspot.com) noted the farming is a bloodsport. Boy, I totally agree! And it is because of this violence that many people get turned off to the idea of small homestead farms. 

First of all...I've decided not include photos of blood, gore, wounds, dead animals. So feel free to use your imagination. 

It's not just what the farmer does that makes this a bloodsport. Take a good hard look at Nature itself. Livestock live by their own natural rules of behavior, not ours. Rams fight, sometimes killing one another. Same with goats, bulls, even horses. Include even cats and dogs. And small animals such as chickens and rabbits. Many a farmer has had animals injured or killed due to fighting or harassing. Have you ever thought where the term "henpecked" comes from and what it refers to? Hens will literally peck another low ranking hen to death! ..... then eat the victim right down to the skeleton. {insert photo from your imagination} Yup, the peace and joy of farming. 

"Livestock vs the Farmer" sport...... Often the farmer gets the bloody end of the stick, though the animal may ultimately end up losing the game by going to slaughter. Plenty of farmers have been badly injured, even killed, by livestock. I'm no exception, though I don't think I've been killed yet. I've been knocked about and thrown around by horses, sheep, pigs, and goats. Spiked by roosters. I've been clever enough not to own a cow so far. Been bashed, foot stomped, squashed, and bitten more times than I can recall. And I've got scars to prove it. As a human, I should be clever enough to out think my livestock, but somehow that doesn't always happen. So I tell new farmers, it's not a matter of "if" you get injured but "when" you will get injured by your livestock. And when it finally happens, it will be your own fault. Afterall, the animal is only doing what Mother Nature made it....a cow acts like a cow, a ram does what rams do, etc. 

Ah-ha you say, be a farmer without livestock. So, ya think that keeps farming from being a bloodsport? Think again, brah! Instead of doing battle with warm, fuzzy (or feathery), living things you'll be discovering that tractors have the nasty reputation of being the number one farmer mutilator and killer. Start adding in augers, harvesters, combines, shredders, mowers, and all those others items that plant farmers use and you have one highly dangerous occupation. {good spot to insert another imagination  photo} And don't forget the non-mechanical items that can injure, maim, draw blood : ladders number one! Getting injured harvesting crops using a ladder has ended more than one farmer's career. 

Firsthand I've seen action in this game, even excluding the livestock. Luckily my ladder falls haven't resulted in injury. But I've cut my finger with a hand sickle in the exact same location so many times that you'd think I'd have a tough band of scar tissue there by now. Or you'd think I'd be smart enough to wear leather gloves or stop using a hand sickle. Well, it took almost 10 years but I now put a glove on my left hand about 90% of the time. Duh...so I'm 10% stupid. 

I'm not the only one letting blood flow. My neighbor hit himself in the head with a fence pounder so hard that he knocked himself out. Woke up to find that his head wound had already stopped bleeding and that the cut needed numerous stitches to close. {great photo opportunity} Another farmer down the road almost lost a finger to a fence pounder, defleshing one side of his finger. In fact, it's not uncommon for a farmer to be missing part of at least one finger by retirement age. 

More non-animal bloodletting that I've seen happen (happily not all to myself)........
{pick and choose your photos for this list}
...bloody skirmishes with barbed wire
...hand picks bouncing sideways into one's foot
...cut fingers from pruners and harvesting knives
...falls off of truck beds
...falls out of trees
...injury, and even one death, from silos
...scalp tears from hair getting caught in equipment belts
...toes amputated by haying equipment
...hay fork through the foot

So if you want to take up farming, a first aid course is a grand idea. Keep a well stocked first aid kit. Keep a cellphone with you for calling 911. 

I won't let the blood aspect of farming keep me away from this sport. I love it. I get a deep sense of satisfaction working a small farm. 

Friday, April 18, 2014

Iron/urine Chelate

What's this chelation thing that I'm doing with urine? And why? The "why" part is that I'm adding plant nutrients to the soil that otherwise wouldn't be there. For example : adding rusty nails doesn't provide plant available iron. Adding plain urine, while adding immediate nitrogen, doesn't supply slow release nitrogen. 

The "what" part is that I'm doing is creating a chemical reaction between a metal (rusted iron) and an acidic solution (urine) where the nitrogen in the urine bonds with the metal. The chelate compound thus formed is slightly soluble, therefore the nitrogen doesn't simply go off into the air or get leached out with the rain. That's good, because nitrogen is typically rapidly lost from soils. Plus the iron itself is a plant nutrient. In chelated form, it's available to plants. Otherwise it is insoluble and will just sit there in the soil unused, unavailable. I'm no chemist, so I don't know exactly what is going on with this chelation process, at a chemical level. I've talked to several chemists over the years and they've tried to explain it to me. Much of their in depth discussion flies way over my head, so I just take their word on it. Combining urine and rusted iron = a solution of iron that is available to plants + nitrogen that is also available to plants but doesn't rapidly disappear. 

I am aware that most iron in the soil is not bio-available. The plants cannot use it. The micro organisms cannot utilize it. I have seen gardeners poke old nails into their soil, but from what I've been told, it won't help the plants any. But if you take those rusty old nails and soak them in acid, then there is a chemical reaction. The iron gets converted into a compound that plants can eventually use. 
(Old nails that have been rusting out in the rain.)

Since soaking old rusty nails in urine creates better plant nutrients, that is what I'll do. And experience seems to confirm that it works. The garden rows where I sprayed iron/urine chelate as a foliar spray, the plants were visually darker green and more lush appearing. I now use the chelate mix as a soil or compost additive rather than a foliar spray. Foliar sprays are more difficult for me to work with, so I put my effort into creating good soil instead. Some day, when I'm bored, I'll experiment in greater detail with foliar sprays. 

So, how exactly is urine chelation done? Well, I'm kind of lazy about it. I just put a bunch of old rusted nails into a milk jug or other plastic jug. Most of my jugs I keep 1/4 filled with nails, adding more when needed.
 Then I fill up the jug with urine, screw the cap shut.
Now I just let it sit there until I need the urine to add to compost. That means anywhere from several weeks to a couple months. Every once in a while I'll give the jugs a shake to stir things up. I've been told that doing the process this way takes weeks to work. Setting the jugs in the warm sun makes the process go faster. But be aware that sun degrades the plastic that milk jugs are made out of. If you plan on setting the jug in the sun for weeks, perhaps a heavier duty plastic container would be wise. Either way of doing it is ok by me. I'm in no rush. But if you needed the process faster yet, you would soak the metal in HCl  (swimming pool acid) overnight then add the solution and any leftover metal to the urine. Either way, the urine solution gets cloudy and a layer will settle to the bottom. I shake the jug before pouring off the chelated urine for using it. Any nails not dissolved get used for the next batch. 

If you don't have old nails, you could use any kind of scrap iron. In the past I've used bits of leftover angle iron and also rebar scraps. It just has to be able to fit into a jug of some sort. I guess you could use a 5 gallon bucket with a lid, but so far I've been doing ok using jugs. 

Pasture to Garden - part 4 (part 2)

Continuing ...........

3- sprinkle crushed coral, as a source of calcium and slow, over time pH adjustment. I gather coral rocks from the beaches here. By placing them on the hot coals in my woodstove, the coral cracks and crumbles. Once cooled, I'll smash them up a bit with a hammer. 
....chunky burnt coral.....
.....after I've worked it with a hammer. Largest pieces are 1/2", plus lots small gravelly/dusty stuff.....

4- sprinkle crushed burnt bone, as a source of phosphorous. Some calcium and pH effect. I gather old bones from livestock pastures here. And friends & neighbors save me their bones from chicken, pork, beef, etc. I just pop them into the woodstove and retrieve them when the fire has cooled. Some bones crumble easily by hand. Others need a little encouragement from a hammer. 
....chunky burnt bone....
....after I've worked it with a hammer. It pulverizes pretty easy.....
I mix the coral and bone together for easier application. What amount do I use? For this demonstration area, I used one of those red dish pans that I used to measure out the wood ash. That's a hefty amount, but this soil has been in pasture for decades without any improvement, so it can use it.

5- generously sprinkle lava sand for mineralization. Around here we use lava sand for making concrete, so sand is easy to come by if you wish to our chance it. My own driveway is a source of sand for my garden. The lava gravel gets gradually crushed by the vehicles, producing sand. So I'll harvest it by the shovelful, dump it through a 1/4" screen, and return the big lava pieces back to the driveway. 

6- generously sprinkle moist, homemade compost that hosts plenty of micro organisms adapted to the sunny areas of my homestead. I use enough to cover the soil surface. In fact, this is such a large area that I will use all the compost that I have on hand! My compost contains plenty of green and brown plant material, various manures (sheep, horse, rabbit, chicken), biochar soaked in chelated urine, and lesser amounts of ash, coral, bone. Each new pile is seeded with micro organisms from the previous pile. The main reason I use compost piles is to grow a raging colony of micro organisms for adding to the gardens.
Some of my compost piles have been aged, that is, they have completely cooled down and worms have invaded. In this photo, Crookshank has found a worm and is seeing if it's good to play with. 

I'm also going to mix in some fresh, still warm compost with the aged stuff. No science behind this idea, it is just that I need all the compost I have and it wouldn't hurt to use a bit of both. 

7- lightly sprinkle sugar atop the compost layer. This is controversial, but I think that it helps the microbes get a jump start. I only use sugar in soils where I am initially introducing micro organisms. I don't believe that healthy, established garden soils need it. 

8- cover it all with 3-4 inches of fresh grass clippings. In my experience, mulching is very important. I live in the tropics where the sun and wind quickly dries out the soil. Once the soil dries, it becomes hydrophobic, becoming extremely difficult to get evenly wet again. I don't do overhead irrigation like commercial farming, so mulching is a good way to go. 

I was really fortunate and got a nice rain after applying everything just before mowing for mulching material. So I decided to run the rototiller quickly over the surface, mixing everything up, then apply the grass clippings. 
....ready for mulch....

9- make a sacrifice to the rain gods for very, very gentle rain. 

Well, step #9 you can skip. But if you like dancing wildly in your front yard, go for it! 

After a few weeks you can actually see the difference in the soil. As time goes on, if I keep the soil mulched with a minimum of 2 inches of clippings (adding more as needed) the soil will retain moisture and stay soft enough to dig. A big difference from the unimproved soil in other areas of the homestead.

If I have it available I like to rototill in an inch of volcanic cinders. The cinders "lighten" the soil and help retain moisture. Each cinder piece is full of holes, nooks, and crannies which hold water really well but also allow air circulation. So the soil stays moist but drains well. I have a couple of pits of cinder on my property but its getting harder and harder to reach it as I mine it for my new garden areas. Eventually I'll run out if I keep expanding my gardens. Unless of course I discover another pit.

I didn't mention biochar as one of my amendments, although there is some in the compost. Biochar is still controversial. I don't know how beneficial it is nutrient-wise. But I have had success using it for moisture retention. It sort of evens the moisture levels out. It's not as effective as volcanic cinders. But I'm still toying around with it and experimenting. Since I have seen some positive results with biochar treated vegetable beds, I will continue to add it to the soil. I make my own, not buy it. I don't think that I would purchase it. Being a trendy item, it's expensive. When I use biochar, I soak it in chelated urine or manure tea prior to adding it to the compost pile. I almost always apply the biochar via the compost, rather than by itself. If I have an area that I'm targeting for biochar treatment, I will make one compost pile that contains a lot of biochar. 
This is what the char looks like when it comes out of the TLUD stove. I'll soak it overnight in a bucket with chelated urine, then hit it with one of the handheld stick blenders (NOT my kitchen one, for sure!) It chops it up quite nicely. Then the whole mess gets poured onto the hot compost pile. 

Thursday, April 17, 2014

Pasture to Garden - part 4 (part 1)

Next step - rototill the surface. I'm using the tiller like it's a cultivator to cut the plants off at ground level. This is just one more way to try to kill the grass, or least slow it down. 
For demonstration purposes I've cultivated a small section. It will take me a couple of days to do the entire new area since I can only run the tiller for a half hour before my hands give out. This type of cultivating is hard on my hands, wrists, arms, and shoulders. It's because of those dang lava rocks. Bang. Bang. Bang. Anyway, I got this section nicely scuffed, cutting just about all of the grass plants. Not every plant was burned brown by the vinegar/clove oil. As you can see, there's some green grass still. But the tiller successfully chopped it down to the dirt. 

Once I have most of the grass decapitated (yes, farming can be brutal warfare), it's time for the next step before the grass starts coming back. No time to waste because I've discovered that if I delay, the grass gets the upper hand again. So now's the time to apply soil amendments, microbes, and mulch.....and water. I want to water everything after applying so that the amendments bond or mix with the soil, the microbes stay alive and start to set up housekeeping, and the mulch keeps the soil moist. 

Before this new garden is usable, the pH needs to be adjusted. I know that the soil will be acidic because of two factors -- acid rain due to living downwind of an erupting volcano, and the factor that I sprayed strong vinegar onto the grass and soil. I'm not going to bother testing the pH at the moment because I have done so in the past when I've used this method of grass control and always found the pH to be acidic, so I'll plan on checking it in a couple of weeks and made more adjustments as needed then. 

Why bother applying amendments? Why not just apply lime and then plant the garden? Well, the soil is currently suitable for growing pasture grasses, not the more finicky vegetables I'm planning to raise. Grasses can take a low pH and lower nutrients than vegetables. Plus by spraying vinegar and exposing the soil to the sun and drying wind, I severely damaged the soil ecology and mass murdered the soil micro organisms. Those micro organisms are extremely important for my farming technique. They feed on the organic material that I add to the soil, becoming part of the natural cycle for producing plant nutrients. 

So here we go........

#1 - wood ash. I save the wood ashes from my own stoves plus I have friends who give me theirs. I have plenty. So I apply enough to get everything ashy but not totally covered. As I said, I'll plan on applying more in a couple weeks if needed. Wood ash raises the pH fairly rapidly, supplies potassium and small amounts of many minerals.
I spread the ashes fairly evenly. The red dish pan in the photo was full with ash when I started. That gives you a bit of an idea how much I applied. 

#2 - a light spray of dilute ocean water.  I'm not sure if this really is beneficial but I haven't seen it hurt. Some people swear that it helps with establishing the micro organisms. Since I haven't seen it harm my soil, I do it just prior to introducing the microbes to virgin ground. I mix I cup of ocean water to a gallon of water and spray very lightly. 

Oh my....rain. It's started raining fairly heavily so I call it quits for the day. Tomorrow I'll pick up where I stopped.  ..............to be continued. 

Wednesday, April 16, 2014

Pasture Maintenance

Creating new pasture is one thing, but maintaining it is another. On my farm, it's not just the livestock that try to destroy the pastures. The downpours try to erode it away. The aggressive "weeds" try to kill off the edible plants. 

I have a number of different nasty plants that want to take over my pastures. I don't know their proper names, but I've got a few I've learned. Nutsedge is one. It's a grass that none of the livestock likes. Oh the goat will eat a little, but not enough to control it. It spreads rapidly, choking out the good grasses. Round-up doesn't kill it. So I use a mattock to dig out the major clumps and weedwack off the seed heads as they start to develop. It comes back every year because the birds spread the seeds. 
    Nutsedge    (photo from patriotpestfl.com)

Mexican elderberry is a pain. If I don't kill it when I see it, it sends out side roots that starts more plants all around it. The goat eats some of this but not enough to control it. Since it shoots up from roots readily, Round-up is needed for good control. I've pretty much eliminated the big patches from the pastures, but it comes back because birds spread the seeds. 
    Mexican Elderberry   (photo from natureathand.com)

There's a couple types of grass that the livestock won't eat. And of course, these grasses are the type that spread rampantly, sending out aggressive runners. The easiest way to keep their numbers down is to graze off the pasture then go around and spray the noxious clumps with Round-up. Easy to see and find them when everything else is short. I never get it all because I don't want to kill off all the edible grasses too, but at least I keep it from taking over the pasture. 

Ferns. 
Don't know the name but these ferns spread aggressively via underground runners. And when you pull them out, you never get all the pieces so it comes back.
 ( deferned area ready for over planting with sweet potato vines)

 But if I pull out a section, plant sweet potatoes as a cover, then pull individual ferns as they reappear, I can gradually eliminate it. I'll also seed pasture grasses or transplant grasses in with the sweet potato vines. Eventually the livestock gets to graze it. 
This pile of pulled out ferns will go as organic fill in one of my pallet grow boxes. The black stick in front of the pile is four foot high. 

Tuesday, April 15, 2014

Pasture To Garden -part 3

Just before leaving for our Maui trip I had good enough weather to get another spraying of vinegar/clove oil done. So when we left the grass looked like this....
Still too much greenery but it was getting yellow. When we returned it looked like this....
Better, but still too much green to make me happy. So I sprayed it again this morning. We had several hours of bright sunshine, so it should burn the foliage pretty well. 

Tomorrow I plan to take the next step -- rototill the surface. The ground has not been derocked, so normal rototillering will be impossible even for a reverse tine tiller. So I will take the little Mantis and scuff the surface. My goal it to cut as many of the grass plants off at the soil surface as I can. Once well scuffed, the next step will be to apply soil amendments. I'll be taking you through the steps. 

Monday, April 14, 2014

Full Eclipse of the Moon

I'm not sure why we are so fortunate, but for once in a long time we have a cloudless night. We can see the moon clear and bright. How lucky, because tonight is a full lunar eclipse. We had planned to drive way down to the tip of South Point, but happily we can now view the moon from the comfort of home. In actuality we're pleased because we won't have too far to go in order to collapse into bed!

Second stroke of luck, the eclipse timing means that I won't have to wake up in the middle of the night to see it. I'm bushed after this trip and would like to hit the sack early. But I'm willing to stay up till 9 to see the full eclipse. Ah, a blood moon tonight! Sometimes neat things come along that you need to see or do, and this is one of them. 

Neither of us thought to charge up the Nikon camera, so all we have on hand for photography is the iPhone and iPad. Quite poor choices. But that's ok. We've seen dozens of lunar eclipses but I hoped to put a pic on this blog. 

So now you'll have to put up with so e terrible moon shots via the iPhone. And you thought the travel pics were annoying! Ha! 
The moon is half eclipsed but the iPhone can't figure that out. Just a blurry white blob. 
Toying with the methods I managed to come up with this shot. 
This shot is just prior to full eclipse. I was hoping for a pic of the blood moon, but the iPhone hadn't the foggiest idea what I was asking for. Once the moon went to full eclipse, the iPhone just gave up. 

So if you missed the eclipse, picture this in your mind.........full moon, Man In The Moon quite evident, and the whole thing is a drab reddish orange. Pretty cool! 


The Daily Drivel

Trip almost over. Going home today. Last of the travel pics! 

What to do to occupy our time in the morning? Uumm. Just kicking around, picking up some gifts for friends, we spied the submarine store. Oh sure, why not. We've been on the sub in Kona harbor plenty of times but never in Lahaina. Taking the early morning trip we'd still have time for lunch before heading to the airport. 
The sub is waiting about 1 1/2 miles down from the marina, moored to its little nursemaid tugboat., "Roxie".  We passengers are ferried down via a pleasant, short ocean boat ride. The sub looks identical to the one located in Kona. Same company operates both, so we anticipate a nice trip.

The water was exceptionally clear this morning. Visibility must be at least 100'. Pretty good! And we start seeing fish immediately as the sub begins to dive. In fact we saw all sorts of fish and coral formations throughout the trip. Including a shark! Wow! Never saw a shark before on one of the sub trips. I'm told that it's not common to see a shark. 

White tipped reef shark. 

At the deepest part of the trip, the sub actually settles down to sit briefly on the bottom. 128 feet deep. That's about 25' deeper than the Kona sub trip. 
After touch down, we head back to the surface. After transferring everybody back onto the ferry, we head back to Lahaina marina........passing what is jokingly referred to as the "unemployment line" -- a line of local surfers waiting for a good wave to ride. 
The local unemployment lines can be seen all over these islands. The locals show up as soon as it gets light enough to see, just about dawn, and stay till 5 pm (or when the sharks start to feed). Meals are eaten on the beach, but most of their time is spent on the water. What a life. Not what I'm looking for, but obviously it fits their style. 


Sunday, April 13, 2014

The Daily Drivel

More vacation. I'm already for this trip to be over. Perchance you are too? 

If you ever make it to Maui, I'd suggest that you give the aquarium a visit. It's worth the admission fee. Where else can you pet a sea slug? Walk through a plexiglass tunnel with sharks and rays swimming over your head and under your feet? Pretty cool! So I ask you, have you pet your sea slug today? 
So many of the tropical fish are incredibly colorful. This aquarium is right up hubby's alley when it comes to fish viewing. He hates getting his face wet when "swimming", thus snorkeling is pretty much a no-go activity. The only way he gets to see the fish is from the comfort of dry land. Hence the plexiglass tunnel is número uno in his book. 
When it comes to sharks I'd tend to agree with him. The aquarium houses numerous rather large sharks, all of which look much nicer with plexiglass between them and I. 
Now here's something I've seen firsthand while snorkeling, turtles. I've had them practically touch my face mask! How cool is that!?!
Now I have no idea what this fish is, but he was quite interested in us. Could it have been our colorful baseball caps? Bright yellow and brilliant red? He constantly hovered right by us, checking us from different angles. After being scrutinized for five minutes, we blinked first and left. Mr Fish followed us to the end of its tank. So he was interested in us specifically all along. Gosh it's a bit unnerving to be the recipient of "watching". 
One more photo for today.....the banyan tree in Lahaina. Outside of the California redwoods and sequoias, this banyan tree is the most amazing tree I've seen. In the photo that's all one tree! For real! It blew me away the first time I saw this tree. It takes up the entire space of this square of land. If you come to Maui, it's a "must see".