Monday, June 10, 2019

Pallet Boxes for Potatoes

I've been making more boxes as I have the wood pallets available. Along one side of the sheep paddocks is an area with only an inch or so of soil. The only thing that will grow is tropical grasses, and even they have a hard time making roots. Thus they grow in a mat that can actually be pulled up like a sheet in places right off of the pahoehoe lava beneath. It's really weird. It's like having a grass carpet. 

This is the area I'm building more pallet grow boxes. It's a method whereas I can grow food. So far I have 10 boxes made, filled, and planted with potatoes. 


Here's a quick description of how I make these....
... I cut the pallets in half retaining both cross pieces for stability, then screw four together into a box. I'll use pieces from the discarded section to fill in any big gaps on the sides of each box. 


... To make them more visually pleasing, I paint the sides. 


... Next I place cardboard on the bottom to help keep the grass farm growing up through the soil. Then I line the sides of the box with some air resistant material. Currently I'm using black plastic trash bags. 


Several layers of cardboard on the bottom. Then I use a staplegun to Lin the sides with plastic trash bags. 

... Then the boxes get filled with my homemade compost. After watering and settling for a couple days, I'll plant them. 


Coarse compost fills most of the box, then compost is used to top it off and plant into. 

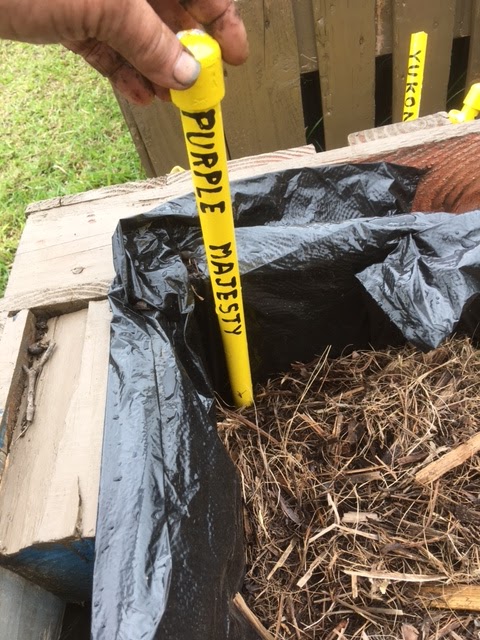
After planting, don't forget the label. 
These boxes are made very much like my compost bins. But they don't have a side that is removable. And they are only half as high. I find the height to be very ergonomic. Just right for an old buggah like me. 

Once this row of boxes is completed I plan to make more for other areas where there is little or no soil. I might grow more potatoes, or I might try something else. Time will tell. 

Two months after planting, the potatoes look great. 

Saturday, June 8, 2019

Greenhouses Ready for Planting

Because of heavy winds we got a while back, all three greenhouses needed some repair. The oldest one had a few broken hoops. The pcv pipes snapped because then had become brittle. It was to be expected, and I wasn't surprised because I had gotten so many years of use out of them. The building of that greenhouse had been their third project. Yup, I re-use materials when possible. The other two greenhouses had pipes that were fine, but they both needed new screened end walls (Bucky the goat torn up the screens one day when he got loose.) 

Replacing the broken pipes was a quick and simple job. Unscrew the old ones, screw in the replacements. With a battery powered drill, removing and putting in screws is a snap. 

The poly cover on the broken greenhouse had torn in several places due to the jagged pipe ends. Since I needed to recover it, I took this opportunity to try out something different : a greenhouse tarp. Instead of being poly film, it's just what it sounds like --- a finished tarp complete with grommets. I opted for the kind with embedded mesh, hoping it will be able to withstand the winds better. It lets in less light, but since our tropical sun is intense, that may be a benefit. We shall see. 

The ground beds needed some TLC. I first removed all the weeds.

Because of disuse, weeds invaded the greenhouses. 

Next I added an inch of sheep manure. Then 3 inches of county mulch. After a good watering and allowing it to set overnight, I dragged out the tiller and rototilled it all in. A second watering, then a covering to protect the soil. 


I used old sheets to protect the soil until it's time to sow seeds. 
In this case I used old sheets in one greenhouse. They will help retain soil moisture until I get it seeded with the hot weather crops (okra, lima beans). In the other two greenhouses I used just county mulch, about 6 inches deep (it will settle to 2"-3"). I'll be transplanting larger seedlings -- tomatoes, peppers, squash, cucumbers, so the mulch won't be a problem like it would be for seeds. 

once the mulch was applied, I gave the beds a good watering.  

Getting water to the greenhouses is an issue that I haven't fully resolved. Right now I'm storing water in trashcans. I'll use the sump pump & generator to water the greenhouses as needed. To fill those trashcans I need to bring water over from the ag catchment tank, or transport it from the county taps (via a tank in the back of the pickup truck). Not the best solution. Perhaps later this year I'll set up a catchment system beside the greenhouses, but I don't have time for that right now. If the water issue gets to be annoying, it will prompt me to take action sooner than later. 

Thursday, June 6, 2019

More Seeds and Plants Started

Did some more seed sowing and added some more items to the list .......

Onion (yellow spanish) 
Tomato (black vernissage)
Squash (black beauty zucchini, desert zucchini, dark star zucchini)
Lettuce (green ice) 
Parsley (evergreen, Italian) 
Catnip
Basil (genovese)
Cucumber (bella, saber, puccini, nokya)
Carrot (solar yellow)
Pepper, sweet (buran)
Papaya ( local variety) 
Assorted flowers (forget me not, johnny jump up, alyssum) 

With the squash, cucumbers, tomatoes, and peppers I'm only sowing 3 seeds each. These plants will be going into the greenhouses so I don't need very many plants. I'll save the extra seed for starting more new plants later. 

I also has some questionable seed on hand. It was old and I didn't know if it would germinate. Rather than use a garden bed, I opted to start some in pots. It's just to see if the seed is still good. If anything sprouts, I can always transplant it into the garden.....
Beans (red swan)
Lima beans (eastland, and an unnamed black & white lima) 

I've also done a bit more planting......
8 pipinolas
6 pineapple tops
16 taro starts 

So the plantings to date this year come to.....
400 square feet of cholesterol spinach
19 pipinolas
18 pineapples
32 chaya cuttings
4 banana trees
16 taro

Wednesday, June 5, 2019

Starting seeds

While the mini greenhouses still need some repair (age and high winds weren't kind to some of them), I'm going ahead and starting seeds. There's enough houses in good condition to be homes for the container boxes and seed trays.

Old tofu containers make nice seed starting trays. I use a soldering iron
to burn a few holes in the bottom for drainage, 
Several of the cooler containers are now cleaned, refilled, and ready for transplants. First crops in will be carrots. 

Seeds that I've started so far include.....
Carrots (ya ya, oxheart, amarillo)
Leeks (King Richard) 
Bok choy (extra dwarf)
Kale (thunderhead, blue curled vates)
Celery (Chinese pink) 
Tomato (black icicle, orange icicle, black beauty)
Squash (golden glory)
Cucumber (picolino, socrates, itachi)
Portuguese cabbage
Winged bean (urizun Japanese) 
Celeriac (giant Prague) 
Chard (verde de taglio) 
Beets (avalanche) 
Pepper, sweet (mini bell mix, pretty-n-sweet)
Cilantro
Assorted flower(cosmos, marigolds, vinca, impatiens) 
Papaya (waimanalo) 

Tomorrow I'll get another group a seeds sown and I'll let you know what I've chosen to start. Some of the things I'm starting will be for hydroponics. Others will be in slug-free containers. Yet others will go into the main garden area. 

Tuesday, June 4, 2019

County Mulch

Many people have asked me what I use for mulch. There are many options, and I have my favorites.

#1 ..... Grass clippings. These are readily available as long as I'm willing to put out the effort. I look at  grass mowing as a form of daily exercise. I don't belong to a gym, but I do own a lawnmower. There's lots of walking involved, plus bending, lifting, etc. it's a good work out with the benefit of ending up with several trash cans full of clippings.  
    Grass clippings are easy to apply, I can regulate the depth desired. They breakdown to provide nutrients to the soil and plants. And they stay put even when the tradewibds blow. That can't be said for newspapers and cardboard! 
   The only problem with grass clippings is that I often don't have the time to gather all that I need. 

#2 ..... County mulch. Our county takes green waste and grinds it up, creating a mixed mulch. A good portion of it is coconut tree trimmings. But of course there is just about a little of everything else in there too. It's whatever homeowners bring to the recycle center. 
    When the county grinds up the green waste, it gets piled up in huge windrows. Being fresh, it quickly heats up like a giant compost pile. Anything living, such as coqui frogs or weed seeds, are soon cooked to death. I've been using county mulch now for years and have never had any weeds germinate from it, nor have I seen any form of animal or insect life in the hot mulch. And believe me, it can be really hot, too hot to handle with bare hands when it's first loaded into the pickup truck. 
   I like the county mulch for not only mulching the gardens, but also to help fill the pallet grow boxes. The mulch is coarse but with lots of fines in it. So it's a good mix. Because it is mostly woody, I add manure when filling the boxes, and layer it with green stuff, like weeds or grass clippings....plus a bit of garden soil to add minerals and microbes. 

One pickup truck worth of mulch. It's a nice sized pile. 

Some coarse stuff, lots of medium and fines. 
    
I have only one problem with county mulch -- it's too far away. It's a 3 hour round trip to pick up 2 cubic yards of mulch. That's what fits into the truck if the side panels are on. A pickup typically carries one cubic yard, but with bed sides, I can get 2 in there. 
    I seldom have the opportunity to get the mulch myself. But David often goes to Kona and returns deadhead (nothing in the cargo bed). So once he found out that I desire county mulch, he makes a point of swinging past the mulch yard and getting 2 yards of the stuff for me. It's a win-win situation because I pay him for it, enough to cover his gas and time, basically making his trip to Kona free. 

Monday, June 3, 2019

On Catching Piglets

As you might remember, my mama pig and her two babies have been loose on the farm. Well I'm real proud of myself that I caught them, getting the two babies into a piglet pen without mama attacking me. After securely latching the door, I thought, "Job well done." 

Ha! Not quite so, I soon discovered. Before I had the chance to walk away, the babes tried multiple times to jump out, with one successfully hooking it's front feet on the top of the pallet fence. Now this fence is 42 inches in height, so that's quite a high jump. So I decided the pen needed a wire roof to prevent jumping, and I happened to have suitable piece of fencing on the farm. But I needed to go get it before the piglets escaped. So I dragged over a couple of wood pallets and laid them across the top of the pen. So far, so good. Off I went to get the materials.

You guessed it......when I returned the piglets were gone. How? First you need to know that I have two piglet pens side by side. Pen #1 has 4 partially grown piglets in it, pen #2 next door is was empty before I put the newly captured piglets into #2. When I threw to pallets over the top of pen #2, the piglets in pen #1 apparently got curious. Standing on their back legs they were able to use their snouts to push the roof pallet off, dropping it into pen #2, thus creating a nice pallet ladder for the captured piglets to climb out. Drats! Foiled again! 

So I'm back to square one on pig catching. I haven't given up yet, but I need to come up with a better design for catching and confining. These wild pigs are much harder to deal with than the commercial types. 

The baby piglets quickly returned to the house area, a spot that they are familiar and comfortable with. So I'm making piglet trap #2 up by the house, using their pig trail into the woods as the trap site. I've dragged a few cattle panels up from the goat pasture (they were used as a pen to separate kids from their mamas). I've lined the pig trail with a panel on either side (the panels are 16' long). The far end is currently open, but I will bring the ends together and clip them together, shutting the trap when I'm ready. The entrance will also be stoutly clipped shut once the piglets are in the trap. 

I've been feeding the pigs inside what will become the trap. At first they were nervous, but now they are quite comfortable with the arrangement. The past few days I've been approaching while they are eating, allowing them to turn and run out the back while I "close the trap" at the entrance. They now are no longer spooked, but instead watch me, returning to eat once I walk away. Looks like I'm almost ready to try closing the end and trapping them. 

Once trapped, I plan to run them into a small cage, then transport them one at a time to the piglet pen.......which I have already roofed in anticipation. Well at least that's the plan. 

Sunday, June 2, 2019

Quick Update

First of all, I'm alive and well. Things around here are ok. I've been too occupied to blog. In fact, I've been too occupied to work the farm much at all. For the past 10+ days, hubby has been having a bit of a stay-at-home vacation. Ah-ha.....now you know why I was occupied .......a hubby under foot all day. Ha,ha,ha,ha. Worse than having a flock of bummer lambs! But to give credit where it is due, he did try to be helpful at times. 

Over the next few days I'll catch ya'll up to date on farm happenings.