Monday, July 31, 2017

Ka'u Farm School - In Session Again

The Ka'u Farm School was back in session thus week. "Yours truly" was in attendance because I'm always interested in learning some new tidbit about growing food. And yup, I learned a few. 

Stacy & Rachel were there to promote their new endeavor, the Hoveatery. Their next event is this August 11. It's pretty neat to see people making meals using our local foods from small growers. I fully support their efforts! 


Greg, a small local farmer, was there to talk about home food gardens. With the help of other local knowledgable food folks, they gave great demos and info about various gingers..... shampoo ginger and how to harvest the "shampoo"; turmeric; false cardamom (the seeds are used for flavoring and the leaves as wrappers for foods especially fish); galingale (mild edible root and flower). They also encouraged people to grow yacon, pipinola, plukenetia, and moringa. Plus gave us a chance to smell and taste some. 


Also demo'd was some nursery cutting propagation using clean sand rather than a potting mix. Plus seeding greens (lettuce, tatsoi, mizuna, mustard) in potting soil for a cut n come again salad harvest. Greg showed how small farmers make veggie transplants, called plugs, in specially designed trays. Attendees had the opportunity to take some home for their own gardens, 

Raina gave an overview of upcoming programs. The Ka'u Farm School has proven itself more than just a flash in the pan and other organizations are starting to notice. With funding finally being offered, the school can now bring in outside speakers and host further workshops. Wow, it's in its way! 

And finally, before we all stepped up to the potluck buffet, Kyle talked about the local Farmers Union. 

All in all, another very nice presentation for our fledgling school. 

Sunday, July 30, 2017

Sharing Space with Spiders

Found a new one, to me, that is. Found this fellow sitting on a sweet potato leaf. 
 

Working in gardens, yup, you're going to be sharing the space with nature's critters. In fact, I'm the one invading their space, not the other way around. I get along with most critters I find here, though there are a few that I discourage. 

Friday, July 28, 2017

Reject Seed - Using Them

For the past couple of years I've been trying to produce seed for myself. So far I've been focusing upon the bulky seed that usually costs the most to ship here to Hawaii. Beans. Peas. Potatoes. (I'm not yet growing much corn.) 

After a bit of a learning curve, I now have things down pat when it comes to most bean seed, peas, and potatoes. I'm also successful with many herbs and radishes. It's routine now. 

Just recently I harvested quite a bit of bean seed. After sorting through the finished seed, I stored four quart jars in the frig for future plantings. This left me with a bit more than a cupful of rejects -- seeds that were discolored, had dark spots on them, were smaller than others, were misshapened, or had some other defect. Seed companies just throw these away, but I wanted to know what would happen if I planted them. They represent about $7 in seed if I had had to purchase them (of course, assuming that they were good quality). Why throw $7 away? 


Now......I only planned to grow these seeds for cropping, that is, not seed saving. No sense in selecting for plants that might reproduce small or deformed beans. But if I could get edible beans from them or at least plants to feed to the livestock, then I'd be happy. So I went ahead and planted some. 


Except for a few misses, the beans germinated fine. So far the plants look normal. So it looks like I'll get an edible crop out of them. 

Another use for reject seed would be to plant them in the pastures. Nothing lost by opening up a shallow trench, plopping in seed, covering it up. When it germinates, the livestock will find a treat on their next pasture rotation. I feel it's a better use of the seed than to simply chuck them into the newest compost pile. 

Just another example of zero waste and utilizing one's resources on hand. 

Thursday, July 27, 2017

Taro Propagation - Via Corm Buds

Cleaning out one of the bean growing beds, look what I uncovered.......some lost taro corms. 


As soon as I spied them I recalled that I had rested some freshly harvested taro atop the cut log edging, and apparently forgot about it since the bean plants, at the time, covered them over. 


They're beyond eating now, but they present a great example of another way to propagate taro. The corms have dormant eyes in them, and under normal conditions, they never grow to fruition because you cook and eat the corm. But in this case, the abandoned corms slowly began to awaken. The eyes near the soil came to life and set out shoots and roots. 


By carefully cutting the corm into chunks, I can now plant each of these shoots and they will grow into a nice taro plant. This is not the usual way that I propagate taro, but it's a very useful method to use under special circumstances. 


Just recently I had one of those special circumstances come along. I had a new taro variety, called Nuie Ula'ula, that has been growing for awhile. Then all of a sudden I noticed that the top had rotted off. Geez. I lost a variety that I had made a trip over to Maui to acquire. Sad. 

I dug up the  base of the plant in hopes of finding an oha (baby offshoot)......

I was in luck. Five of the dormant buds were sprouting in the corm. I removed the rotted part of the corm, and by replanting the corm on its side, I will be able to get new plants. So all it not lost afterall. With a little time, I will end up saving this variety in my garden collection. 


Wednesday, July 26, 2017

Manure Clean Up

One of the reasons for keeping large livestock is for their valuable manure. Both the sheep/goat and donkey manure gets used in the garden as fertilizer, with much of it being processed via composting. But how does it get from the pasture

I don't maintain very many large animals, currently just a small flock of sheep (10), one donkey, and 6 goats. While they have access to several areas, they tend to spend much of their time in one area. It's a favorite lounging and sleeping area, thus also a popular pooping spot. That makes gathering the manure a tad easier for me.

So, the poop has to be gathered in some fashion. While there are manure forks sized for horses, the tines are a tad far apart for picking up smaller donkey "balls". And forget using a fork in sheep & goat manure, they tend to pass nuggets the size of raisins. 

So, what to do? Hand pick up? That's backbreaking and slow. So I opt to use a pooper scooper, like what's made for dogs. But since they aren't available locally, I have my own version. 


Ace Hardware sells a brush rake in the gardening section and a dust pan on a stick in the household area. Put the two together and I have a pasture pooper scooper. No bending over. The rake gets the little nuggets. The dust pan holds just the right amount without getting to heavy. 

While I could use a five gallon bucket to hold the manure, I opt to use old feed sacks. They work fine for me. Plus they are easy to drag behind me as I clean up. No heavy bucket to carry. 

Tuesday, July 25, 2017

Calf Branding

Last weekend I had the opportunity to attend a local calf branding event. This was a "first" for me. Oh, I've worked around cattle before, mostly dairy cows. But I've never seen branding and working the calves. 

I arrived at the ranch at 9 a.m.  The herd had already been brought in from the pastures and the calves separated out. Pictured below, a modern day Hawaiian cowgirl rests, waiting for the next step. Behind her is the pen with the anxious moms. Yes, cowboys still exist here, for real! 


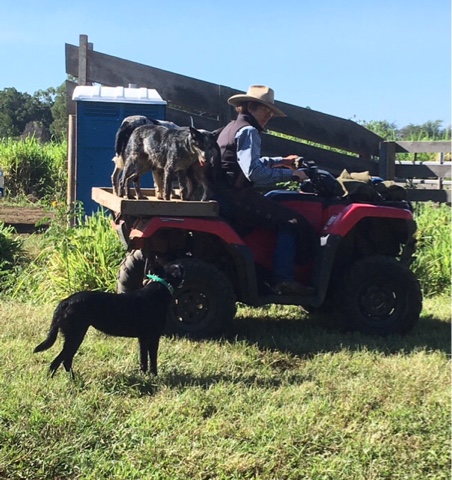
The farm dogs have done their job and are taken away from the area. Those canines love to work, so keeping them in work area would only frustrate them. So they go home to rest. 


The calves are in a pen, of course separated from their moms. I was surprised to see how quickly they calmed down. Very little bawling was heard, just the occasional call to mom. On average, a little less than 10% of the calves would call out occasionally, hoping to find mom. Surprisingly, most were really calm. Not what I expected, but I was pleased to see how gently the calves were being handled. 


The work corral is specifically set up for this action. Small groups of calves can easily and calmly be moved from the main pen to a smaller catch pen. Everything gets set up in advance before the first calf is roped. 


By roping a calf, I mean gently noosing the hind legs. No dashing about on a horse, no throwing a noose over the head, no yanking a calf by the neck, no excitement, no hot-dogging. Everything is very low key. In fact, none of the calves seem very nervous until it's down to the last two. The last two finally notice that everybody else has disappeared and they are reluctant to step into the noose. Usually at this point the calves are caught by placing a noose over their head and shoulders and allowing them to walk through the noose, then closing the noose about the hind legs. Again, very low key and no excitement. 


Once roped, the calves are slowly dragged out of the group pen and to one of the work stations. I was quite surprised to see that most of the calves had no objection. Since nobody was acting excited, most of the calves stayed calm too. 


Once at a work station, the calves were positioned onto their right sides. The horse kept tension on the rope, holding the hind legs still. A cowboy sat on the calf to hold it steady and calm it. Some calves attempted to stand and threw the cowboy off, but others opted to lay still. So far, so good. 


Now came the part that the calves voiced an objection. Frankly, I would too! A hot branding iron was held to the spot on the leg for two seconds. The calf was vaccinated and an ear tag attached. And if the calf was male, it was quickly castrated. Everything was done quickly and efficiently. The calf was released in the matter of a couple of minutes. 


Once released, most of the calves made their way over to the corner of the pen near the exit gate, which was close the the waiting moms. A few simply walked around, visiting the work stations and watching the next calf being worked on. Wow, they didn't seem spooked at all. In fact, cowboys had to shoo these curious calves away from the work area so that they wouldn't be under foot. 


The calf below, sporting it's fresh brand, wanted to return to the catch pen. Eventually someone came by to urge it to join the other calves already done. 


The whole affair was done according to a prearranged pace. 30-40 calves were done, then everyone took a brief break while the finished calves were returned to their waiting moms. Below, a couple of cowboys taking a watermelon break. 


I had anticipated a branding event to be rowdy, upsetting, with lots of bawling calves. In actuality, it was a calm, low key event with very little bawling except from calves actually being branded. Once released, those calves stopped bawling. Some limped for 2-3 minutes (yes, I timed it) while others didn't limp at all. Within 3-4 minutes the calves acted fairly normal, awaiting the gate to be opened so that they could go join their moms. The cowboys waited to open the gate until all the calves in a group were not only done, but also calm and recovered. They watched them for several minutes before returning them to the herd. 

The whole event was run smoothly, and I again emphasize, calmly. The only glitch I saw was when two calves, at different times, broke away from their restraints. But again, no cowboy style hot-dogging. The calves were allowed to join up with other calves and calm down. Then a horse & rider slowly entered the group of calves, noosing the errant calf and taking it to the nearest work station. 

Bravo!!!!!!!! A job well done. At the end, all the calves were returned to the herd and given time to hook up with their moms. Once most of the calves had sorted things out, the herd was released back into the pastures. You would have thought that these cattle would have high tailed it as far away as possible. But no. They hung around. The Cowboys actually had to push them away from the work corral and urge them back to the grazing area. 

344 calves were done, equipment packed away, and horses tended, all before lunchtime. There were some 60-70 people who worked together to get this job done, all volunteers, some coming from other ranches up to a 3 hour drive away. Their reward? In the future, other ranchers will come to help them with their own branding events. Plus at lunchtime the host ranch presented a great lunch (roast beef and plenty of side dishes & desserts), plus a fun raffle of numerous cowboy oriented items. I could see that these people all knew one another, worked well together, and enjoyed one another's company. 

What a wonderful experience.....as long as I'm not the calf, that is. 

So before someone asks, why brand them instead of using just an ear tag? The terrain on an Hawaiian ranch is rough. Thus ear tags can get ripped off and lost. So if the cow breaks through the fencing and leaves the ranch, its ownership can be determined by its brand. Ok you say, why not use a microchip? A microchip isn't visible. One needs to use a scanner, handheld, to read the chip. Ever try to get near enough to a beef cow on pasture to try to read a microchip with a small handheld device? I don't want to try that, but if you're game, just let somebody know where your health insurance card and notorized will are before you give it a try. Oh you say, just get better fences. Really? I haven't seen a fence yet that can keep in 100% of all cows. No rancher wants its cattle to get out, but in real life, it sometimes happens. Thus cattle need easy to see identification. A brand does that. 


Monday, July 24, 2017

First Pineapple of the Season

Yup, it's pineapple time again! 


Last Thursday I picked the first one. This week there are a couple more ready. So far it's the white ones that are coming ripe. I do have a few of the gold type, but truthfully I forgot to mark the plants so I'm no longer sure which ones they are. Perhaps this year I'll remember to tag them. 

White? Yes. Hawaii grows a white fleshed (actually very pale goldish) that is sweeter and much less acidic than the gold types. But it's also not a good shipping type, so it's just available locally. Just about everyone in my area grows the whites instead of the golds. 

If you ever make it to Hawaii, you really need to try a white pineapple that was ripened on the plant. Heaven! Grill it, and it's even sweeter. 

Sunday, July 23, 2017

New Orchids

We've been getting a bit of rain almost every day now for long while. Perhaps this is what has triggered some of my new orchids to bloom. These are my unknown ones that I picked up at a super discount at Home Depot & Lowes...those out of bloom plants that nobody knows what they are. 

Now don't go ahead and start asking me how to care for orchids. Honestly, I haven't the foggiest idea. I just stick them around. Some up in trees. Others atop rock walls. Here's some of the rock wall orchids......


I'm always amazed and delighted when they bloom. Sort of like a miracle. Coming from New Jersey, I see orchids as being that impossible plant that only the super experts can get to bloom. So I'm still in awe when it happens to my own little plants. 


Saturday, July 22, 2017

Chaya - Wow, It's Blooming

To tell you the truth, I never thought about it. Does chaya bloom? I can now say for sure, yes. 


Up until this spring, I had been pruning my chaya bushes on a regular basis. But now, they're producing more leaves than I can use for our meals. Thus the bushes have been growing bigger and more mature. So for the first time, they're bursting into bloom. Dozens of new little flower buds are showing up at the ends of 10 inch long stems. 


Pretty neat! I wonder if there's a pollinator here for them. Will they produce fruit/seed? Time will tell. 

Monday, July 10, 2017

More Reasons For the Egg Slowdown

"S" asked if there were other reasons why chickens would stop laying eggs. Sure there are! In my own case I believe it's a combination of older birds, them mostly not being commercial egg production breeds, and shortening daylight hours. If I constantly rotated young birds into the flock, bought only heavy egg layers, and provided extra light, then I'd most likely see lots of eggs almost year around. By maintaining two separate flocks and managing their molting period so that only one flock molted at a time, then I'd have a steady supply of eggs. Yes, it could be done. But frankly, it's not the kind of work that I'm currently interested in doing. 

Reasons why hens slow down or stop laying...
...shortening daylight hours and no supplemental light being provided. 
...old birds. After their second laying cycle, some breeds significantly lay less eggs are tend to stop early each year. 
...wrong breed. The commercial heavy egg layers are best for production through the year. Other breeds, mixbreeds, and in my case the ferals, lay less and stop early. 
...poor diet. Not enough protein or calcium will reduce egg laying. An unbalanced diet will also affect egg laying -- too much if one thing or not enough of another. 
...too much scratch being fed. 
...not enough clean water. 
...a break in food or water availability. Letting the hens run out of each could shut them down. 
...a change in diet. Change the food type, or even the brand, can affect some hens. They like consistency. 
...change in environment. New waterers. New feeders or bowls. New roosts or change of location. Remodeled coop. New pen location. New roof or the roof being removed. 
...new chickens being added to the flock. Or the significant removal of a number of hens from the flock. Flock dynamics change, thus affecting the pecking order. 
...illness. Sick birds often don't show signs, other than eating less and stop laying. 
...parasites. 
...something new outside of the pen. New dog. New neighbors. Heavy equipment being used. Helicopters flying overhead. Drone flying over the pen. Stockade fence removed. Brush and trees removed. 
..predator. A nighttime visitor you're not aware of? A dog visiting the pen when you're not home. Rats. Snakes. Owls or hawks checking the pen daily. Skunks. Raccoons. Possums. 
...the weather. Severe storms, floods, extreme cold, extreme heat can all affect egg laying. 
...moldy feed. 
...they've gone broody. 

Perhaps you just bought the hens, and they stopped laying. Yes, they were laying great for the seller, but changing homes is a real shock for the hens. It is not uncommon for them to stop egg laying. 

Not all flocks are so sensitive to changes, but if they already under stress or if they are extremely settled in a routine, then changes could result in egg laying issues. 


Sunday, July 9, 2017

Daily Egg Production Down

My daily egg production is way down. That's to be expected for this time of year and the age of my hens. From mid January to mid June I was getting 3 dozen eggs a day. But around June 25th I noticed a significant drop off in egg production. By July 4th I was getting only a half dozen of eggs daily. 


Today I gathered 9 eggs, more than I've been getting each day this past week. Yesterday I gathered only 5. 

Why the slowdown, you ask? My hens are mostly older birds. I've got a few young ones, which are most likely my egglayers right now. All the senior birds have stopped. That's just the way it is with old chickens. I do have some young girls that are 3-4 months old but it will be a few more months before they are old enough to start laying. 

What causes the slowdown? I suspect it's the short day length. The birds' diet and routine hasn't changed. The only change I can see is that the length of daylight is getting shorter. 

If I were primarily interested in egg production, I would buy two dozen new layer chicks every January. I would expect them to start laying just about now, taking up the slack. But eggs aren't my number concern. Instead, they're a bonus. So I happily take what I get and don't worry about it. 

Why do I keep these non-productive hens? Manure. It's my number one reason for keeping chickens. The pen litter goes into the compost, producing fertilizer for the gardens. Chickens can turn a lot of garbage, waste, and grass clippings into something very useful. 

Friday, July 7, 2017

Row Marker - Common Flour

At times I plant a row and need to know exactly where the seeds have been planted. Usually this means that I need to come back later and apply mulch (heavy in the walkways and just a dusting where the seeds are), or plan to apply water to help the seeds germinate. I don't use sprinklers to water the garden, so there's no way I want to waste water and time watering the walkways. 


One of the ways I've come to like for marking rows is sprinkling a bit of flour. Yup. Plain old baking flour. It's nicely visible, safe to use, biodegradable, cheap. Plus it's still visible even after 2 waterings or rains. It's faster to use than running string. It's more visible too. Leave it to me to trip over a string, totally obliterating the row marker. And sometimes I've been the recipient of a slightly moldy or caked bag of flour that's being discarded by someone else. Wow....free stuff....right up my alley! 

I think that on an earlier post I was advocating using little sticks and twigs for marking rows. But now that I have a hefty supply of cast off flour, that's what I'm using. I definitely prefer it to twigs. 

Wednesday, July 5, 2017

Eating REAL Fresh is Great

Eating from the garden isn't all the difficult. Today I walked through and picked a handful of what was in easy reach: Italian flat beans, an onion, cherry tomatoes, garlic chives. Sauté in homemade macnut oil. Added some dried, ground red and green sweet peppers (one of my food drying experiments). When the beans were almost soft, cracked two freshly gathered eggs over the top, and cooked a couple minutes more until done. With the ingredients being so incredibly fresh, within minutes of cooking, nothing refrigerated, the flavors were super. 


One thing that hubby noted, veggies that have been cooked within minutes of picking taste so much better than those that get refrigerated or held overnight. 

One of the benefits of growing your own.....it's super fresh! 

Tuesday, July 4, 2017

Email Address

Haven't figured out how to find my email address? Here it is....

Kaufarmer@gmail.com

Be forewarned....I don't privately answer emails. I simply get too many to answer them all, so I don't play favorites, therefore answering none. Plus I don't consider email to be private, so don't be surprised if you see your questions or comments showing up on this blog. But I won't use your name or email, just your initial. And oh yes, obnoxious emails just get instantly trashed. Instant zap!  I don't bother to even read them. 

If you post a response right onto the blog via a comment, I will see it faster. 

Monday, July 3, 2017

Chop & Drop

"H", "L", "E", and "L" (number two) all emailed to tell me about a permaculture method called "chop & drop", which they felt would make my life so much simpler......not as much work involved with chop & drop gardening, no compost, no manure hauling, no irrigation, no hard work, no nothing. Ooooo, I only wish! 

Chop & drop isn't all that new a concept. Subsistent agriculture around the world has used it, seemingly forever since the beginnings of ag. Nature itself uses it, though she doesn't weild a metal machete. 

The idea wth chop & drop is that the plant material never leaves the spot. All its minerals and nutrients return to the soil, in place. Additionally it acts as a coarse mulch, helping to retain soil moisture and providing shelter for soil life and new plant life. 

Now to my situation.....
...my land is not virgin. It was severely overgrazed for years well before any idea of moving the Hawaii popped into our heads. Thus very little variety was growing here when I began my homestead. The little soil beneath the ferns and coarse pasture grasses was severely depleted due to exposure when the edible plants were eaten off and by the monoculture-ish situation left behind. 
...my soil is young volcanic (in a geological sense) in a tropical setting. It has not had time to naturally degrade its mineral content. Due to periodic heavy rains, it leeches soluable nutrients. 
...the soil tends to be hydrophobic 
...there is very little actual soil, and what does exist is located between rocks varying from grape sized to larger than a suitcase. I plant around those boulders bigger than a suitcase because I can't move them out of the way by hand. 
...my soil is naturally not very fertile. 

Chop & drop works fine in some of my food forest areas. Most unwanted foliage and plants are simply cut and left in place, flat to the ground, usually at the base of trees. Plus in spots I intentionally grow food plants that happen to lend themselves well to chop & drop culture : okinawan spinach, sweet potato, sugar cane, turmeric, ginger, bananas. Their trimmings are left in place. The method makes it possible for me to manage my 14 acre pasture/woods. Between my machete and the sheep. I can actually walk around that land and access the food trees. When I arrived here, the land was impossible to access on foot. 

Chop & drop won't work for me when it comes to productive food growing. I need to create soil, rapidly increase its organic material content, add missing nutrients.  When it comes to growing all of one's food plus have enough surplus to sell for a livable income, chop & drop simply won't make it. At least, not in my situation. Perhaps sometime in the future, but not now. 

Am I stubborn or stupid for rejecting chop & drop? No, because I do indeed use the method where it works. Yes, it's a major time and labor saver. It just isn't the right method for my intensive veggie production. 

Sunday, July 2, 2017

Time , My Most Scarce Resource

I've learned that for me, under my particular circumstances, time is the most valuable and perhaps scarcest resource. I've been whining all along that if I only had more time, I could reach my goals easier and faster. So what have I done about it? Added more projects to get done. Egads girl, you must be simple minded! 

I currently have two main outlets for my farm surplus. While I'm meeting the needs of the first, I'm  nowhere near fulfilling the needs of the second. So I'm now on a mission to seemingly kill myself trying to expand my growing areas ASAP. Thus the reason the blog gets quiet from time to time. Simply no time to blog. 

These past two weeks I've added two turmeric beds. I happened to have had about three quarts of unplanted turmeric rhizomes available for planting. I had already planted the best of the lot many weeks ago, but now here's this opportunity to expand. So after finding two 6'x8' flattish spots in the shade, I removed the ferns and grasses ( into the compost bin they go) and the surface rocks bigger than a softball. I then incorporated 1/2 cubic yard of compost/soil mix into the little bit of soil there, and shallowly planted the turmeric. Finally, covered this with 2" of chicken pen litter. It's late to be planting turmeric, but the little rhizomes were beginning to sprout, and while they won't produce sellable turmeric, they should produce fine enough stock to use for replanting next year. 

My second buyer wants fresh green beans and snow peas. In response, I've created 200 sq feet of new space. Not very much, but of course it did take time...... plant removal , rock removal (anything bigger than a hen's egg), go mine soil from elsewhere and add to bed to replace the volume lost by rock removal, mix in compost and manure, test pH, add extra coral and lava sand, plant seeds, water in, go mow grass for a light mulch covering, apply mulch. All that takes time. And you know, 200 sq feet won't  be enough. Sigh. I'll be doing this over and over again.

Being that I'll be growing a lot more beans and peas, then I also need the seed for planting. So down to the seed farm I go. Build 5 more pallet grow boxes. Fill them....it takes a lot of time and labor. Top them with soil/ compost mix.  Sow seeds. I need several more grow boxes, but that's a start for now. If I add one new box a week for a while, I might be able to meet my seed needs as I keep increasing the square footage of growing beds. 

Dummy me hadn't taken into consideration the extra harvest and processing time. Is this why some of my farmer friends either get up extra early to go process their harvests, or hire employees. No way do I plan to hire employees! Been there, done that, never doing that again, ever. But I am looking into adding a live-on-the-farm caretaker/part time farm helper. We'll see. For now I am doing the harvesting, which I deem to be a pleasant task. And the processing, which actually I also enjoy. But it takes time. Time! 

I'm fully aware that adding mechanization can help relieve my time issues. I guess that's why farmers gradually add all sorts of time saving machinery, shortcuts, monoculture, and outside labor. I'm only adding things that I enjoy or at least don't cause me stress. While I'd enjoy a tractor, maintaining and repairing it would result in stress and expense. While employees would save me time and physical labor, the stress and headaches simply aren't worth it to me. Monoculture is not appealing. I have no interest in switching to commercial fertilizer or herbacides. A lot of "shortcuts" in commercial production results in much wastage, lower quality, less production per square foot, none of which fit into my scheme. And I'm not interested in eliminating polyculture, nor my multiple scattered growing beds. Stubborn old fool, for sure, am I.  (Talk like Yoda, do I.) 

So I guess for now I'm sticking with my plan and will work on fine tuning my efficiency. I will do what I can do while keeping things in the "enjoyable" category. And I'll just have to accept that there will be nights that I fall asleep in my lounge chair before making it into bed. As long as I enjoy this trip, I'll keep at it, but for those of you who wish to move to a small farm and "live the good life", be prepared to work and spend a lot of time doing it.