Sunday, April 26, 2015

Chicken Nipples

Ha, you're thinking something else, right? You're thinking, "Su, chickens don't have nipples!" Well, what I'm talking about is watering nipples for chickens. 

Anyone who has kept chickens, especially in a pen set-up, knows that the birds can trash a water bowl in a hurry. Before the day is out the water is full of mud and poop. I've set the waterer atop a cinderblock, which helps although some hens manage to sit on top of it and poop into the water. I've also hung it from the roof on a rope so that it sits about a foot off the ground. That helps to keep the water cleaner. But the best arrangement I've seen is to use a water pipe running through the pen which delivers water via nipples. 


The nipples are little plugs that snap into the pipes. They have a trigger that delivers water when the hens peck at it. Nipples come in a variety of designs and colors. 

Some are designed to fit into plastic pipes. Others can be installed onto the bottom of 5 gallon buckets, or other suitable water containers. The above yellow one is obviously for a pipe. 

I've found that chickens need a tad of training before they successfully use the water nipples. But once one bird figures it out, usually the others just follow their example. The top photo shows one of my friends showing her chicks how to get a drink. Easy chick is taken to a nipple, their beak tapped against the trigger, and allowed to drink. It helps if the chicks are thirsty, such as first thing in the morning. Out of a group of two dozen chicks, a few catch on right away. The others learn by example. 

I've found that the nipples work even with low water pressure. So I don't have to hook the system up to a pump. Running pipes off a 5 gallon bucket or a trashcan works just dandy. A trashcan with a lid keeps the water clean so that the nipples don't get clogged. Or I can skip the pipes completely if I only have one pen that needs water. In that case I can use just a covered bucket or trashcan with the nipples attached to the bottom. Then the bucket is set atop a couple of cinder blocks so that the hens can easily reach the nipples. 

Saturday, April 25, 2015

Pipinola , aka: chayote

Pipinolas, that's what we call them in Hawaii. I knew them as chayote back on the Eastcoast. I saw them in the supermarket occasionally, but didn't have the foggiest idea how to prepare and eat them. Besides, they were rather expensive so I passed them by. 

This veggie is super cheap here and not too many people eat them because they are considered "poor people's food" or pig food. People that came from the mainland don't eat them either, but that's because they don't know what they are or what to do with them. 'Tis a shame because they are versatile, quite edible, and easy to grow....at least they are in Hawaii. 

Ok, so what are these things? They are a vegetable that is somewhat like a squash, gourd, or cucumber. But instead of lots of seeds it has one large soft seed inside that adheres to the flesh in a way that the entire fruit is used, seed included. It grows on a vine, actual multiple vines from the same root. When one vine is done fruiting, it dies back. But more vines are constantly being produced. One root can easily have a dozen or more vines at the same time. 

Not only are the fruits edible, the entire plant is edible. The vines are fibrous except for the tips. The last 6 inches can be eaten raw or cooked, same as the fruits. The root can also be eaten though I haven't tried it yet. 
(Above photo from ehow.com)

My favorite size to harvest the fruits is when they are 3"-4" long and still have their baby fuzz on the rind. At that stage the fruits can be eaten entirely, no peeling necessary. When they grow larger the rind gets too tough for eating, though the flesh is fine. I'll add pipinolas to stir fry, soups, and stews. Or sautéed them with onions, garlic, and herbs. They make great pickles by just soaking them in old pickle brine for a few weeks in the refrigerator. Plus they are fine raw in salads. 

The vine tips are good in salads, stir fries, stews and soups. They are also good used as greens,cooked with onions, tomatoes, and herbs. 

Growing pipinolas is easy here. They are a tropical plant and respond accordingly with lush growth when fertilized with horse manure and given adequate water. I see many people simply letting them run along the ground. That works ok but I take advantage of their vining habit to utilize space that often goes unplanted. They readily climb trees, so I have most of my pipinolas planted around dead trees, using the trees as a natural trellis. I've had them climb easily 15 to 20 feet up. Harvesting isn't a problem because it is simply a case of pulling the particular vine. The vine is really tough and doesn't break. 
Above is one of my pipinola growing spots. Here they are growing up a tree that is basically dead. I planted three pipinolas around the base of the trunk about four months ago, so the plants are only half grown and not producing fruits yet. 

So how to propagate pipinola? I grow them from seed, the seed = the entire mature fruit. 

The one above is mature, about 6 inches in length, with a hard rind. Because I wasn't quite ready for it,  I set it down on the soil in a shady spot for a couple weeks which prompted it to start sending out roots and a shoot from the puckered end. The seed doesn't need to be presprouted like this, nor does presprouting seem to affect the growth in any way. I don't bother to presprout, preferring to simply set a mature fruit right onto the soil as is. The puckered end sets on the soil or is slightly pushed into the dirt. But the majority of the pipinola itself is exposed, never buried. 

People who have had failures trying to grow pipinolas here ....
....buried the seed/fruit in the soil. 
....try to grow it in a container.
....didn't give it enough water. 
....tried growing it in infertile soil. 
....assumed that when the first vine was spindly and died that the whole plant was dead. Yes I forgot to mention. In less than ideal growing conditions, the first vines tend to be spindly, short, and short lived. But if it gets more water and some fertilizer, the root will put out more vines that will be stronger. 

Friday, April 24, 2015

Farm Accidents -Danger! (repost)


(This is a re-post because it somehow keeps appearing on the wrong date. If it does it one more time I'm going to trash it, poof!)) 

Did you know that farming is a really dangerous occupation? For real! It has a very high rate of injuries and death. So if you're afraid of getting hurt, reconsider the thought of getting into farming at any level. Wimps need not apply! Nor those with a low self preservation instinct. 

Farm accidents are all too common. Most accidents involve machinery and livestock. Tractors are responsible for the greatest percentage. That's a no brainer. Tractors roll over or rear up and over. Augers and shredders suck you in. PTOs tear you apart. Mowers hack you to bits and kill plenty of kids. Cows squash, trample, and otherwise bash you . Horses kick and bite. Rams and billies charge, breaking hips, legs, and backs. Even geese have been known to break arms. Roosters give nasty punctures that always seem to get instantly infected. 

But many a farmer has fallen off a harvesting ladder ending up with broken bones. No gasoline guzzling machine needed. I know a farmer who beaned himself in the head harvesting coconuts and was lucky not to fracture his skull. Small tools cause lots of injuries......cuts, concussions, lost fingers and toes. Fences & gates, believe it or not, cause all sorts of lacerations and crush injuries that are extremely prone to infection. Grain and wood piles can suck you down and suffocate you. Silos and manure pits suffocate. Chemicals cause toxicities. Molds, dust, and fungi seriously debilitate. 
(Step on a rake like this once and you'll never sit one down this way again!) 
Then there's heatstroke, frostbite, and exhaustion. Yup, farmer types never seem to know when it's wiser to quit for safety sake. We're driven to get a job done, to reach that day's goal. And with livestock, there's that responsibility factor. Can't quit until they're taken care of. 

Farmers get exposed to things that city folk seldom worry too much about. Killer bees. Swarms of hornets. Disease carrying ticks. Transmissible disease from livestock. Tetanus.  Then there's also the wildlife. Depending upon where's the location, one needs to keep an eye out for bear, cougars, stags, feral pigs, etc. Besides physical attack, rabies is a real concern. 

Proper attire is something new farmers overlook when it comes to avoiding accidents. Farms are no place for jewelry, especially rings of any sort. Many a finger has gotten left behind with the ring still attached. Eyebrow and belly rings leave nasty scars when ripped out. Clothing is all important. Forget bell bottoms and loose sloppy jeans/shorts. Loose fitting shirts and long cuffs are just looking for a place to become an accident. Flopping scarves and jacket hoods are killers. If you like having less than 5 toes on each foot, then go ahead and wear sandals or canvas sneakers. And not only wearing the wrong clothing can get one into trouble, but not wearing enough of the right clothing can get one killed too. Running out to the barn in sub-freezing temperatures just to check on that newborn calf for a minute can be a gigantic mistake without a proper coat/gloves/hat. One slip on frozen ground--a broken pelvis/back and you'll freeze to death before help finds you. It's happened. 

How to prevent accidents besides being cautious:
...take safety courses. Many ag extension offices offer all sorts of farm safety lectures and literature. 
...check out YouTube for safety and medical emergency videos. 
...take emergency medicine courses. Red Cross and other groups offer various courses. Know what to do in an emergency. Gun clubs offer good courses and although they focus on gunshot wounds, the emergency treatment isn't all that different of the injury is caused by a piece of farm equipment. 
...keep several stocked first aid stations around the farm in convenient locations. Having a great first aid kit back at the house won't help much if you crush your hand with the skidsteer way out on the back 40. 
...keep your cellphone/ walkie-talkie in your pocket. 
...try to have a buddy. If working alone, let someone know where you're working and when you expect to be back. I simply text my hubby when I'm about to embark on a mission, then retext him when I'm done. 
...don't overlook the need for safety devices for various jobs : harness, safety rope, ear plugs, gloves, goggles, fire extinguishers, epi-pen, livestock restraints, etc. 
...keep machinery properly maintained. Don't remove safety devices. 
...don't leave tools in a dangerous situation, such as exposed knife blades, exposed rake tines, open gasoline cans, etc. 
...don't be in a hurry. Never work when overtired. Don't work when distracted. Stay hydrated. Pay attention! 
...either ban children from farm work or take the time to thoroughly train them. Farms are especially dangerous to children. Be aware that drowning (in ponds, stock tanks, lagoons, and catchment/cistern tanks) is the number one cause of child farm deaths. 

Wednesday, April 22, 2015

Drivel -Sunrise

Just wanted to share a beautiful sunrise from yesterday morning. 


Tuesday, April 21, 2015

Drivel - Spay/Neuter Clinics

Yours truly was off volunteering at the spay/neuter clinics again. Last week it was cats. 89 kitties brought in that day. Today was dogs. 50 dogs plus one cat. Not bad for a day's work. 

(Above- outdoor staging area) 

If you've never been to a dog spay/neuter clinic, then you most likely haven't thought about the logistics of it. Where would you put 50 cages? For this clinic, there was ample outdoor room and luckily it didn't rain. 

(Above- indoor staging area)

All those cages with their canine occupants have to be carried indoors one at a time. Here the dogs are evaluated, sedated, prepped for surgery, neutered, and begin recovery. 


Above is a neat trick for identifying each dog once they leave their cage. The blue tape has the owner's name, dog's name, sex, and weight. No mix ups. No guessing. 


The clinics I work at use volunteers to help watch the dogs as they recover from anesthesia. Trained people monitor the dogs but its the volunteer that keep the dogs snuggled in blankets as needed, watch for problems, alert the staff if something doesn't look right. 

Volunteers are a critical part of the clinics I help out in. I assume that may be the case for clinics around the country. So if you ever have the urge to help out some dogs and cats, volunteering to monitor recovery is a rewarding way to do that. Give it a thought. 

So if you ever plan to visit the Big Island of Hawaii, would like to meet me and volunteer a day at one of our spay/neuter clinics, just give me a shout. By the way, lunch is free! Today we had two women from Austria helping out. They did a super job!!! 

By the way, next month we already have 150 cats planned for the next clinic. Yikes! 

Monday, April 20, 2015

Fencing - Top Barbed Wire

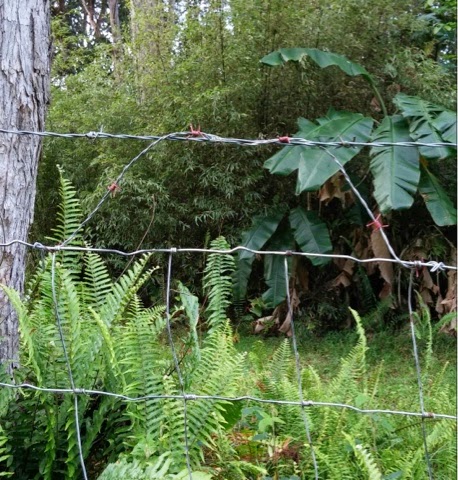
I admit I'm not the best fence installer. It's a hard job. And I don't know any of the inside tricks of the trade. But I got the initial fence up successfully. Since then David has taken over the task of repairs when needed. And after the January windstorm, there were plenty of places that the fencing needed repairs due to downed trees. While making repairs, we decided to run a stand of barbed wire atop the fence. But alas, the posts weren't always high enough or the fencing made an awkward dip some place. How to keep the barbed wire in its proper location? 


David to the rescue on this one. Without a bit of hesitation he clipped a short strand of barbed wire and deftly twisted it this way and that. So even though the fence post (above) was too short, it was no problem. The barbed wire got firmly and correctly positioned. 

 In other locations the barbed wire was riding too high, or too low. Again a short strand of wire properly twisted held the barbed wire strand exactly where it should be. 

Brilliant! Gee I wish I had thought of that one. But I thank whoever came up with this simple solution. 

Saturday, April 18, 2015

How I Plant a Tree

There's lots of advice out there on how to plant a tree. Much of its contradictory. I suspect that has to do with the fact that soils differ from spot to spot, drainage can differ significantly, the amount of rain varies as does wind, sun, etc. I suspect that some trees require TLC when being transplanted while others could simply be wedged into a crack and survive. 

Anyway, I've developed my own method that works for my own location and for most of the trees that I plant. So far the only tree that I've continually failed with is cacao. I don't know if it's my planting method (and I've tried different ways), the location the trees were planted, or some other reason. But to date I haven't managed to keep a cacao tree alive for more than a few months. 

#1- I pick a location that the species prefers. Sun? Semi shade? Shade? I also consider the soil moisture situation. For example, avocados don't like wet feet nor do they like shallow roots.  Other trees aren't that fussy. 

-#2- If the spot has grass growing there, I'll strip off the sod, setting it aside to use later. It will go back into the hole as fill material. 


#3- Dig the hole. Around here it isn't as simple as it sounds. A shovel usually isn't enough, so I use an o-o bar to remove the lava rocks. When I can, I will make the hole 18" deep, but I hope for 24". If I can only get down 10-12" then I move to a different spot. 
I eventually got down to 18" with thus hole before I hit pahoehoe lava. 

#4- I'll separate the soil be small rocks from the big lava chunks. The soil and small rocks will be going back into the hole. 

#5- In the very bottom of the hole I will put some sort of future plant food for the tree. Perhaps manure that might have dangerous pathogens such as dig poo, catbox cleanings, pig manure, human manure. While I don't routinely use human manure, I know of people who do. Under a tree is a good spot for it. Also small dead animals will do, such as roadkill birds & mongoose, etc. As I add this material into the hole I layer it with the soil, sod, and small rocks I had previously removed while digging the hole. I will also mix in a small handful of wood ash and a hefty handful of burnt crushed bone. I fill the hole to 10"-12" from the top. 

#6- Stomp the fill material down and add a gallon of water. Wait at least two weeks. 

#7- Stomp the fill material down again. Feel the surface of the fill material. If it is cool, then go to step 8. If it is warm, add one gallon of water and wait another week. Any warmth from the fill material composting will damage or kill a young tree that is planted atop it. Heat is more common if small animals were used. 

#8- Now I'll plant the tree. Soil and small rocks are used as needed to fill the hole. I'll immediately water the young tree well, then check it weekly for soil moisture, diseases, and pests. 

Just about all my young trees transplant fine this way. The reason I put a nutrient plug under the young tree is that our tropical soil is not very fertile. That nutrient plug seems to help the tree while it is establishing its lateral root network. 

I'm told that this method isn't necessary. And perhaps in many regions that's the case. But I think it's ok for here and it's a way to utilize material I don't want in my veggie garden, the various manures and decaying small animals. No waste. 


Friday, April 17, 2015

Cutworms

Cutworms aren't worms.  How's that for a start? If they aren't worms, then what are they? They are caterpillars. 

So what's that name all about? No problem for me to figure that one out. These caterpillars hide in the top inch of soil during the day, then come out at night to feed. They eat whatever parts of the plant they encounter, which happens to be the stem, usually of a tender seedling. As they munch, they cut the stem right off at the ground. Thus CUTworm. 

The bugger about this pest is that they are so incredibly wasteful. It pisses me off to see that they eat only a small section of stem before moving on. I've had them munch down a two foot row of seedlings in one night. I'll come out in the morning to find the little plants lying wilted on their sides. A total loss. 

All cutworms aren't necessarily the same species. There are a number of moths whose caterpillars exhibit cutworm behavior. I don't know which moths are responsible for the cutworms I find here in Hawaii, but that doesn't really matter. Attacking all moths just to eliminate cutworm damage seems to me to be a bit irresponsible considering that there are plenty of animals that rely upon moths as food. I don't wish to jeopardize those animals, thus I choose to take steps to reduce cutworm populations in a way that won't effect all moths. 

So what do my cut worms look like? They are chubby caterpillars about 1" long. Grey/brown in color. When disturbed they curl up in a ring. 

(Photo from www.extention.umn.edu)

I can find them by stirring up the top inch or two of soil. When I find cutworm damage, I'll go looking for the critter. It's almost usually just one, so it's not like there are dozens around any particular garden spot. Once I find the offender, I'll just simply squish it, adding it to the soil. 

I've had other gardeners tell me that they used moistened, sweetened bran mash (a horse feed) that they added BT to. This is then sprinkled on the ground around newly transplanted seedlings that they wish to protect. I've never tried this, but I suppose it might work, assuming the cutworms will dine on the mash. 

(Above photo from www.gardening.cornell.edu)

Another strategy for protecting seedlings is to put protective collars around the seedlings. I've done that and still resort to this when cutworms are bad. Once open a time I used discarded computer punch cards. They were perfect. Stiff enough to hold up, didn't disintegrate in the rain, easily stapled into position, no need to remove, and they were free. I've seen people now use stiff paper or cut up cereal boxes , plastic cups with bottom cut off, and metal cans with both ends cut off. I would think that aluminum foil crinkled around the stem should work too, though I haven't tried it yet. The idea is to create a barrier so that the cutworms can't reach the stem. Collars work to prevent damage but don't eliminate the worm itself. 


Thursday, April 16, 2015

Thinning


Many years ago when I first started to garden for myself, I acted like every seed and every seedling was sacred. I just couldn't bring myself to purposely kill a seedling. I don't know why I was like that, but it caused me grief in the long run. I often ended up with rows that were far too crowded to properly produce. When I sowed pots in my greenhouse, although I tried to only drop one seed per pot, with the tiny seeds especially, I'd end up with a clump. Then I'd go carefully separate each baby seedling and repot them. And of course, when i was successful in planting only one seed per pot I'd end up with lots of empty pots where I was wasting the potting soil, the fertilizer, and the space it took up. If the seeds had only 80% germination, then 20% of the pots were empties! Duh. 

Although I still tend to be quite frugal, I no longer treat every seed as a Demi-god to be saved and nourished regardless of sensibilities. Ha, now it's more like "off with their heads"! Well, except for the real expensive seeds. Those I still coddle. 

I've learned that some seedlings are very easy to transplant in the very early stages, before they even get true leaves. Thus when I find I've sown them too closely, I can easily tease the excess seedlings out of the soil and plant them somewhere else. All the brassicas are easy....cabbage, kale, cauliflower, broccoli, etc. So are tomatoes, eggplants, peppers. I'm fairly successful with lettuce too. I can thin these veggies without sacrificing or discarding any of the seedlings. 
(Onion seedlings planted one week ago. In a couple of weeks they will be large enough to tease apart and transplant. Right after taking this photo a lightly mulched the ground to help promote faster growth.) 

Some veggie seedlings are far more fragile, making handling them more difficult for me. I'm definitely less successful. Things like beets, carrots, many herbs. I have a tendency not to bother trying to tease these crowded seedlings apart. I'll just sacrifice the extras. I'll use a scissors to snip the culls off at the soil. Sometimes the leaves are big enough to use for salads, soups, etc. so I'll save the snipped off culls for the kitchen. Why use scissors? Pulling the culled seedlings out can disrupt the soil, causing the one plant that I wish to keep to get accidently pulled out too. Boy, I've done that way too many times until I figured out to use a scissors instead of my clumsy fingers. 

My neighbor sowed some onion seeds for the gardens here. He planted way too many seeds per pot. We decided to transplant them to the garden "as is", then let them grow up a bit to a better size for handling. After a bit of growth we gently separated the seedlings and transplanted them. It worked out fine. We had none die this way. But if we had tried to separate them earlier, I'm guessing we would have lost half, if not more. 

The same neighbor also planted broccoli seed too thickly. As an experiment, we transplanted the seedlings into the garden still in their little clumps. As the plants grew, we snipped off the slower growing individuals....eating them in stir fries. As the plants grew bigger, we again snipped the smaller ones out, using their leaves and tips for the dinner table. We eventually ended up with the most robust plants being left to produce the broccoli heads. 

Why bother to thin at ll? Because when there are too many plants too close, they compete for the resources -- the space, the sun, the water, the nutrients. The most robust seedlings win, but at a price. They get stunted to some degree because of the struggle competing with others. With some vegetables, they won't produce well at all if too crowded. The first time I sowed beets, I got only a couple nice big beets. The rest of the bed was nothing but tops. Too crowded. 
(Above, two broccoli plants together. The smaller one is severely stunted and producing a minii head due to the stress.) 

Many plants do better when planted within reasonable distance from companions. I'm guessing it has to do with wind protection and higher humidity around the plants. Just a guess. But I've seen that ypung plants spaced 2 foot apart grow slower than those same plants planted 6 inches apart. So I take advantage of that quirk by planting with closer spacing than my final goal.  Then over the next few weeks of growing I'll thin out the extras. Which to discard? The weaker, smaller, odder looking plants. This method works good for me with most veggies. 

So what to do about those expensive seeds that I do to want to waste? I will sow the seeds individually if I can. Any seedling clumps will be teased apart and transplanted. Out in the garden I will use a quick crop, like radishes, as their companions to promote faster growth...then thin out the radishes. 

Wednesday, April 15, 2015

Death of a Goat

Losing one of your livestock by surprise can be a shock. But it can also be worrisome. I lost Harley yesterday. Found him dead in the morning during my routine morning head count. He appeared fine the previous evening. There was no signs or symptoms to give me a clue why he died. Usually there is always some clue, but not this time. 

Harley was a captured feral goat. Background unknown although he had been significantly starved for several months prior to us getting him. But he was recovering nicely and looking better. Routinely dewormed since I got him, but not prior to that. Not fed grain except for a tablespoonful a day, literally just a tablespoonful, no more. Had access to good mixed browsing 24 hours a day. He was not in with another ram or billy, so I don't think he died due to fighting. But he did have access to two horned female goats, so there a remote possibility of a horning injury that cascaded into a fatal crisis. He was missing two lower incisors, indicating that he was no spring chicken. I checked the entire area that he browsed and couldn't find anything suspicious that he could have gotten into. Harley did have one symptom of a possible health issue....his excessively long, thick coat. It could have been the result of his starvation episode, or it could have been an undiagnosed medical problem.....or it could simply be normal for feral billies. 

I didn't have a chance to do a necropsy on Harley. I had an obligation to be at a feline spay/neuter clinic, so couldn't spare the time. I planned to conduct the necropsy as soon as I got home that night, but my poor neighbor couldn't deal with that. Leaving Harley unburied was rending his soul. So poor Harley was respectfully buried, interred in a lava tube, by the time I returned. Out of consideration for my neighbor, I let poor Harley be. No necropsy. 

So now the worrisome aspect. What did the goat die from so suddenly? Are the two does now in danger? I searched the pasture once again looking for any danger signs. Nothing. I think the two does are safe. So the death of a goat will remain a mystery for now, possibly forever. This fact never sits well with a farmer. One always worries that the rest of the flock is in jeopardy. 

Tuesday, April 14, 2015

Goats & Sheep With Horns


I just posted about the disbudding of kids and lambs, but what about adults that already have horns? How do I deal with them? Well, that depends upon the individual animal. 

Bucky is a smarty and is wise enough to understand the value and use of his horns. I often see him using them to scratch his back. He's been known to rip barbed wire right off the t-posts and take down electric fencing using those horns. He's worked on gates and other barriers trying to escape. Not that he hates being where he is, but he's a goat full of curiosity, just doing goat things. His most dangerous habits are using his horns on others. He will bash other goats and sheep. I've seen him try to jab the horse and donkeys. And many a time he's been successful in jabbing me. 

Harley on the other hand seldom uses his horns. First of all, they are far larger than Bucky's, so they aren't as versatile. But he's never tried to butt or jab with them. 

Neither Nanny nor Honami use their horns for anything but scratching their backs. But both do have a history of getting their heads caught in fences. They will stick their noses just about anywhere. 

Except for Harley, I've had to do something about the horns because of dangerous problems. Bucky cause injuries, thus his horns need balls or knobs on the ends. Nanny and Honami need rods attached to the horns to prevent them from being caught in the fencing. 

A neighbor has a goat who is horned and lives with four non-horned pasture mates. She has resorted to balling the horns to prevent injuries to the pasture mates. 

I don't know if you can buy horn knobs for goats, but I've heard of people using all sorts of things in place of commercial knobs. Balls work. So do the smallest kong dog chew toys. They just need to be attached in some way to the horns. I heard of gorilla glue and liquid nails being used. Some people try using various tapes. And others will screw the ball or kong to the horns. But care must be taken when using screws because only the last inch or so is dead horn. Further back is sensitive, blood fed quick. 


Monday, April 13, 2015

Nooks & Crannies Gardens

So many people I talk with about growing food have the idea that one has to have a designated garden spot. People will say that they have a 50' by 100' garden, or perhaps a 20' by 40' garden. It's like they couldn't possibly grow anything anywhere else but in that chosen spot. I'm not like that. While my main garden (the community garden) is pretty much a large area dedicated to just food production, I actually have dozens of little gardens tucked here and there around the farm.  

(A banana tree planted in a semi open spot that I haven't had time to clear yet. The tree is fruiting! )

Why scatter the gardens around? OCD gardeners would go crazy. It's not properly organized! Everything's not in one spot! Ah yes, I can hear the complaints now. But there are three factors for the apparent hodgepodge approach.

(More bananas tucked into a space along the driveway.) 

Factor #1
.....I've chosen to do the work myself, as opposed to hiring employees to get the entire farm cleared, weeded, tilled, and planted. Not just employees, but I would need to use some serious big equipment to reach the final farm plan, since in order to open and prepare fields for planting I'd have to remove trees, level the ground, remove rocks, etc. That's lots of work, time, and money. By eliminating the money, I increase the time and work........and the pleasure. This is an adventure for me so I am enjoying creating a homestead farm. No need to rush it. 
Factor #2
.....I'm eager to be growing food now, not years from now when I finally have large spaces cleared and prepared for planting. So as a small spot opens up for whatever reason, I'm apt to plant a few things in it. Like the pipinola vine pictured below. A small 2'x3' area opened, so I dug in some compost and manure, then planted a pipinola. I let the vine climb up some of the existing tangle of vegetation. It's already producing plenty of pipinolas that I'm using for pickles. 


Factor #3
.....by spreading out a crop in small patches here and there, I'm less apt to lose the entire crop to insects or disease. While aphids or stink bugs might find one clump, they may miss the others. I see this sort of thing happening all the time. I'm really happy when I only lose part of a crop and not the whole shebang. 

Above you can see that just a few plants of chard planted in front of a rock wall. I don't pay much attention to them, but I've gotten several servings for meals from those plants. When I planted them the grass hasn't regrown yet. Now it has, so eventually it will slow the chard down, causing me to dig it up and replant the spot. 

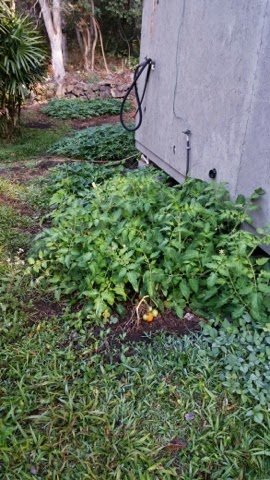
Above is a spot beside the tool shed. Just a little open, unused spot. So I planted a few tomato seeds and let them do their thing while I was busy elsewhere. Further back in the photo you can see a couple of small patches of sweet potatoes. The cuttings became available so I just looked for some small spots not being used. Now there are two small patches of sweet potatoes that I can look forward to eating in a couple of months. 

Above is a garden I purposely created by removing part of the lawn. Right now the patch has snap peas growing there. But it's had green beans, potatoes, sweet potatoes and beets so far. Not a huge space, but it's making food. In the upper left background you can see some greenery on the ground running under the edge of the solar panels. That's some sweet potato cuttings I recently planted. The spot was just empty, so now it's not. Cool. 

Any little corner or edge can grow a few plants. Above I put some taro around the base of a small shed on one wall, and some beets along the other wall. 

All around my property I have little micro gardens, sometimes consisting of only one plant. One tomato. One potato. One pepper. One banana. I believe that even one plant growing is better than zero plants growing. 

Face it, it's not a daunting task to make a spot for one potato plant as compared to a whole big bed of them. So psychologically it's easier to garden when it's only one or two plants that need to get started. Plus sometimes the space available can only hold one or two plants. So rather than let it sit empty, I'll plant something. 

With this whole homestead taking up time, I simply don't have time to create a large bed or garden somewhere all at once. So I do it in little increments. Eventually many of these micro gardens start linking up. Then suddenly I look and realize that I have another good sized garden that's producing. Super! 

So you think harvesting would be a nightmare? I suppose it would if I were trying to grow for a farmers market. But if I'm just thinking about dinner with a collection basket hanging from my hand, it's no big deal to harvest a little of this and that as I walk around enjoying visiting my little gardens located in the nooks and crannies. 

Sunday, April 12, 2015

Community Connection -Gifting

My connection to my local community is being reaffirmed every week now, practically every day. Having come from a rather cold, indifferent social situation, I still get warm feelings inside when I make connections. Going to town and greeting dozens of people I care about. Sharing....especially sharing. Sharing time, support, effort, joy, ......and gifts. And while this post is looking at gifting, make no mistake that gifts are only what community is all about. Heavens no, it's just one warm, fuzzy, small delightful piece. 

(Fresh homemade bread from an interesting friend.)

Much of my life I've lived where people generally didn't gift without cause. It had to be a special occasion where gifting was expected (birthdays, holidays, church donations, etc). Duty gifts, that's all they were. Seldom any feelings behind them. Gifts were also given in an attempt to gain favor or special services. Gifts to the boss, teacher, neighborhood police, your garbage man, the carpenter...whoever you wanted special care, attention, or favor from. 

(Jigsaw puzzles.....because my mom does puzzles every day.)

Also in that life, people usually kept their material items to themselves, hoarding them if not being used. If not wanted anymore, then they were sometimes sold or usually thrown away in the weekly trash. Oh boy, I still recall those happy days of trash picking in the wealthier neighborhoods. Those people threw away everything, even things still with price tags or in original packaging. Rather than gift it to some person or some organization, it went to the dump. The sense of sharing within a community was unknown. 

(Handmade tote bags & egg cartons, each from community friends.) 

My little community here is totally opposite. It took me a while to discover and develop it, but my community network is alive and well. And gifting without strings and obligation is part of it. In fact, gifting is often spontaneous, coming completely by surprise. 
(Pumpkins , yum! They gave me several, how wonderful.)

Since this sharing and gifting is not something I was raised with, I'm often not sure how to act appropriately. But I am trying. So I share my excess too and hope that the appreciation is mutual. 

(A large meat grinder, wow. I surely will be putting this to good use. I can't believe how fortunate I am.) 

An online person I've been following this past year has been Paul Wheaton. Based upon his permaculture philosophy, the concept of gifting surplus among community members is something he wholeheartedly supports and wants to establish himself. When I first heard him talking about it, I thought , "Oh sure, that ain't gonna work." But I eat my words, it CAN work. I get proof every week. The photos on the post entry are all gifts I received recently. So at least within a small community, Paul's idea of sharing surplus really can happen. 

(Fresh fruits from a good friend.) 

My grandmother often said that it was better to give than receive. As a child I never believed that nor understood what she was getting at. But I've finally caught on these past dozen years. It feels good to share. Everytime it's done I feel like another strand has been woven into my community web. Yes, it feels good, it feels right. I hope it continues. 

Saturday, April 11, 2015

Attached to my meat animals?

(Note: it's been raining here so I haven't been getting photos taken. I'll add them later once the sun returns.) 

I am often asked if I get attached to my animals that I raise for meat. Or a slight variation- how can I raise an animal knowing that it's going to be killed to be eaten? Yet another variation- how could I slaughter (actually they use the words murder or kill) an animal I raised and knew? All good questions for any non-vegetarian homesteader. 

I know of several homesteader types and home gardeners who, while they grow their veggies, buy supermarket meat. They can't bring themselves to even consider raising their own meat. And while they are outspoken supporters of organic and non-chemical, they still buy their meat from a store.

This issue not only affects households nowadays and not just those who were grew up with no farm exposure. I recall my grandmother and great aunts/uncles/cousins remarking that they often traded animals with a neighbor or relative when it came time for slaughter. So even family farms sometimes were uncomfortable slaughtering or eating one of their own animals. It's a long standing issue. 

In my own situation, I wasn't raised on a farm, nor by farming parents. But for some reason as a child, I was strongly attracted to farming. By 12 I already longed to attend agricultural high school, but that was not to be. I did happen to spend a few summers "out in the stix", while not actually on a farm, close enough to see some farm action, livestock auctions, feed stores, tractors, hay harvesting, and listen to farmers talking among themselves. I absorbed every moment. 

When old enough to officially work, I landed a job with a veterinarian. Sweet heaven! Over the years I also took short stints doing various farm jobs -greenhouse laborer, crop picker, manure mucker, horse exerciser, etc. 

So in my own case I've had some farm exposure though none of it was actual farming. I've taken a number of ag extension office classes where they taught various animal husbandry classes, which often included butchering. I've been a helper at many a home slaughter/butcher of hogs. And then their is my lifetime career in veterinary medicine. So even though not raised in a farm, I've had significant animal exposure. 

So how can I? How can I raise an animal for food? Probably because of my experiences in veterinary medicine. Not that I became calloused or unfeeling.  Just the opposite. I empathized with the animals. 

First let it be known that I firmly believe that an animal should be fed a diet that it was designed for. That includes humans. I'm an omnivore and I accept that fact. So becoming a vegetarian or vegan (that term didn't seem to exist in my youth) wasn't something I could agree with. 

Second, via my veterinary life I firsthand saw the inhumaneness (is that a real word?) of livestock keeping, transport, and slaughter. And I'll include other animals in with that, be them varmints, cats, dogs, birds, fish, etc. The degree of outright callousness and cruelty on the commercial use of animals is mind boggling, and heart wrenching. I learned early on that home raised meat, home slaughtered meat was the most humane way to go. 

I personally have no objection the eating animals that I have personally raised and slaughtered. Not everyone in my family feels this way, and I respect their beliefs. But it is a point of contention on the homestead. So all's not peaceful paradise on the farm. But we've worked out a method of "don't question, don't say". So if that idea works for you, go for it. 

But I too have some animals that I e become emotionally involved with to the point that I would not wish to kill and eat them. My ancestors obviously ran up against this too. Their solution was to swap animals with someone else. My solution has been to either keep the animal as a pet or producer, sell it, or swap it. Just recently I had to make a decision about one of my pigs, Hammie. I did not wish to see here eaten, so I kept her. She is now a producer for the farm, pregnant with her first litter. 

Many other homestead farms have had to deal with this problem. Like Jenna, most have kept themselves emotionally detached and do not do the slaughter themselves. You do whatever works best for yourself. But the two things that won't work is ...
...1- keeping every animal you produce till it dies of old age.
...2- requiring people that you sell the animals to that they not eat them. 
Neither of those options work well in the long run. 

Friday, April 10, 2015

Why Sheep?

(Note: it's been raining here so I haven't been getting photos taken. I'll add them later once the sun returns.) 

April asked via email, "Why are sheep often recommended for a homestead farm?" 

Well I can't say why others think sheep are good homestead farm animals, but for me they have proven to be a good choice. 

...Size. They are small enough to handle and big enough to produce something useful. (Size has a factor in most of the other reasons that sheep make good homestead animals.)
...They can grow and maintain pretty well on just good pasture. No need for large amounts of expensive grain. I do give mine a small handful of grain daily, but it's a training aid to keep them friendly and coming to me when I call them. 
...They turn my grass into a useful product. It's one way to utilize pasture and create something that helps sustain the homestead. Since I have both rams and ewes, about every 8 months I get a new batch of lambs. 
...They fertilize the pastures. Historically sheep were used to fertilize farm fields. While I pick up some of the manure for the garden, most goes to fertilize the pastures.
...If I didn't have some sort of grazing livestock my pastures would be out of control. In fact, when we moved here those pastures were impenetrable. The overgrowth was a solid tangle. So pasture control is a big plus with my sheep. 
...Meat. Lamb is a great addition to the dinner table. Along this same line, sheep are easy for the homesteader to home slaughter and butcher. 
...No big equipment (other than fencing) or expensive shelter is needed, say, compared to a dairy cow. A simple 3 sided shed for protection from wind and rain is enough. And the sheep don't mind if its not fancy. No special heavy duty stocks or chutes are needed for working my sheep. 
...Restraint is easy. My sheep all wear a collar, which makes a handy "handle" to grab them. And if I need some restraint in order to do something like foot trimming, hubby can flip them into their backs and hold them there for me. It's easy enough to do. In reality, most allow me to trim a foot without being flipped over. 
...They are easily fenced. Some livestock are great escape artists. But sheep tend to stay in their fences. 
...They produce milk. I've only had one ewe that I milked. I could easily train them all, but I'm lazy. The milk is rich, tastes good, and makes nice cheese. A plus for me is that they don't produce a lot. I'm not interested in gallons, or even quarts of milk. 
...Wool. In my case, I don't produce wool. I prefer hair sheep. But I know of several small operations that harvest the wool and use it. 
...Hides. I've never attempted to process a hide but I know of other sheep people who have. Tanned fleeces can be quite useful. 
...Sheep are not all that dangerous. Ewes are generally pretty safe. Rams may or may not be dangerous depending upon the individual ram and the breeding season. And while sheep could hurt me if I'm not careful, it's not like a bull that aims to kill this human....gore it,  toss it around, then mash it into an unrecognizable pulp. This is not to imply that sheep are cute, loving, Mary-had-a-little-lamb plush toys. Plenty of times I've been bashed, dragged around, knocked over, and run over. Actually it wasn't all that bad an experience. Really. 
...Fairly hardy. While not as rock solid as a cow, sheep are not real fragile either. There are certain husbandry issues that I needed to master, but all in all it wasn't a complicated mystery learning how to keep sheep. 

Thursday, April 9, 2015

What Lawnmowers Were Not Meant To Do

(Note: it's been raining here so I haven't been getting photos taken. I'll add them later once the sun returns.) 

First of all, I don't have a lawn. What little lawn I did have has been replaced with a garden area. And what other grass grows on the farm is allowed to grow tall then get cut for either livestock feed or mulch. So it seldom looks like a lawn. But I do use lawnmowers, just not on a lawn. 

I have a big riding mower that I use carefully to mow stretches of grass on other people's land. It is essentially harvesting mulching material, that is, grass clippings. Since I've had to repair it several times, I've become rather careful with it. It is a prima donna and only allowed to mow rock free, level, light grass. No stalks, branches, bumpy or rocky areas. 

My other mower is a self propelled gas mower, the type people use for their lawns. This baby is a workhorse. And I admit that I work it to death. One of these lasts me a year before its literally worn out. Other than oil changes, cleaning the air filter, and keeping the blade sharp, they don't break. They just get used so many hours that they wear out the engine. 

So if I'm not manicuring a lawn with it, exactly what does it do? Ok, time to cringe. 
... Mowing down weeds including stemmy, stalky stuff. 
... Chopping through underbrush including downed tree twigs
... Chopping up the pile of weeds I've pulled, turning them into fine material for composting
... Chopping up coarse plant material, again for composting. 
... Sucking up and chopping the debris that the weedwacker hacked down. 
... Reducing dried horse manure into fluffy material for compost. 
... Sucking up fallen tree leaves out of the driveway. 

These jobs are pretty hard on the mower, I agree. But I find a lawnmower to be dang handy to make compost and mulch. It's tons faster than hand cutting material, dragging it over to a shredder-grinder, feeding it through that machine, then forking it from under the machine as the job progresses. I've own and use both, and I can honestly say that the lawnmower is faster and easier.....and a lot cheaper. 

So when a mower dies, it gets thrown away, right? Wrong. I scavenge parts. I can repurpose pieces for other projects. By the time I'm done there isn't much to throw away. And any metal that's leftover goes into the recycle bin. 

Wednesday, April 8, 2015

Yacon in a Pallet Grow Box

Up until this year I've always grown yacon in the traditional way....right in the ground. But it seems to me that this plant would do very well in one of the pallet grow boxes. This is some of the reasons that led me to this conclusion.....
....it responds very well to compost and manure
....it likes to send roots down and produce its largest tubers under the plant
....tubers can easily reach 15" below the surface
....the tall stalks could use a bit of support
....it grows best when I can apply extra mulch and manure-mulch periodically during the growing season
....it does best for me in soil that can stay moist but also drains well

The pallet grow boxes seem to be able to provide for everything on my list. 
....the box is essentially one giant compost bin with manure
....the boxes are deep
...the tubers can easily be harvested by simply removing a side and gently scooping the soil away
....as the growing season progresses, the soil level will sink, leaving the pallet sides available to help support the tall stalks
....as the soil level lowers, it is easy to add layers of mulch and manure
....the boxes drain well and the compost mix retains moisture

In theory, it sounds great. So next step is to give it a try. 
(Disclaimer--- the photos are lousy. The day was overcast and drizzling. No sun = lousy photos.) 

Enter one clump of yacon plant base, loaded with nodes that are starting to sprout......
First step: cut the clump into pieces for planting. By dividing the clump up, I can get lots of smaller plants. I find from experience that a smaller clump with 1 to 3 sprouts produces a nice sized plant where the underground tubers don't get overcrowded. 


Dividing the clump is easy. The nodules are crisp and easy to cut or break apart. 

Above - here's the grow box that I'm planting today. It's been filled and tromped down for several weeks. It has heated up and cooled down. So it's ready. I simply laid the pieces on top. (pictured below)


I planted 9 pieces, 5 of which I will be transplanting to another grow box in a week or so. That will leave four yacon plants in this box. The second box is almost ready for planting but is still a tad too warm, so I'll wait one more week for that one. But in the meantime the yacon keikis can spend a few days starting to grow some roots while in this box.


Above-  I'm piling about 3 inches of garden soil on top. Of course 3 inches isn't much, but remember that I plan to continually keep adding mulch, compost, or manure. Eventually the yacon will be under 5-6 inches of material, maybe more.

The final step, above---- water. I watered the box lightly. Since it is an overcast and drizzly day, I haven't added any mulch on the top. I'll let the rain moisten the soil for me tonight. Tomorrow will be time to add an inch or so of mulch, enough to keep the sun off the soil surface. As the yacon grows, I will add more grass clipping mulch so that it will be 2-3 inches thick. If we go into a drought, then the mulch layer will need to be thicker.